SPC herringbone installation instructions with integrated underlay
1.
Before delivering the floor to the installation site, doors and windows must be installed in the building and all wet trades must be completed, e.g. plastering, construction of partition walls, painting, etc. If there are basements under the installation site in the building, they must be dry and well ventilated. SPC panels can be installed in all residential rooms such as: living rooms, bedrooms, kitchens and bathrooms and in most public facilities.
SPC floors should be used as intended for specific room types (utility class) in accordance with ISO 10874. You can find information about the intended use of a specific SPC floor for different room types (utility class) on the product package, in the product’s technical data sheet and in the product description at www.barlinek.com.
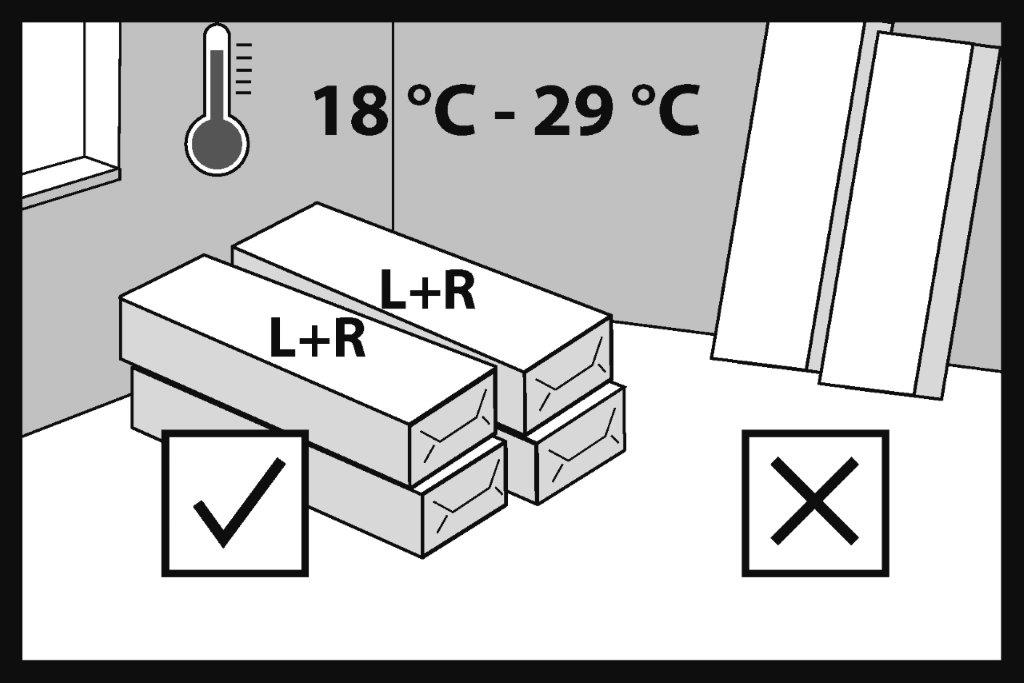
Handle packages containing SPC floor panels carefully during transport and unloading to avoid any mechanical damage. Store SPC floor panels in their original packaging in a dry place, in a horizontal position, on pallets or wooden beams. Maintain a free space of at least 75 mm between the SPC panel packaging and the substrate.
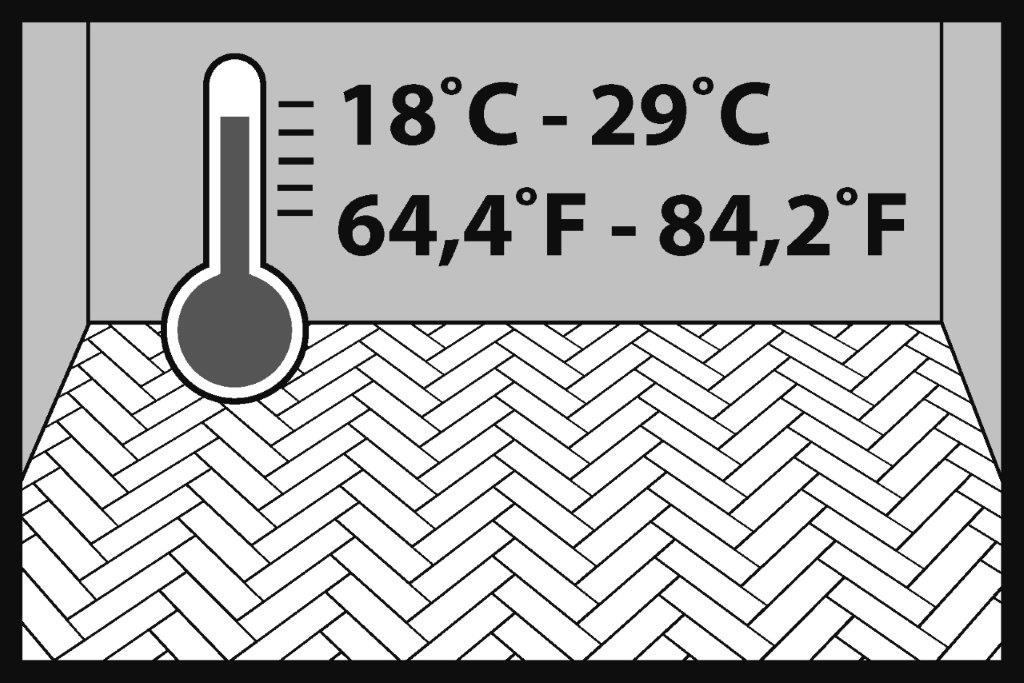
To ensure its acclimatisation, store the floor for at least 24 hours in its original packaging in the room where it is to be installed. The air temperature in the room should be between +18°C and +29°C.
2.
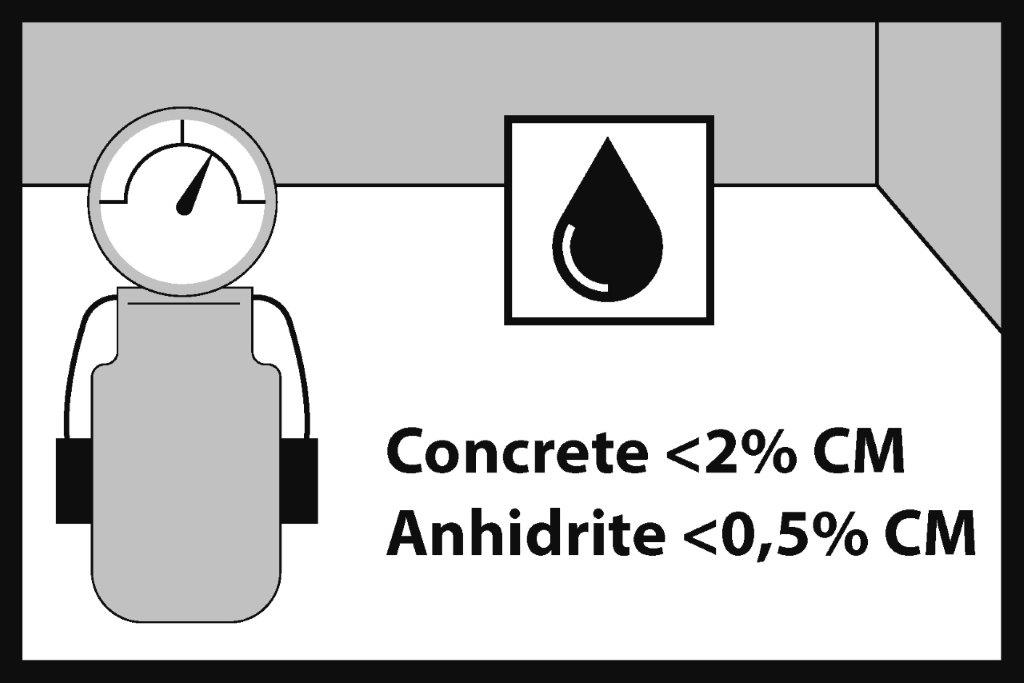
The moisture content (humidity) of the wooden subfloor (or wood-based boards) should not exceed 12%. The moisture content (humidity) should not exceed 2% for concrete subfloor and 0.5% for anhydrite subfloor. The measurement results should be documented.
3.
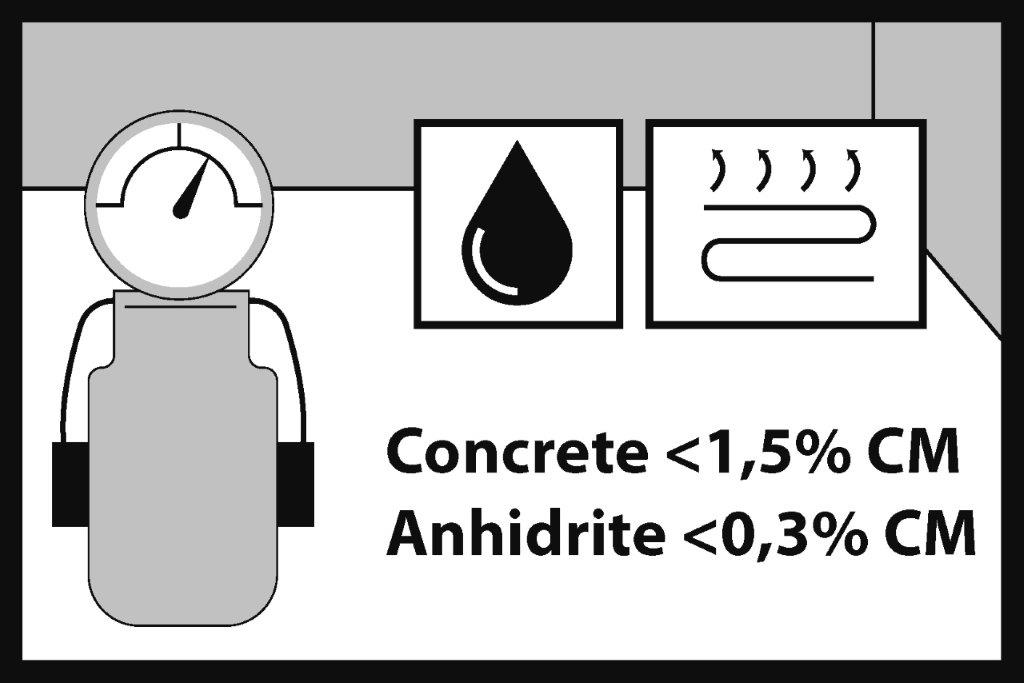
If the SPC panels are installed on an underfloor heating system, the moisture content (humidity) should not exceed 1.5% for concrete subfloor and 0.3% for anhydrite subfloor. The measurement results should be documented.
4.
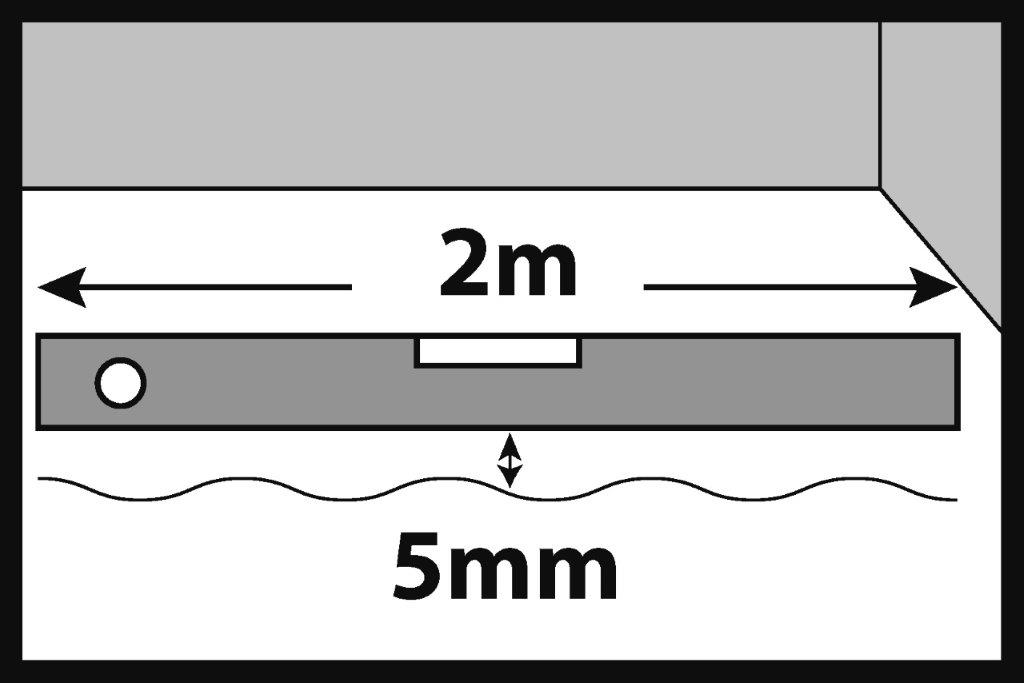
The maximum permissible unevenness is up to 5 mm, measured over a length of 2 m. Spot/local unevenness must not exceed 2 mm over a length of 20 cm.
5.
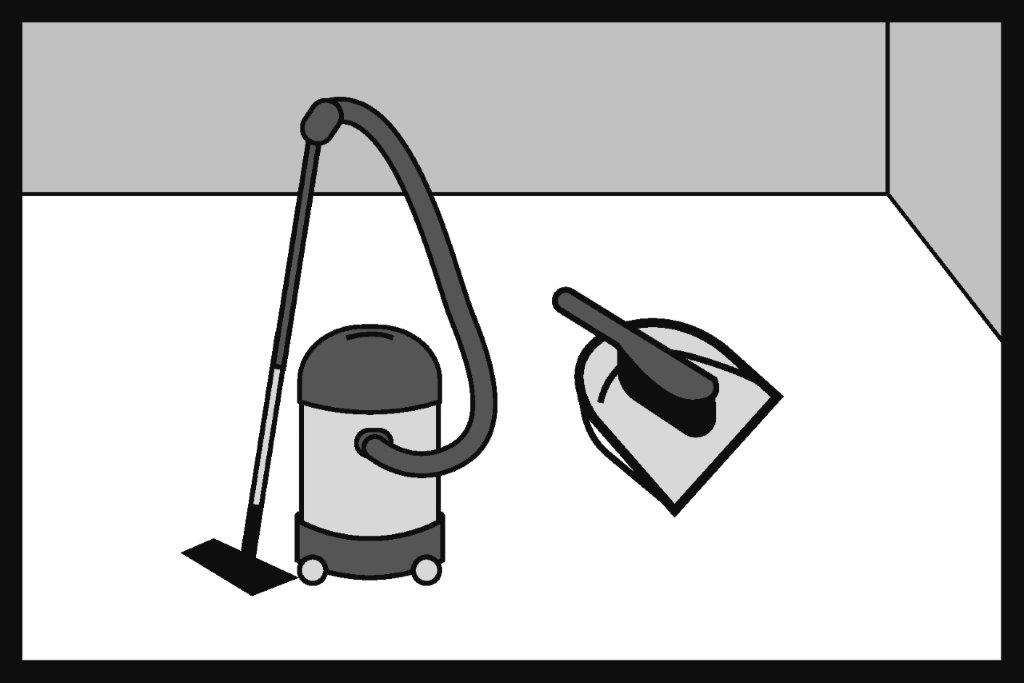
Brush or vacuum clean the subfloor before installing the SPC panels. The subfloor should be free of dust, debris, paints, varnishes, wax, grease, oil, hardeners, sealants, solvents, sand, glue residues, fats and other foreign bodies.
6.
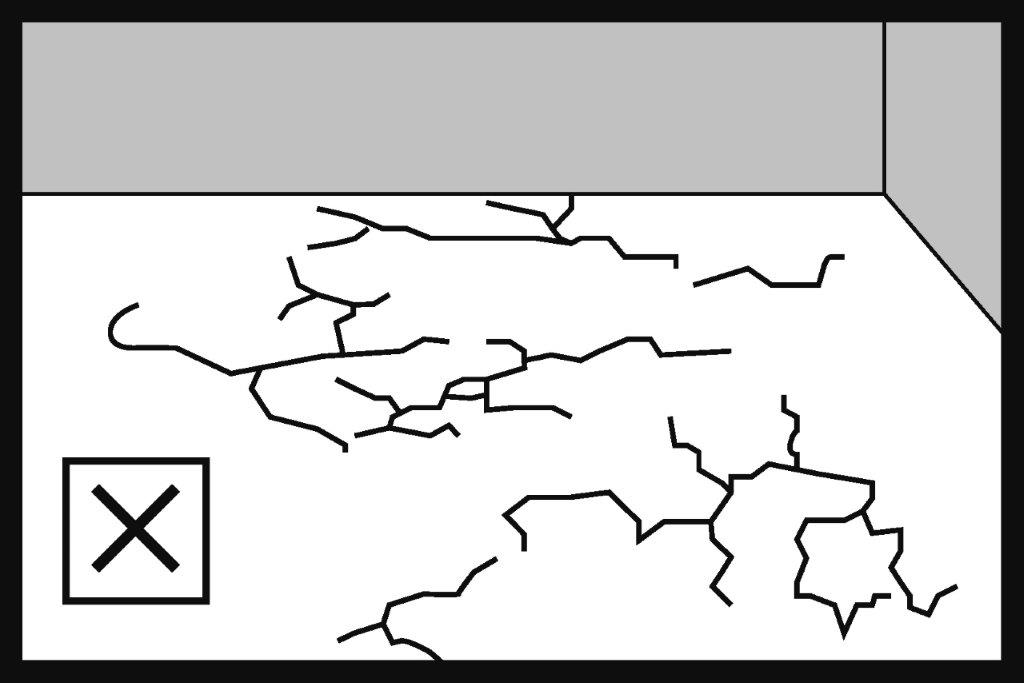
The subfloor should be dry, stable without scratches and cracks and clean without visible dirt. Fill cracks and defects in cement or anhydrite subfloor with filler. For floating installation on ceramic tiles, fill joints with a width of more than 5 mm and a depth of 2 mm with filler. For adhesive installation, fill all joints with putty and read the adhesive system manufacturer’s guidelines.
For information on the adhesive system recommended for the installation of the SPC floors, please visit www.barlinek.com
Plywood, OSB, chipboard must be structurally solid and installed in accordance with the board manufacturer’s recommendations. We recommend installing wood-based boards in two layers, connected with wood screws. Install the boards in the first and the second layer with the staggered edges. The wood-based board substrate must provide adequate stiffness and support for the correct installation of the SPC floor. The board joints should be smooth and should not cause the boards to deflect or spring back under load.
All screw heads should be slightly recessed below the board plane.
Important!
SPC panels with integrated backing cannot be installed in an adhesive system.
7.
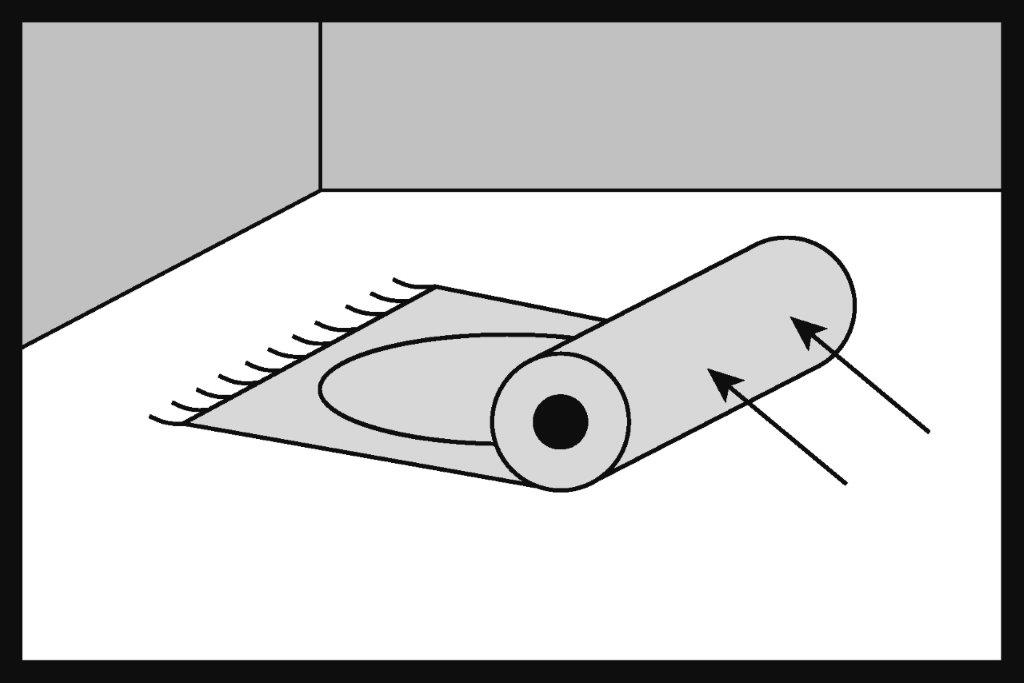
Do not install the SPC floor panels on existing soft carpet flooring, soft PVC floor lining, carpets or other similar materials.
8.
Recommended tools and materials to install the floor:
- Protective goggles
- Vacuum cleaner or sweeping brush
- Knee pads
- Protective gloves
- Non-rebounding mallet (white rubber mallet or sand filled mallet)
- Spacer wedges
- Tape measure
- Pencil
- Electric saw
- Spirit level

9.
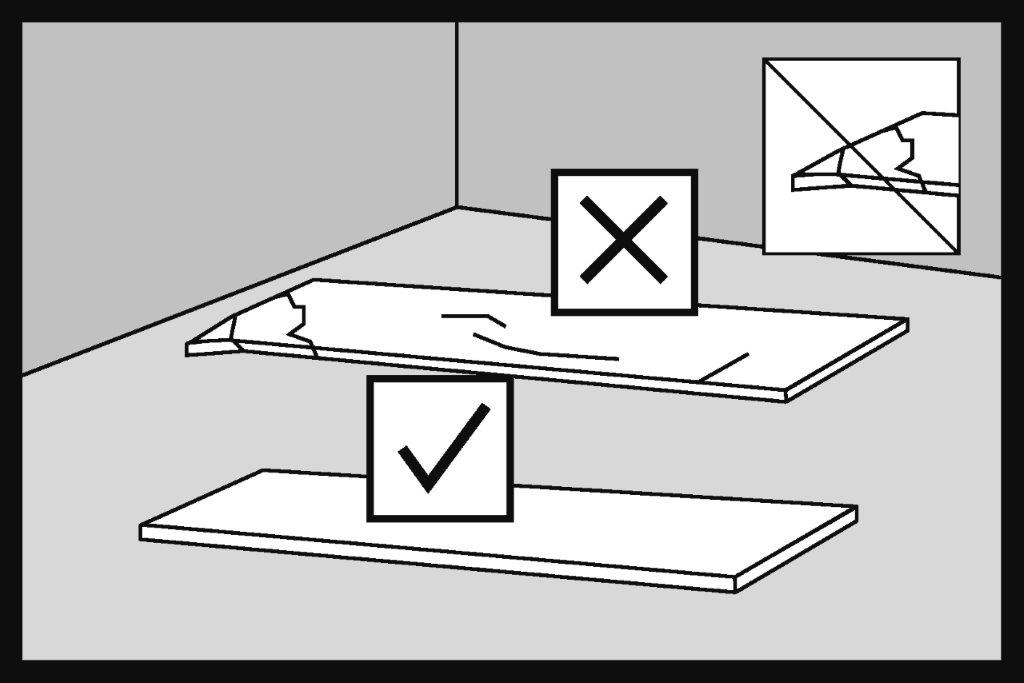
Before installation, the investor or fitter should check the SPC panels for compliance with the order. Check the panels for quality, finish, gloss, colour, mechanical damage (information on the product type can be found on the label or in the installation instructions or product card). In case of doubt, the investor or fitter should not use any SPC panel that they consider unsuitable for installation and should immediately contact the seller. Installing a damaged SPC panel, a panel that does not comply with the order or a panel with visible defects or unacceptable visual features will void the warranty.
10.
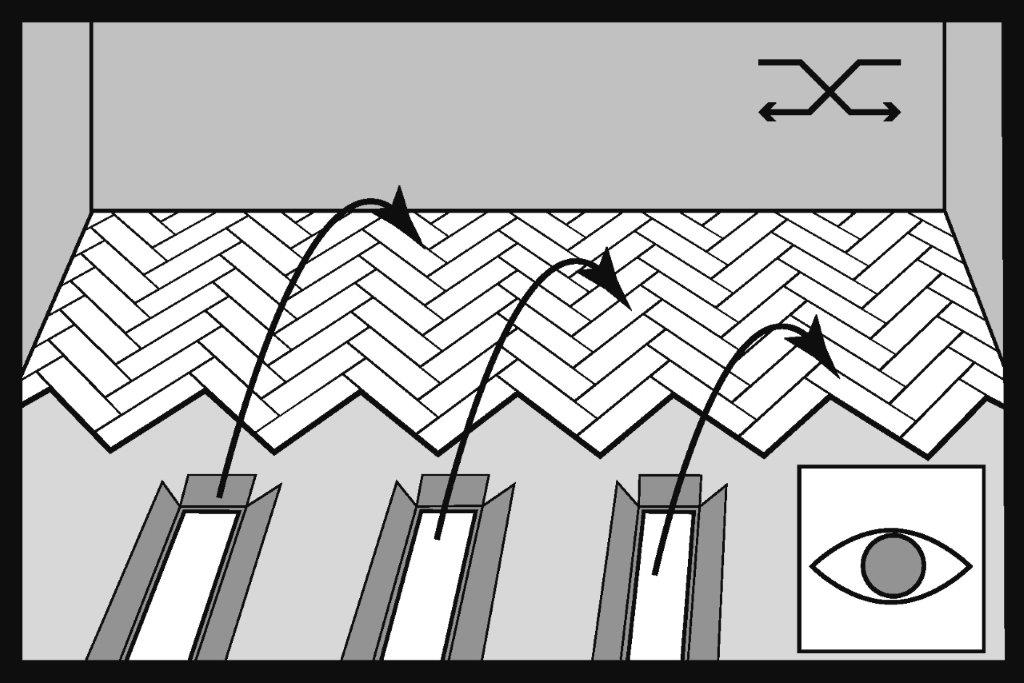
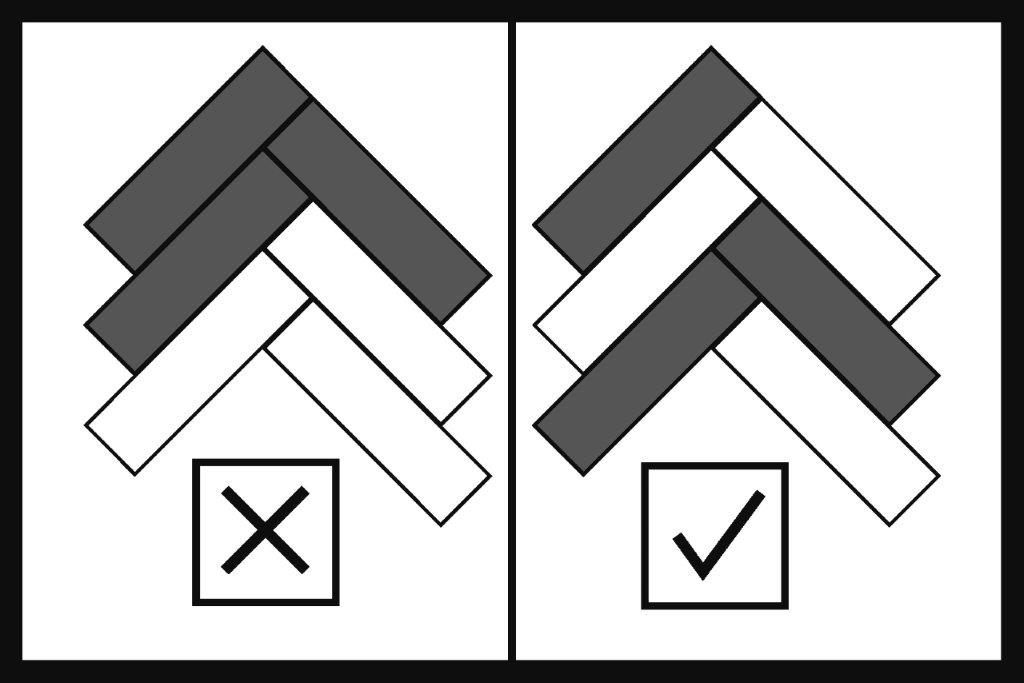
Install panels from several packages, choosing them appropriately according to colours to achieve a balanced visual effect for the floor.
Order approx. 3% more panels than the measured floor area. For rooms with many angles or obstacles and rooms where SPC panels are installed diagonally across the room or at connections with ceramic tiles, it may be necessary to order approx. 10% more panels than the measured floor area.
11.
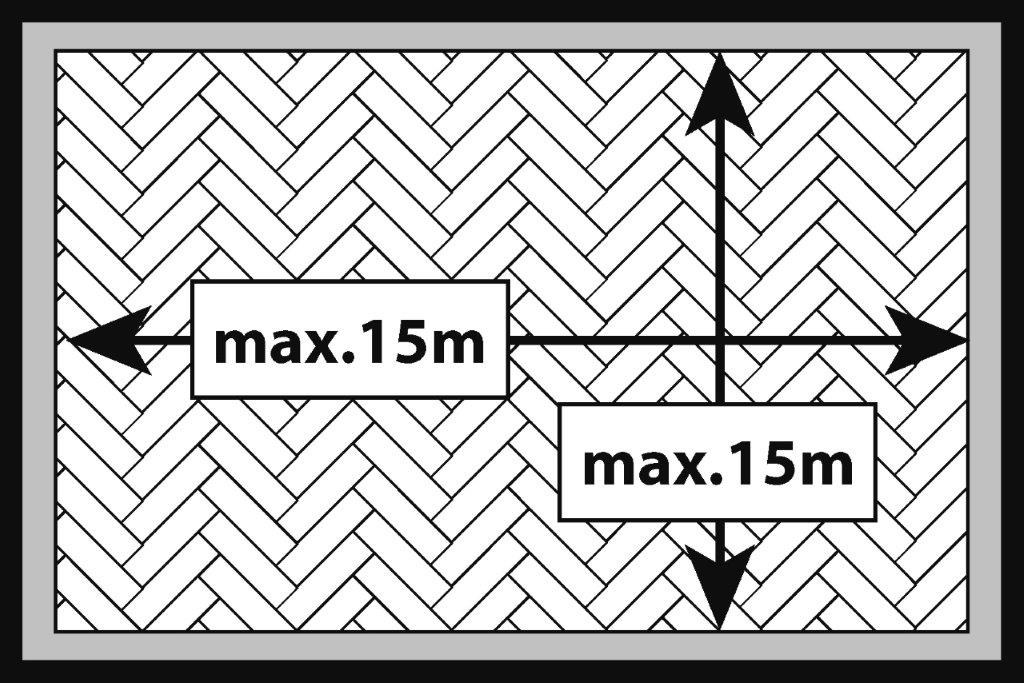
The maximum dimensions of the floor plan of a house/apartment for which the SPC floor installed as a floating floor does not require expansion gaps in doorways are 15m×15 m. For dimensions up to 15m x 15m do not make expansion gaps in doors and doorways to adjacent rooms. Make expansion gaps around walls and building elements such as stairs and columns.

12.
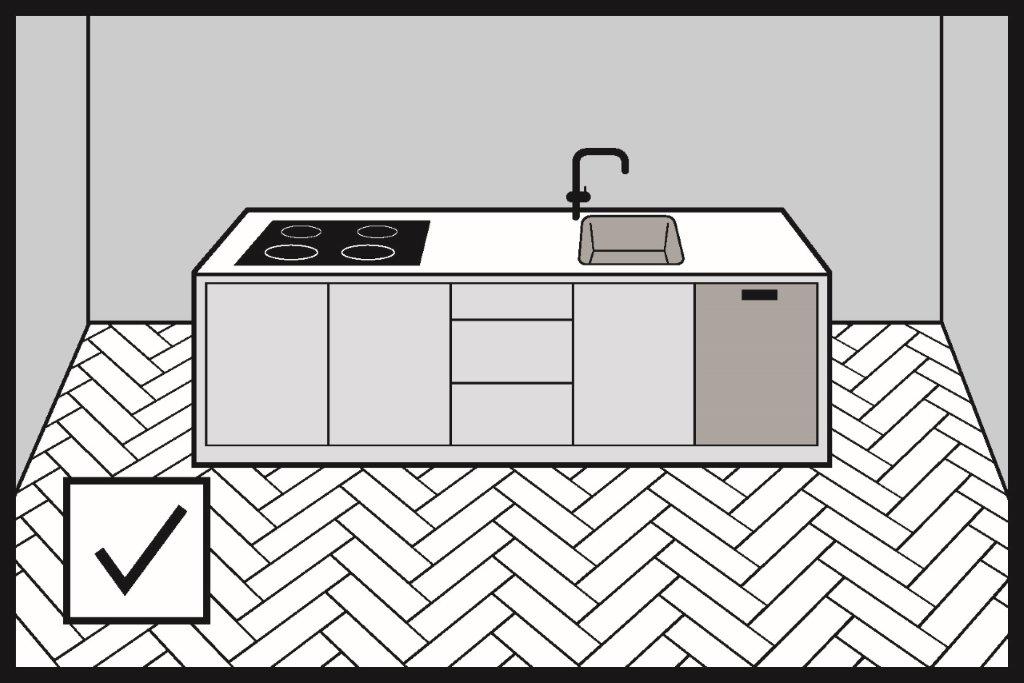
Heavy items such as a kitchen island or furniture can be placed on the floor a floating floor without the need to leave expansion gaps around the structure.
However, it is required to make a perimeter expansion gap around fixed elements leading from the floor to the kitchen island, e.g. water and sewage system.
Always leave expansion gaps by the walls regardless of the panel installation system.
13.
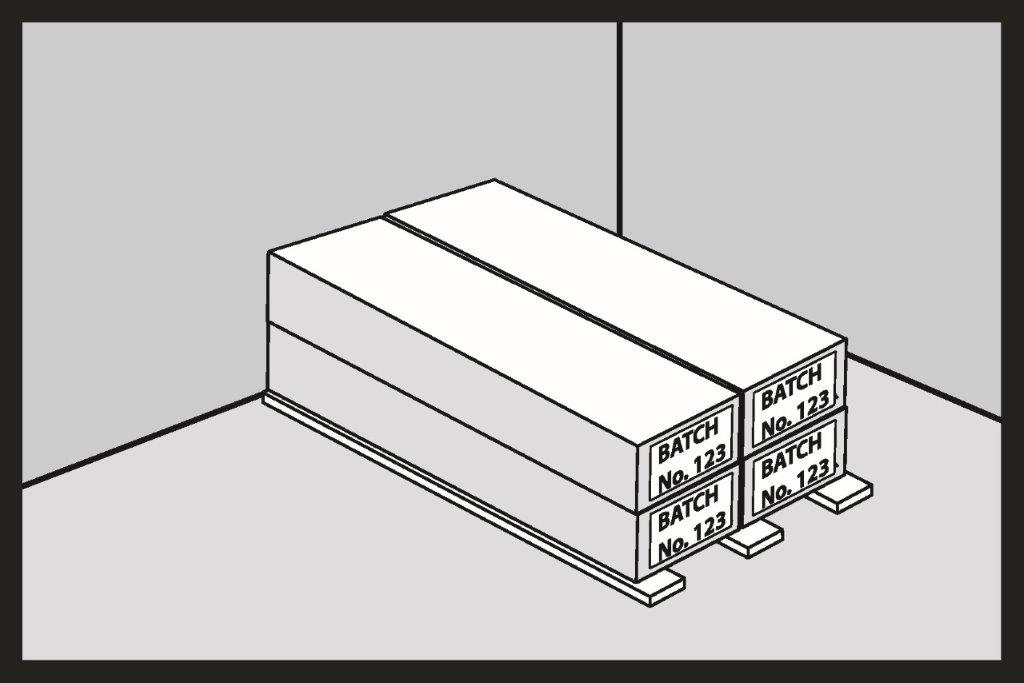
Please note that individual production batches of the SPC floors may slightly differ in shades. Therefore, floors from one production batch should be installed within one room. Check the conformity of the production batch before starting the installation. The production batch number can be found on the panel packaging (i.e. “Batch no”). To facilitate the identification of the installed floors’ production batch in the after-sales processes, make and keep a photo of the package of the installed SPC panels, with the production batch number visible.
Installation of the SPC panels as a floating floor
14.
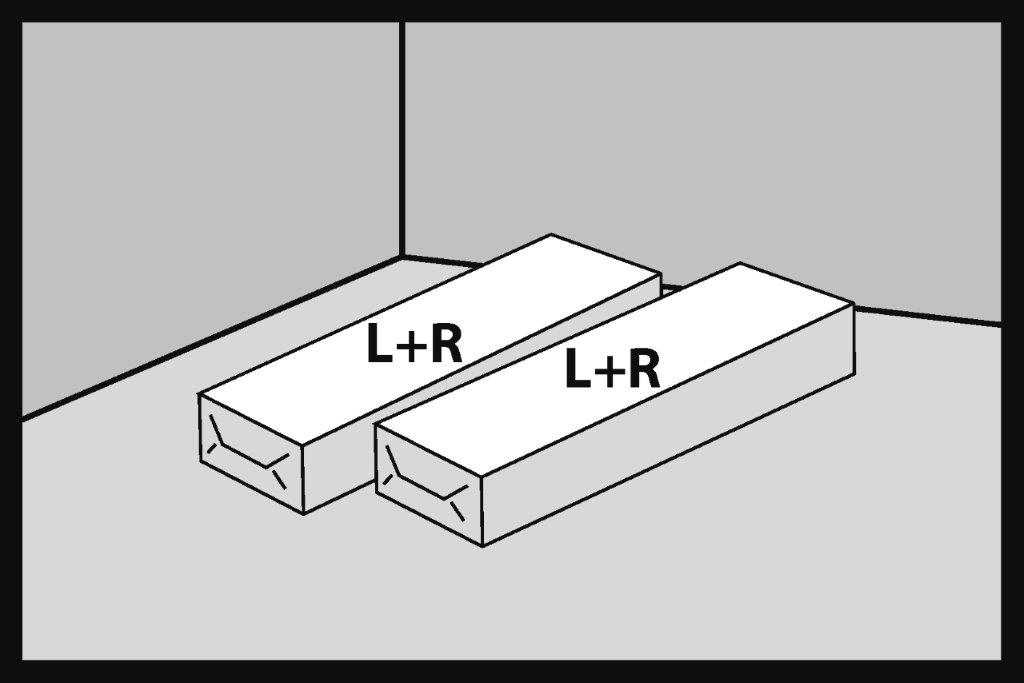
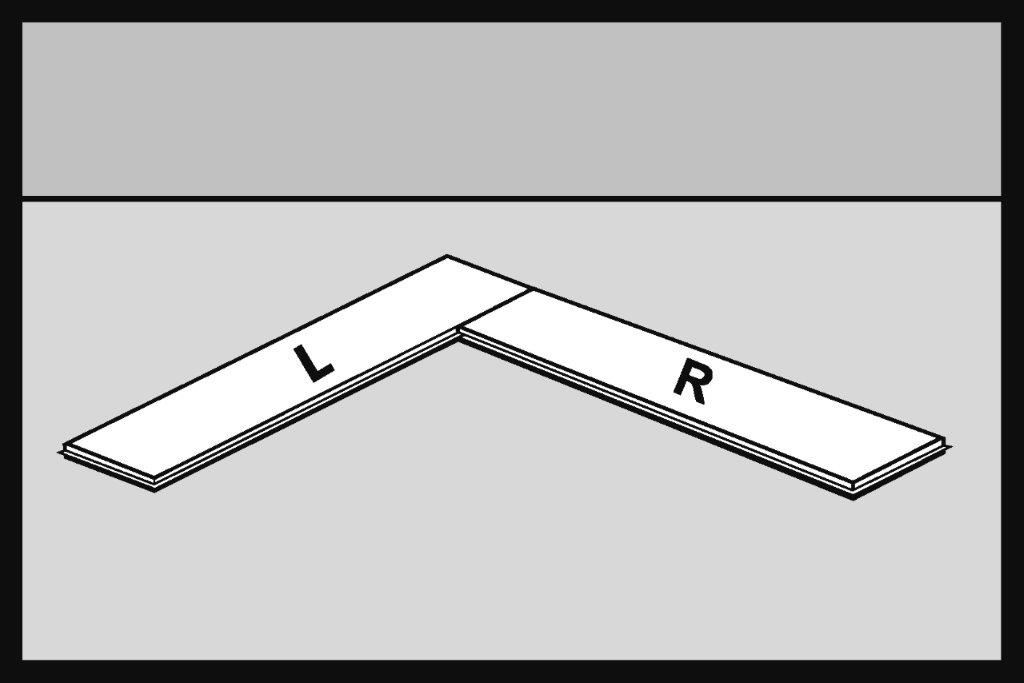
Each package of the panels for the installation in the classic herringbone pattern contains two types of panels: left and right ones. The letter “L” is printed on the left panel’s bottom layer, while the letter “R” is printed on the right panel’s bottom layer.
15.
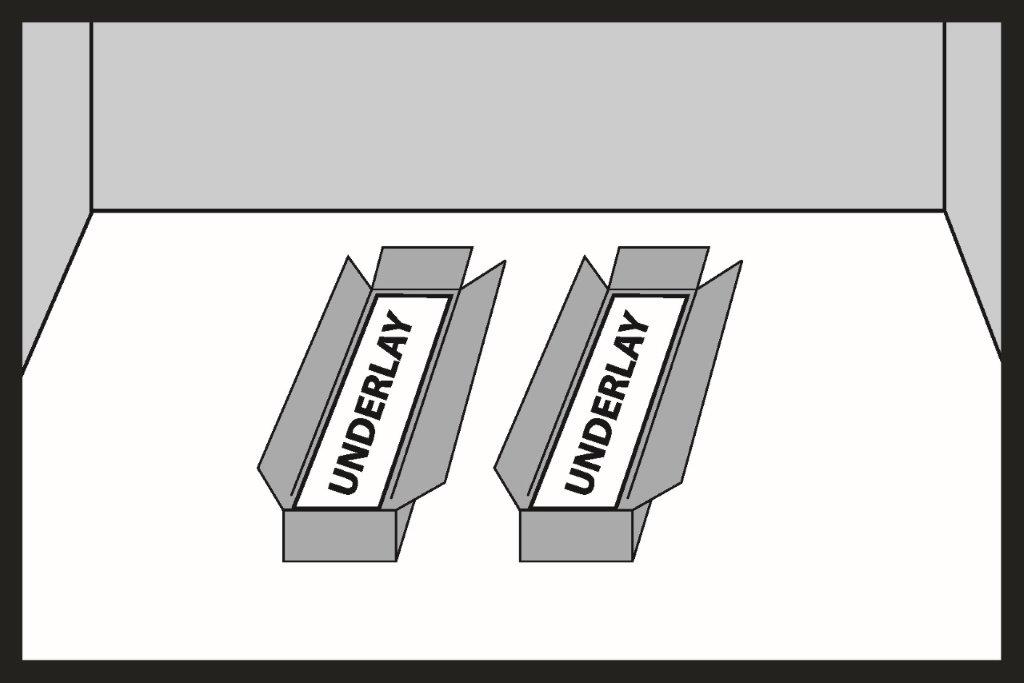
A 1mm thick XPO foam underlay is glued to the bottom of the SPC panel. CS parameter of the underlay – short-term load ≥ 400 kPa. The underlay integrated with the SPC panel with this parameter can withstand various types of loads throughout the entire service life of the floor.
Important!
No additional underlay is used.
16.
Start installing the panels in the classic herringbone pattern from the left side of the room to the right. Always make sure that the grooves (joint groove) on the longer sides of the L and R boards are in front of you.
17.
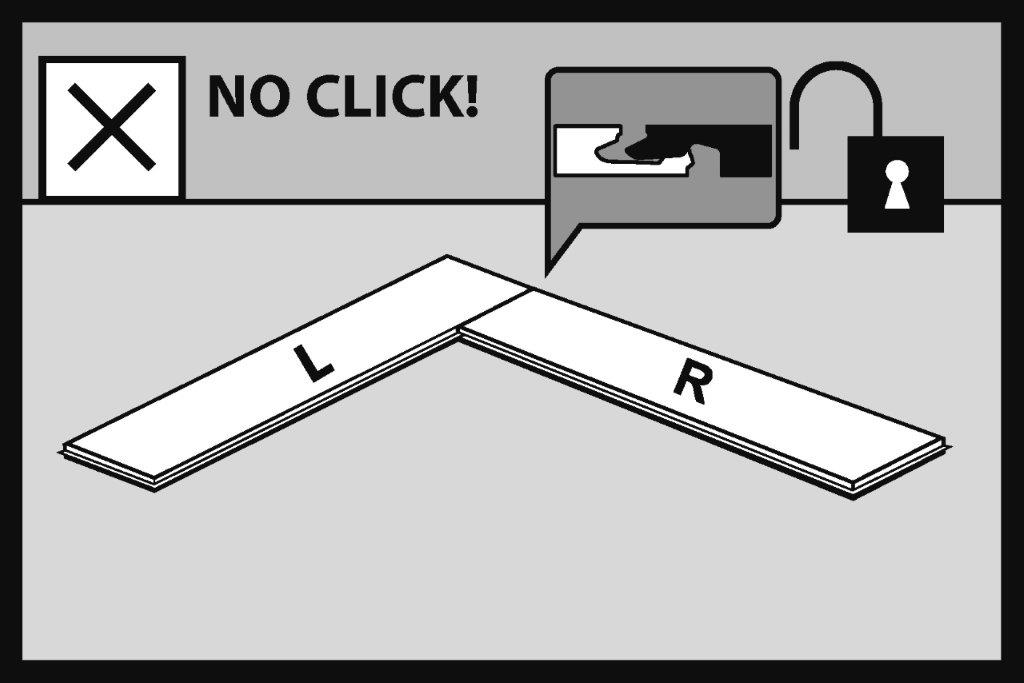
Connecting the joints of two boards on the short side does not mean that the joint is locked.
18.
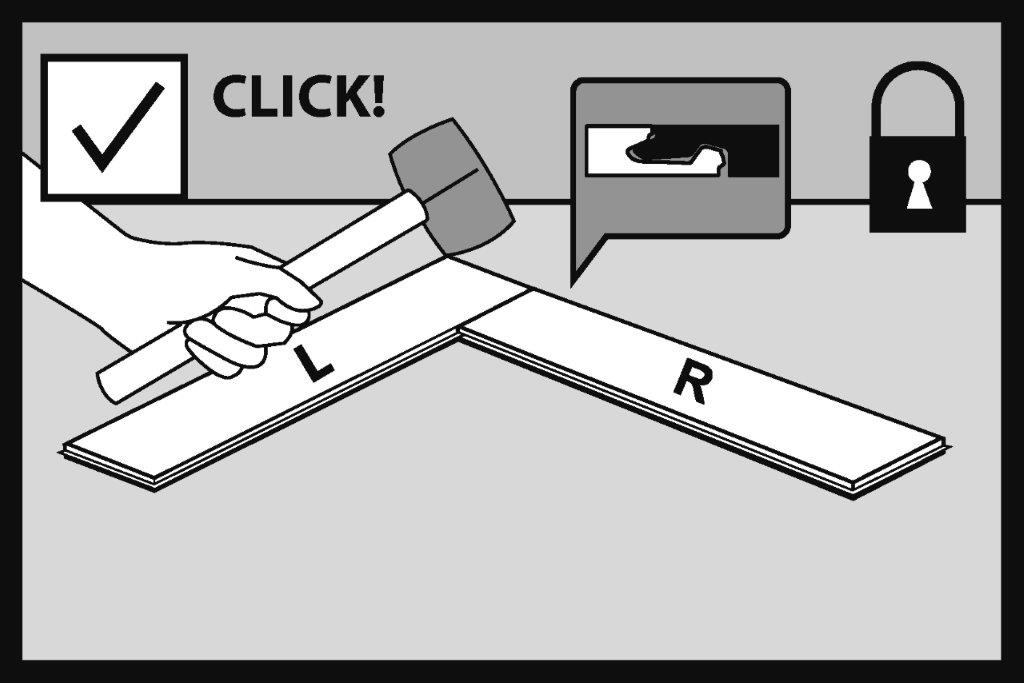
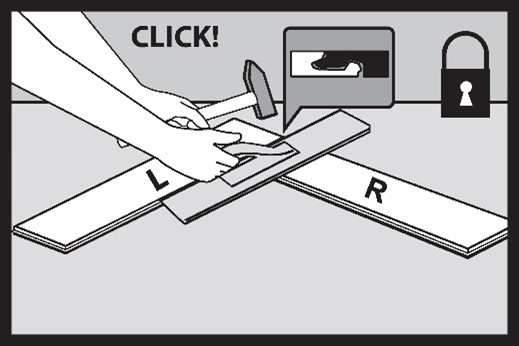
The joint is locked by hitting the joint connection several times with a mallet. If the joint is properly locked, the top layer of the panels should form one plane and there should be no visible difference in levels between the connected elements.
Important!
Use a non-rebounding mallet (sand filled mallet or white rubber mallet).
To properly join the panels, each short edge should be tapped in using a tapping block and a hammer placed from above.
19.
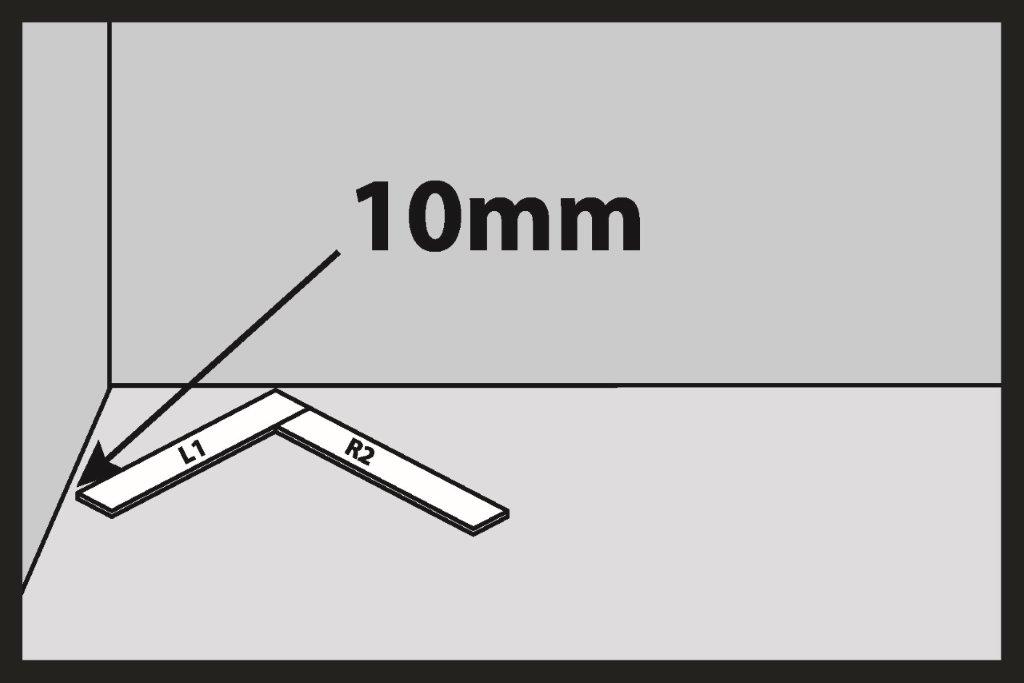
The order and quality of installation of the first two panels is very important. Install the left panel (L) first (1). The right panel (R) is installed second (2). The corner of the L1 panel should be 10 mm away from the wall (expansion gap). This is very important and will determine the correct installation of the panels.
20.
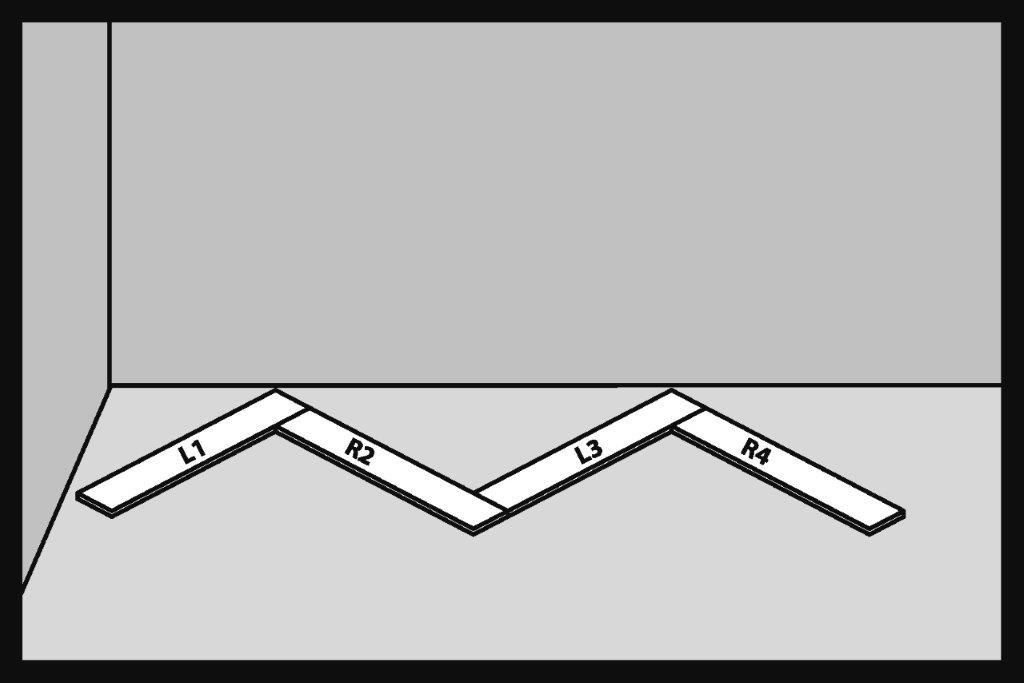
Install the next panels in the order L3 and R4.
Remember to tap the joint short edge connection with a non-rebounding mallet or white rubber mallet.
21.
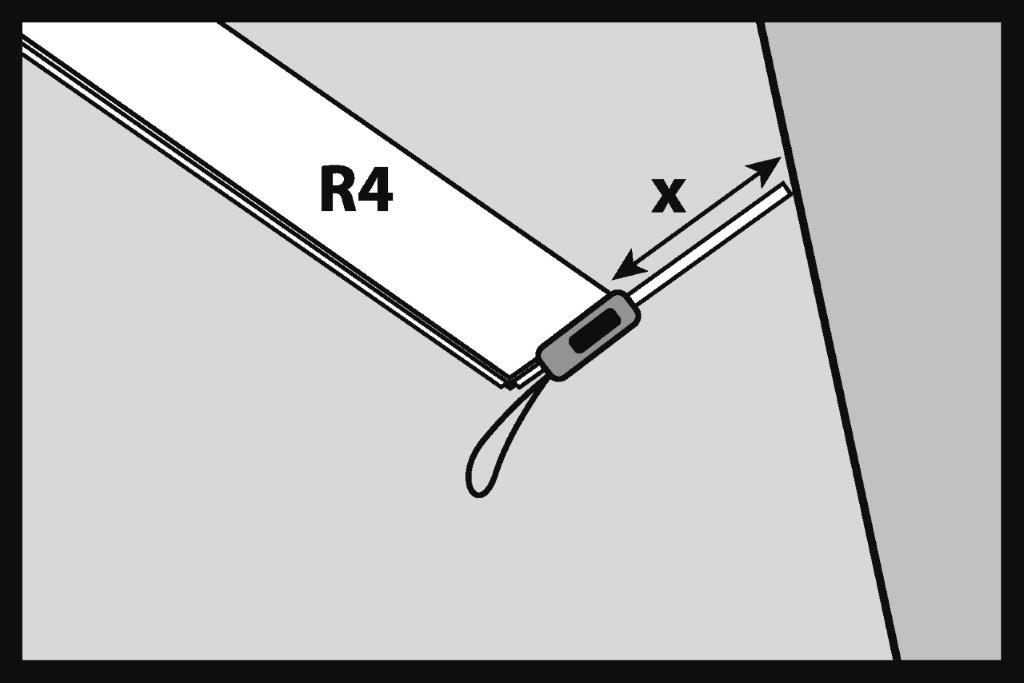
Start the installation of the last panel by measuring the distance X from the corner to the wall.
22.
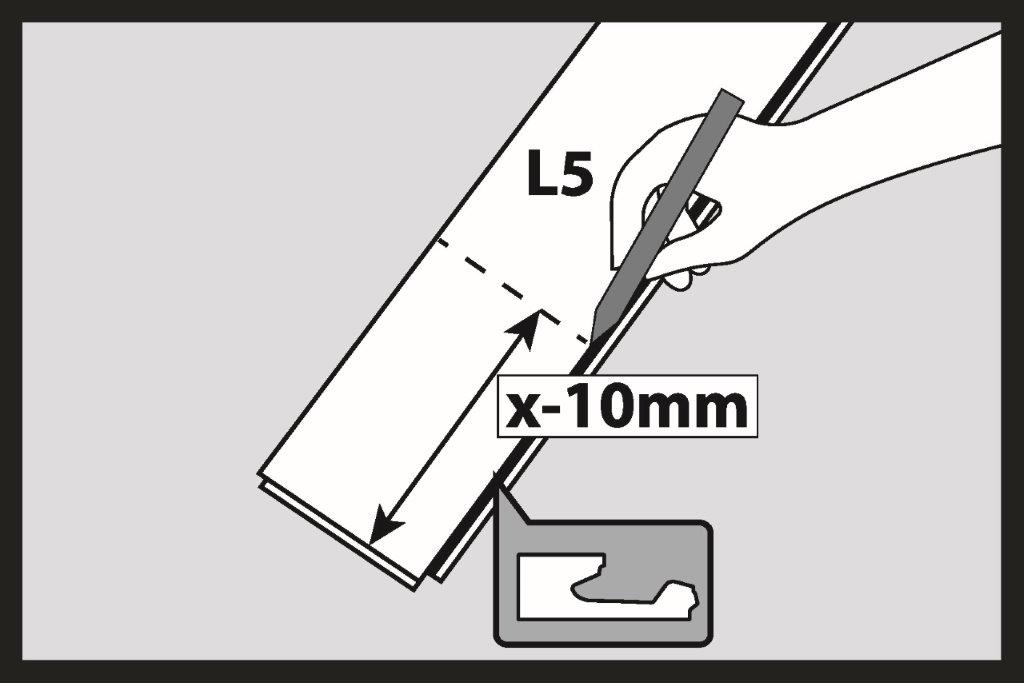
On the last panel (in this case panel L5) measure the distance X reduced by the expansion gap width of 10 mm.
23.
Using an adjustable angle, measure the angle Y between the short edge of the panel and the wall.
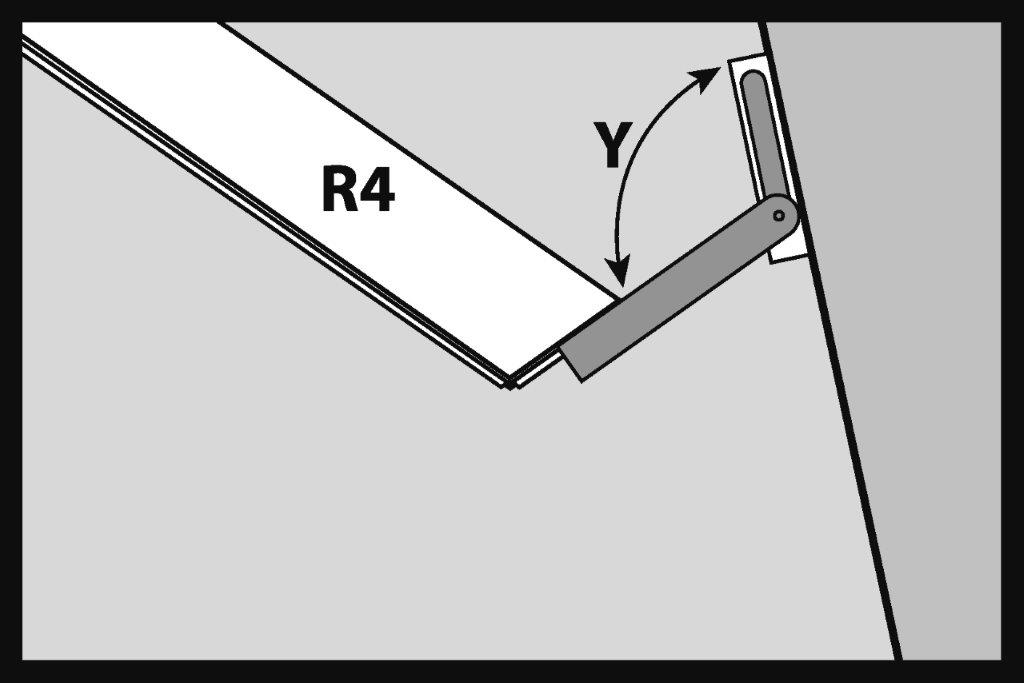
24.
Transfer the measured angle Y to the L5 panel and mark the cutting line.
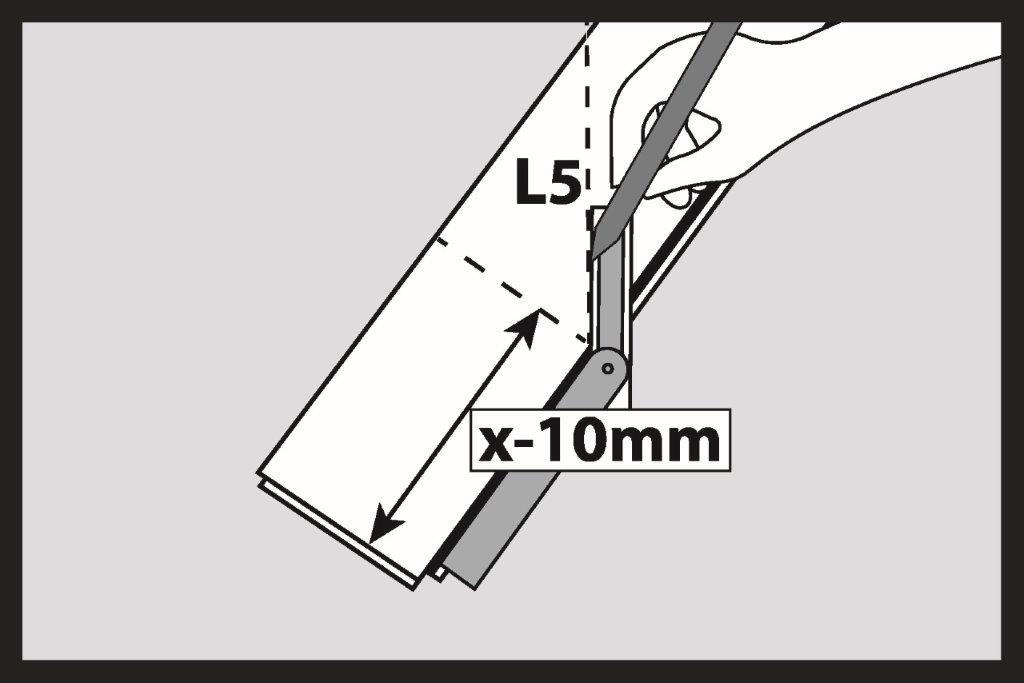
25.
Cut the SPC panel using a hand saw or mechanical saw.
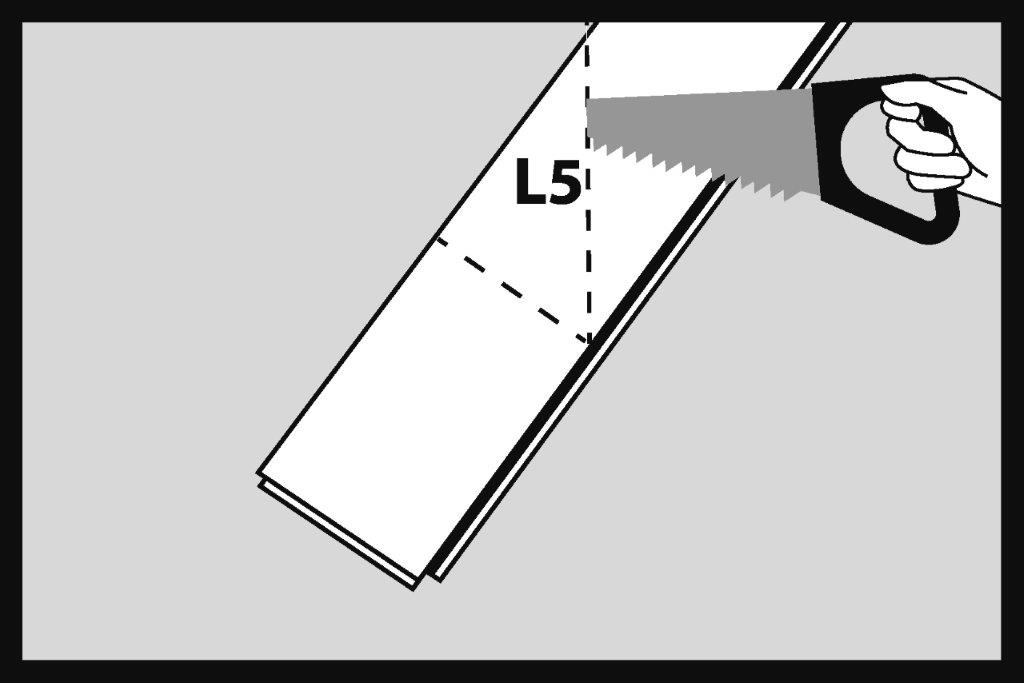
26.
Connect the panel cut to the correct length on the joints. Remember to tap the joint connection with a mallet. After installation, the expansion gap between the correctly cut panel and the wall will be 10 mm.
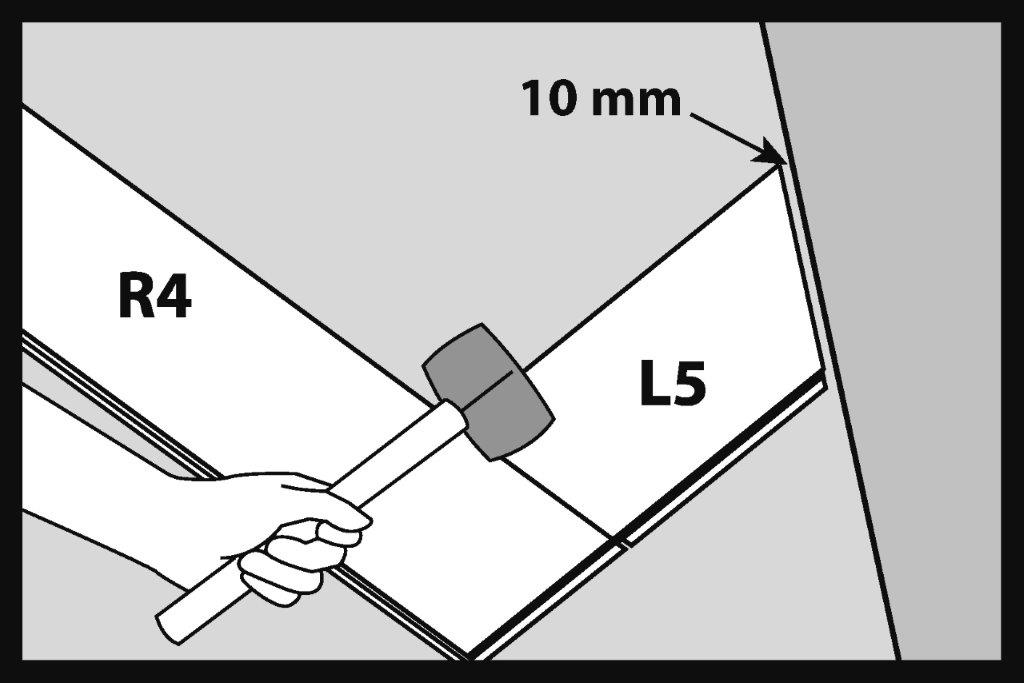
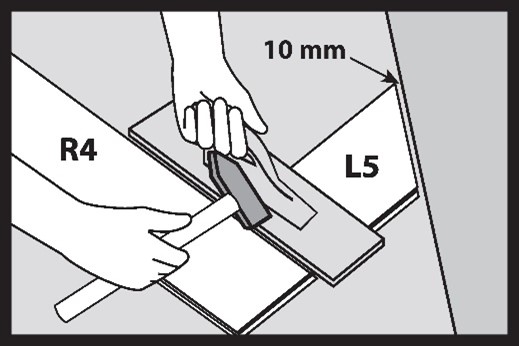
27.
To properly join the panels, each short edge should be tapped in using a tapping block and a hammer placed from above.
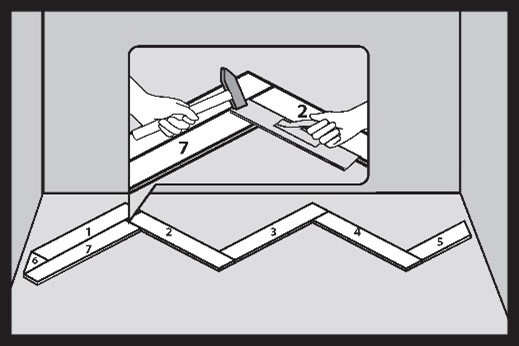
28.
We place the tapping block on the top of the panel, at its very edge.
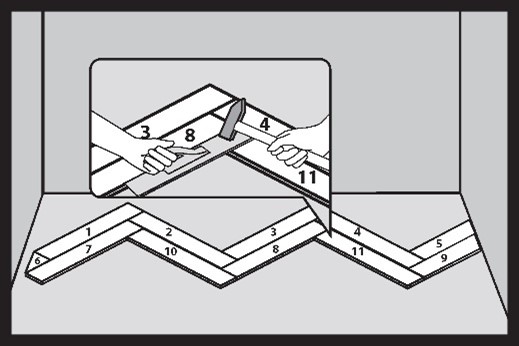
29.
After installing the first strip of the panels in the herringbone pattern, install the next panels. The installation order is very important. See the drawing for the correct installation order.
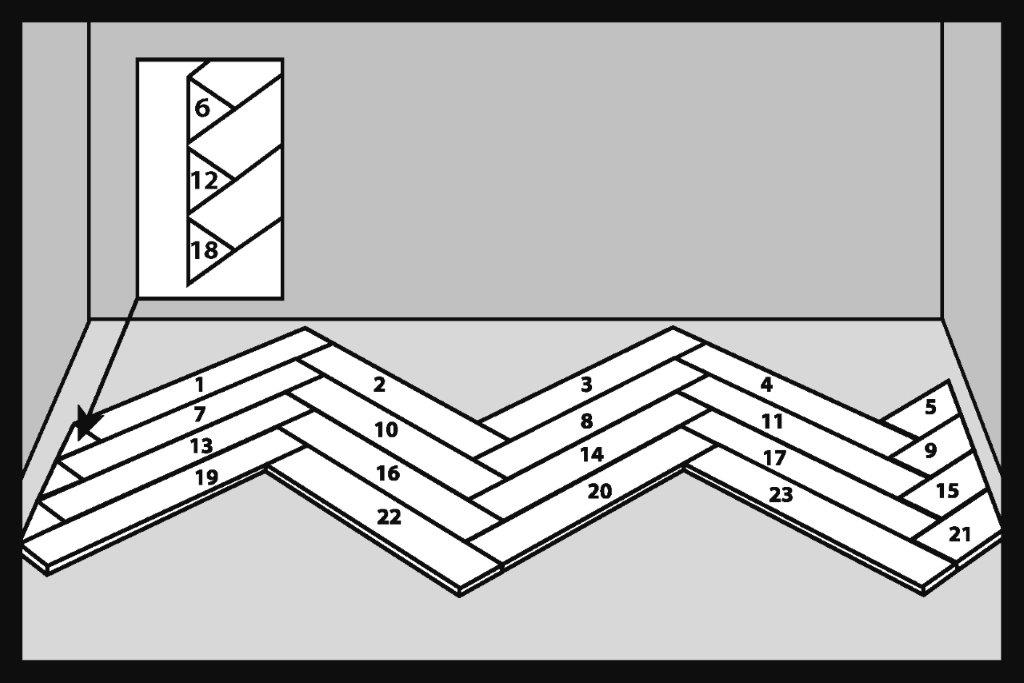
30.
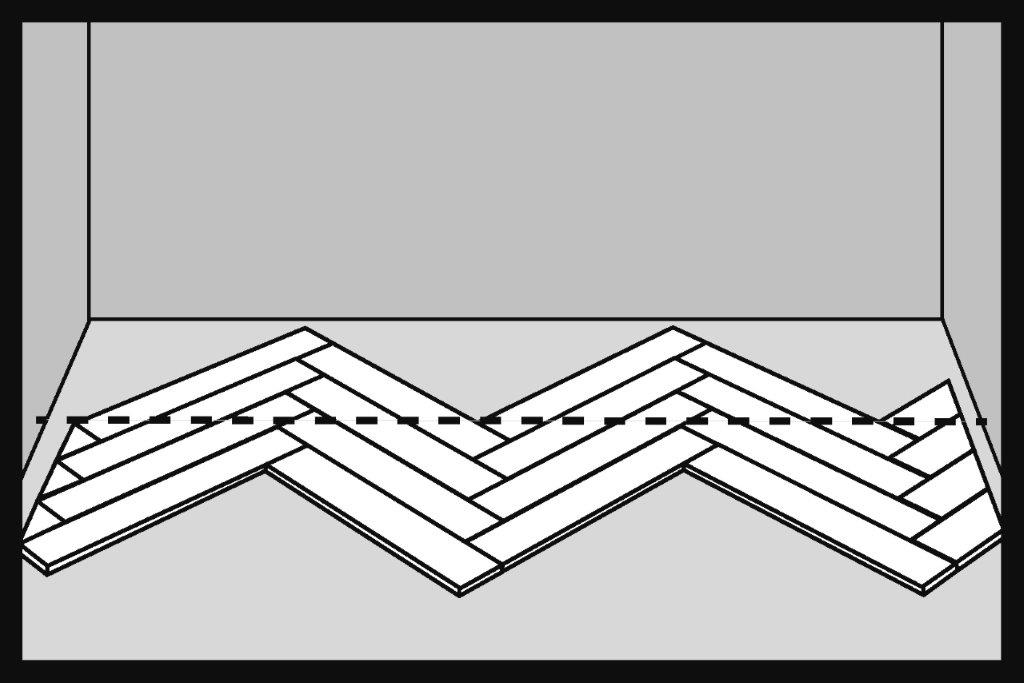
After installing four rows of the SPC panels, mark the cutting line parallel to the wall. The line runs from the corner on the left to the right.
31.
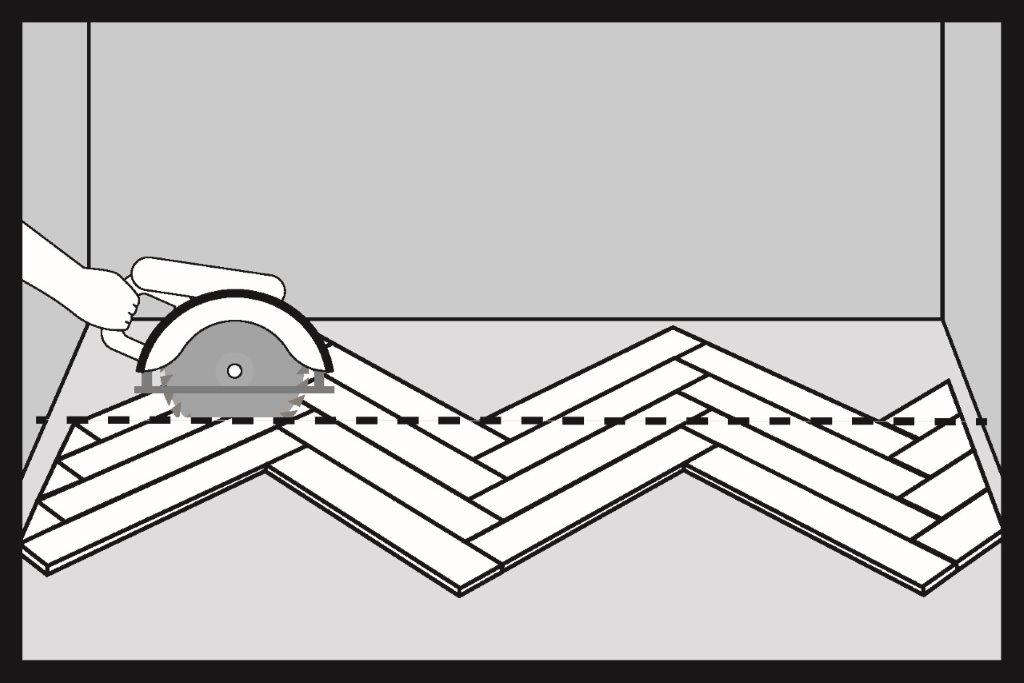
Use an electric saw with adjustable cutting depth to cut the installed SPC panels.
32.
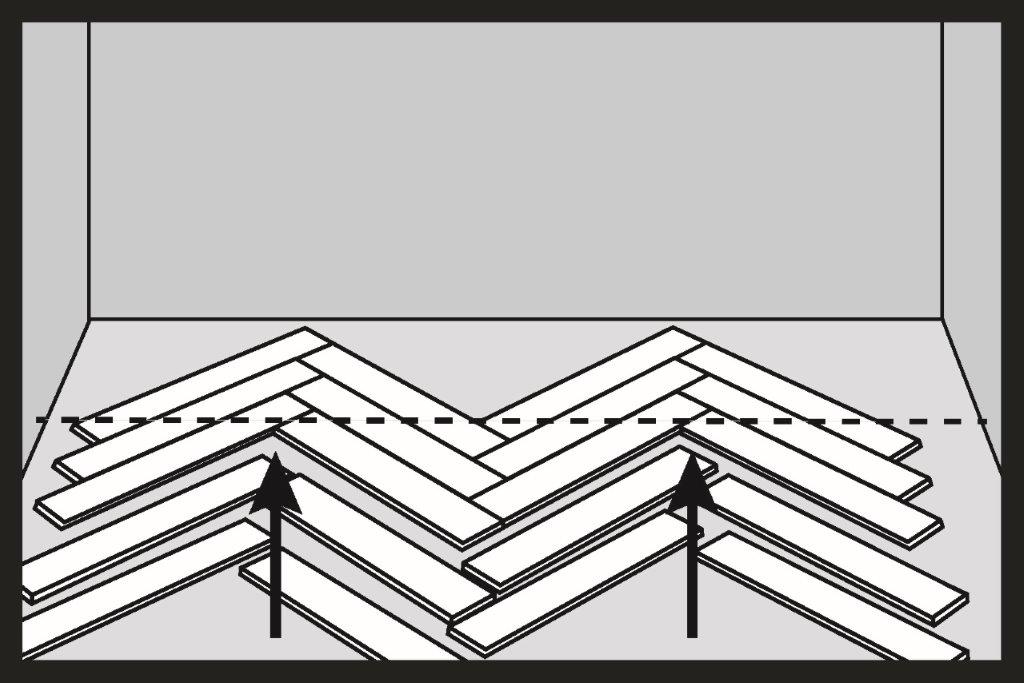
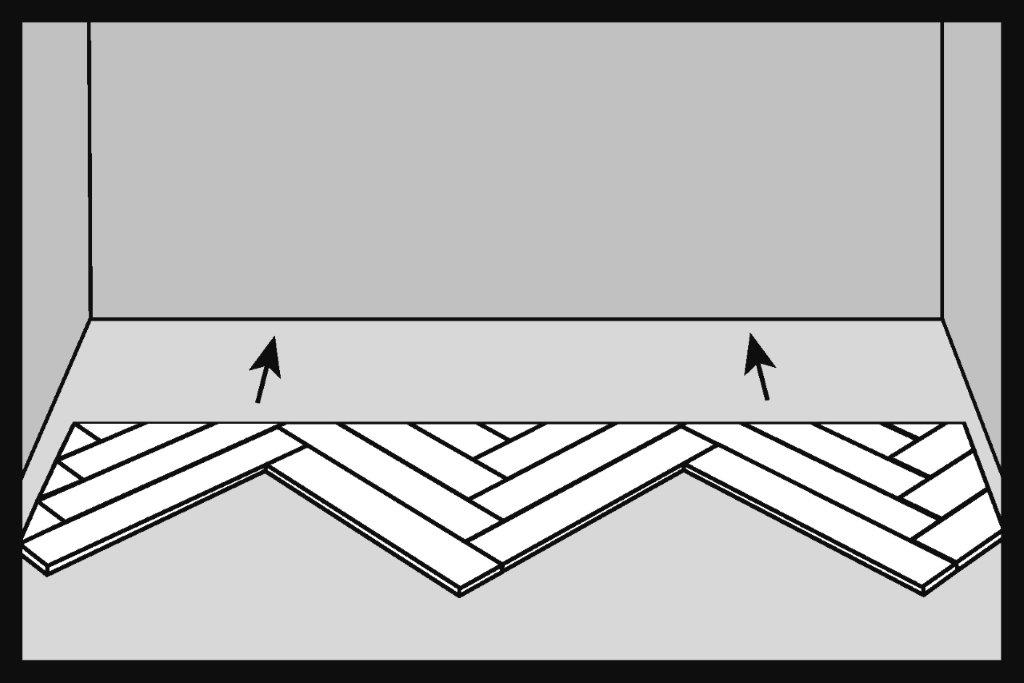
If you do not have an electric saw with adjustable cutting depth, you can use a hand saw for wood. Unlock all installed rows of the herringbone pattern panels. The arrows show the direction of unlocking.
33.
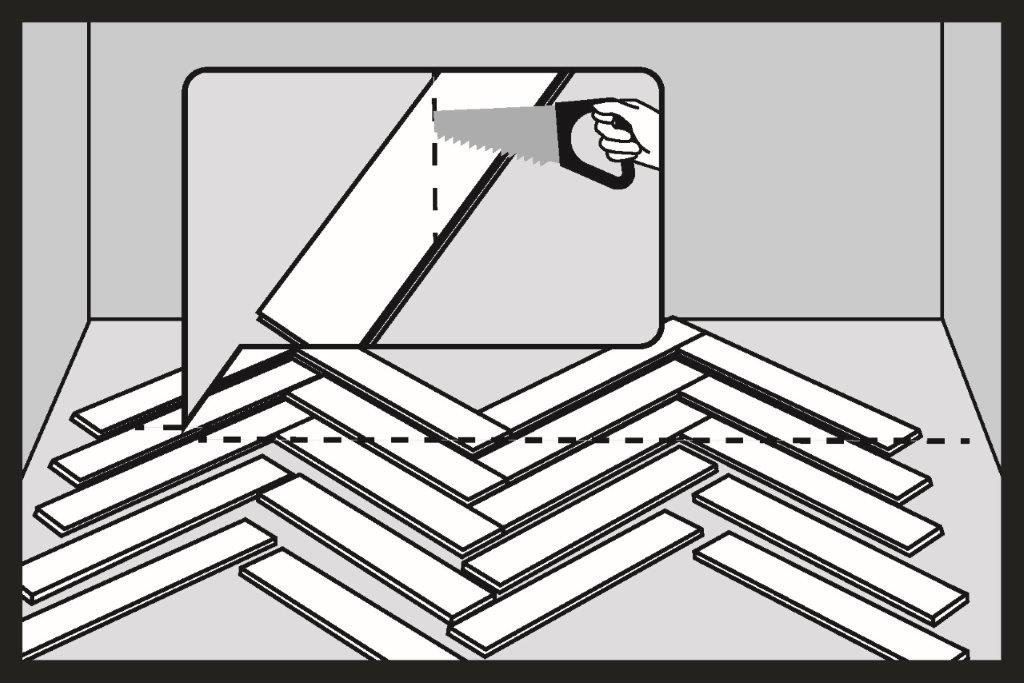
After unlocking the floor, cut individual panels along the drawn line. Assemble the cut panels into one surface.
34.
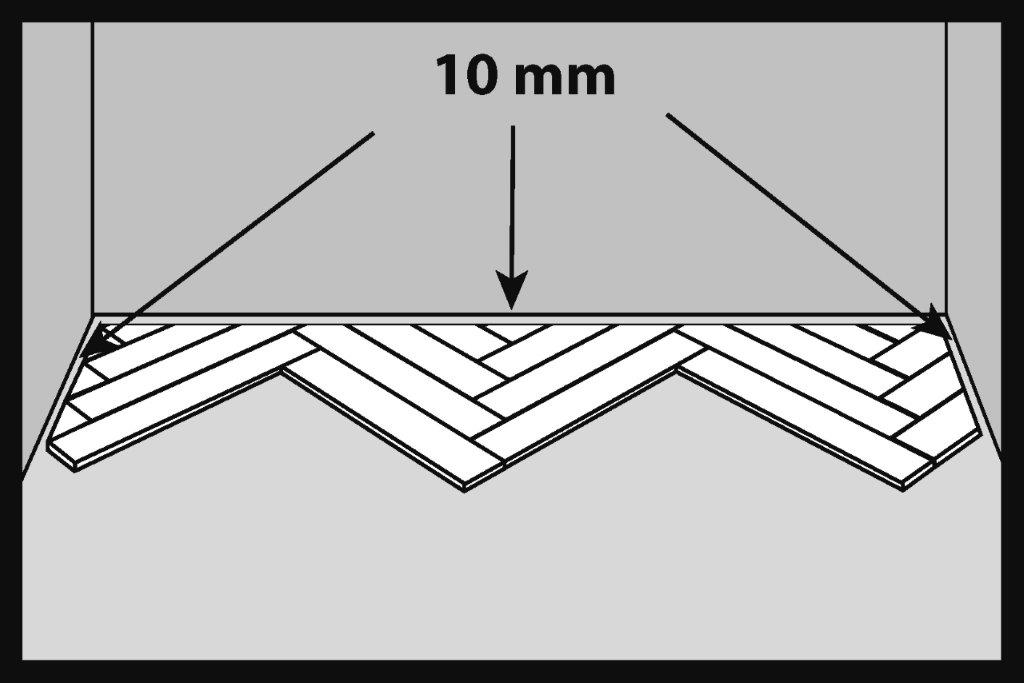
Regardless of how the SPC panels are cut, move the entire floor surface to the wall.
35.
Remember to leave a 10mm wide expansion gap on each side.
36.
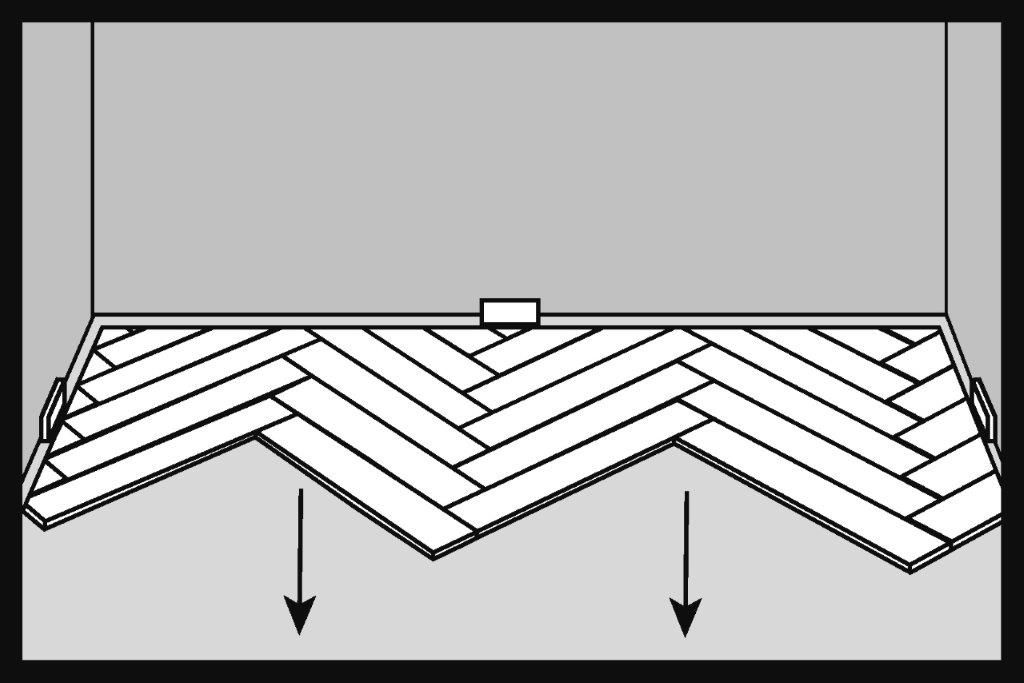
Install the remaining SPC panels in the same order as when installing the first four rows of panels.
37.
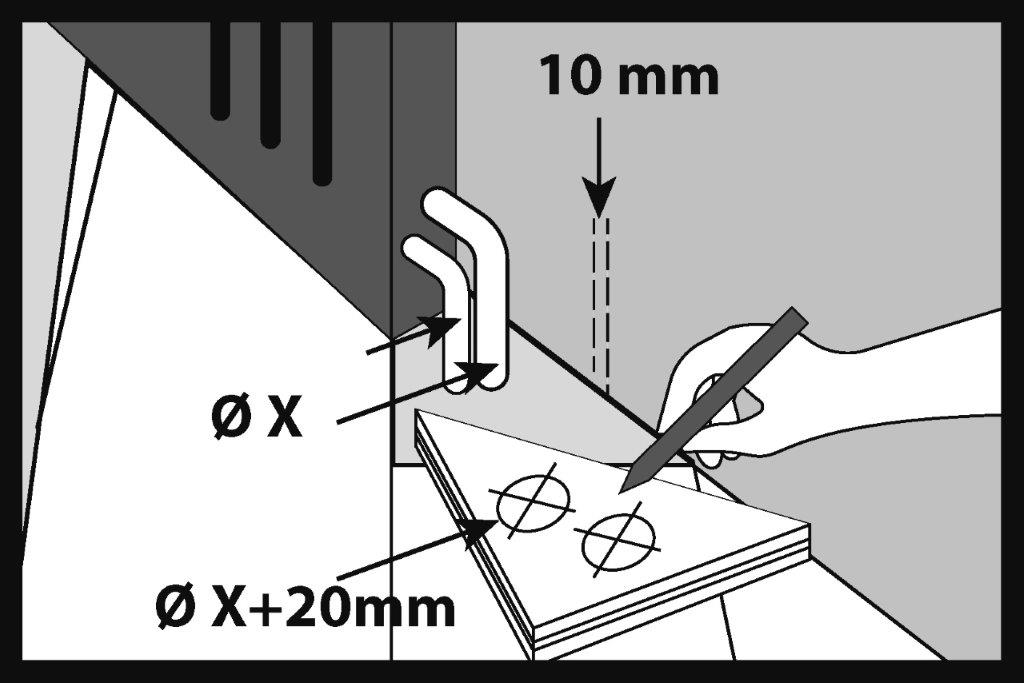
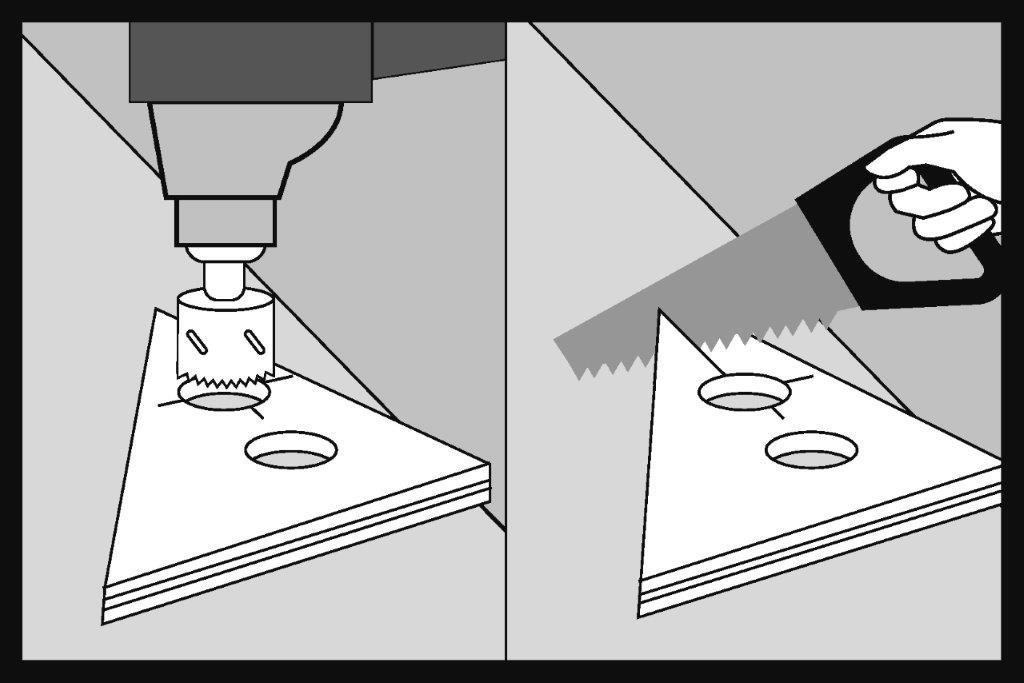
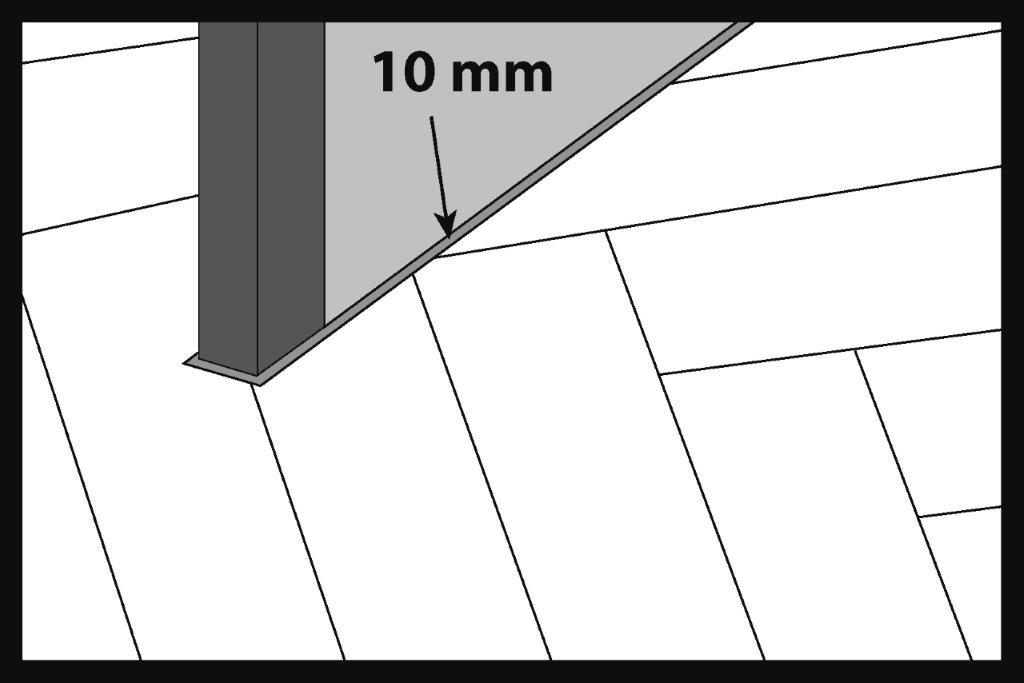
When installing the floor panels near pipes, cut holes with the diameter of the pipes increased by 20mm. This will allow you to maintain a 10mm expansion gap around the pipes.
38.
Use wood drills to cut the holes. Cut the panel along the diameter of the holes.
39.
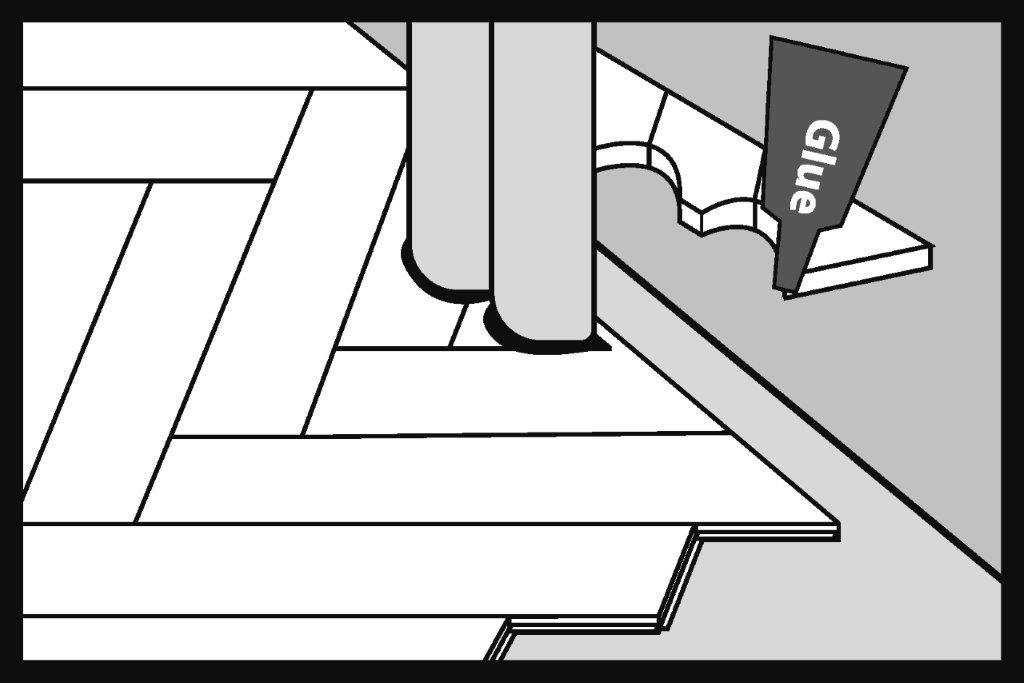
Glue the cut piece of the panel using assembly adhesive.
40.
The maximum dimensions of the floor plan of a house/apartment for which the SPC floor installed as a floating floor does not require expansion gaps in doorways are 15m×15 m. For dimensions up to 15m x 15m do not make expansion gaps in doors and doorways to adjacent rooms. Make expansion gaps around walls and building elements such as stairs and columns.

41.
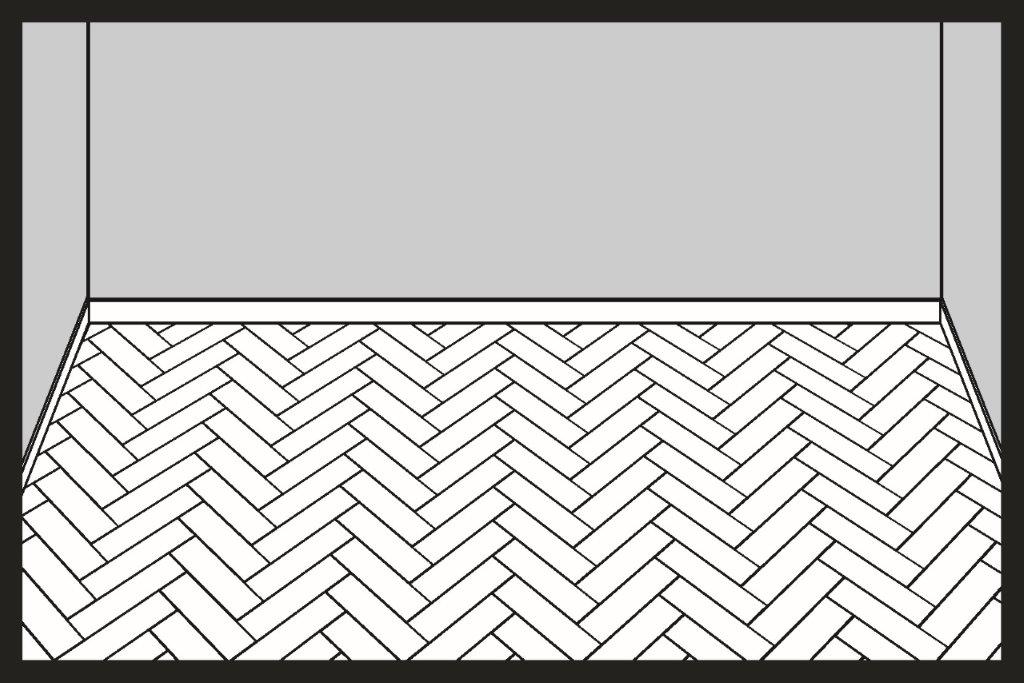
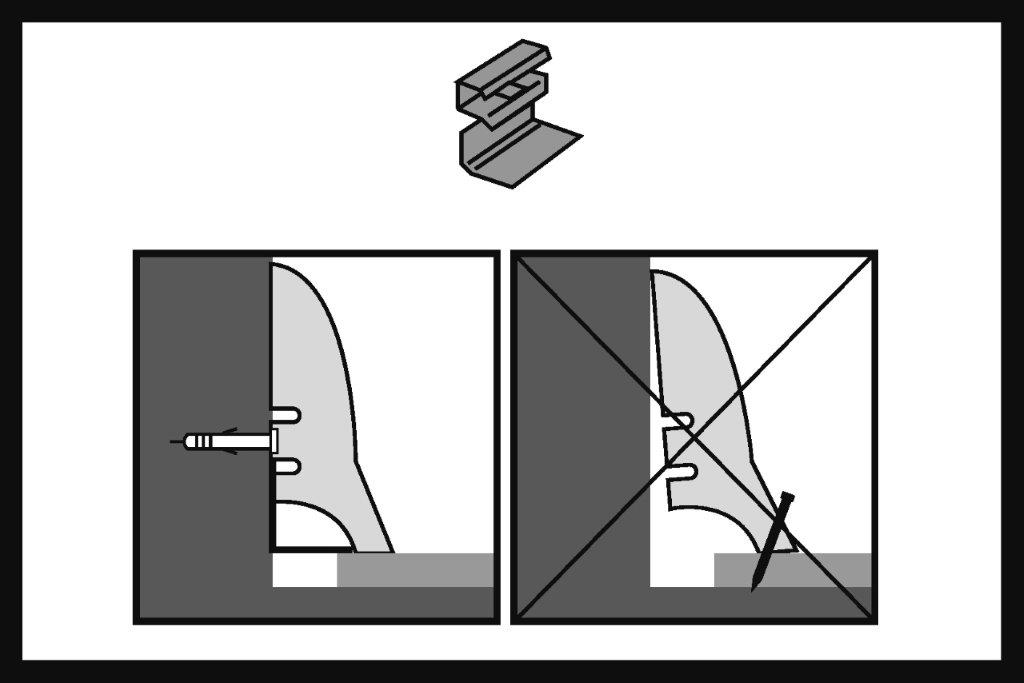
After installing the entire floor, install decorative skirting boards. Attach the skirting boards only to the walls using assembly clips or assembly adhesive.
Installation of the SPC panels on an underfloor heating system
42.
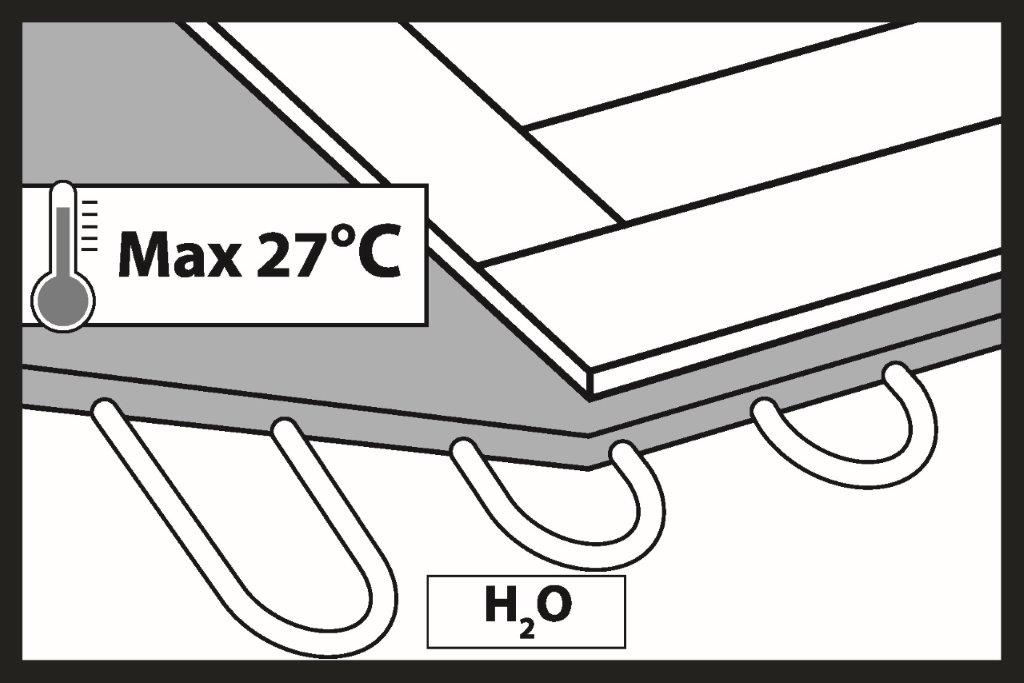
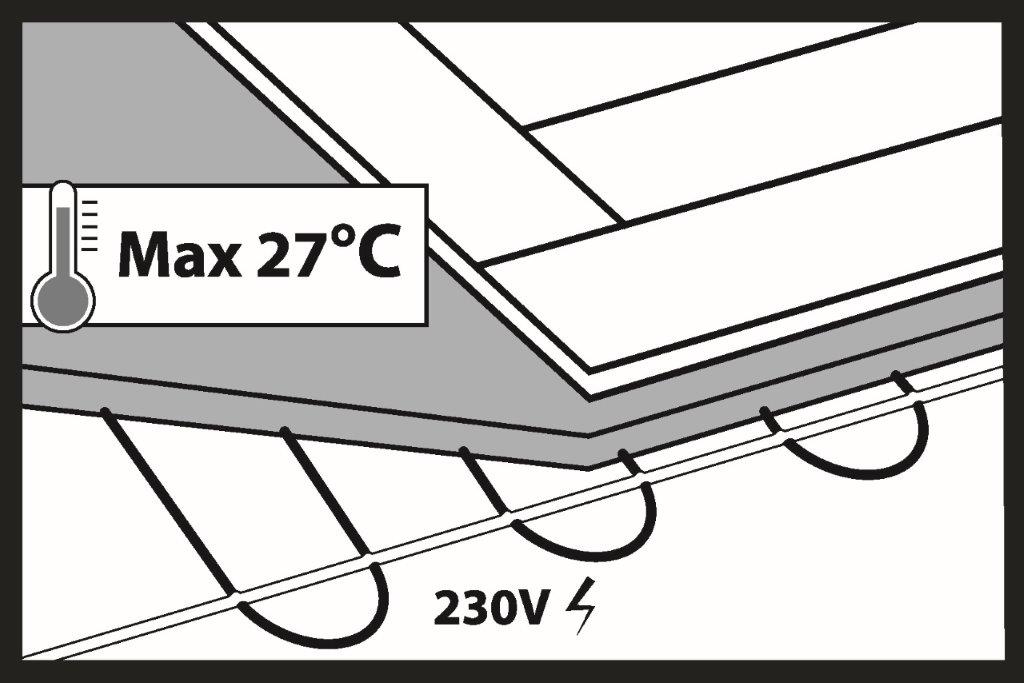
The SPC floors with integrated underlay can be installed as a floating floor on a water or electric underfloor heating system.
Important!
The precondition for laying the panels on an underfloor heating system is to conduct the screed heating process and prepare a screed heating report – this only applies to new, unheated screeds. The information on the screed heating and the screed heating report are available at barlinek.com. The screed heating process should also be performed in the summer.
The limit above which the heating system should not be set is 27°C on the panel surface. The screed moisture content for installation on an underfloor heating system should not exceed: 1.5% CM for cement screeds, 0.3% CM for anhydrite screeds. When installing SPC panels with integrated underlay on underfloor heating systems, make expansion gaps of at least 10 mm between rooms.
- To avoid uneven operation of the panel core, the entire floor surface should be heated. If there are two or more heating loops in one room, the set temperature difference between the loops must not exceed 5°C. This also guarantees the greatest comfort of use (no colder spots on the floor surface).
For the SPC floors installed as floating floors on heated substrates, maintain expansion gaps between the heated surfaces and the surfaces without the underfloor heating system. The underfloor heating system should be started no earlier than 48 hours after the completion of the SPC floor installation. When using the SPC floor installed on an underfloor heating system, remember that the evaporation of any liquids spilled on the floor surface may be accelerated. Therefore, any stains of liquids such as wine, urine, milk, etc., should be removed from the floor surface immediately, because if they dry on the SPC panel surface, they may cause permanent discolouration of the floor. The height of the screed overlay above the heating elements should be at least 20 mm. Installation on heating foils – infrared heating mats:
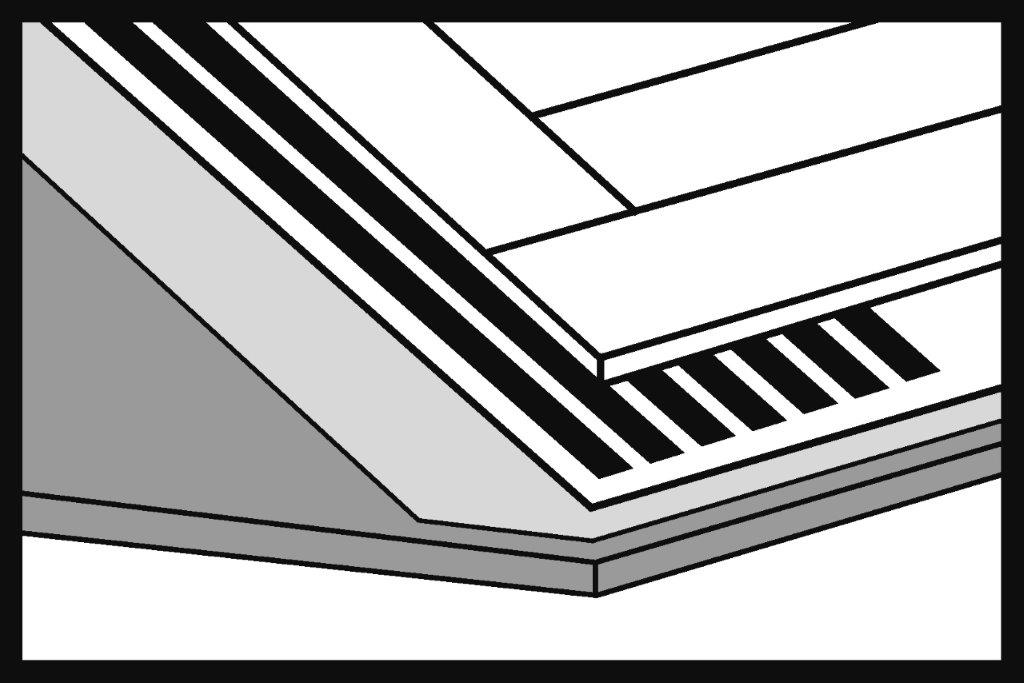
- underlay for the heating mat – minimum 4 mm thick, well insulating – usually XPS with CS≥400 kPa; the thickness of the underlay should allow for the placement of connectors and cables;
- heating foil;
- vapour barrier film or construction membrane;
- SPC floor;
Controllers and floor temperature sensors must be used. For fitters – thermal seals are recommended. Furniture placed on the floor with an underfloor heating system, e.g. sofas, should have legs at least 10 cm high.
Installation of the SPC panels on underfloor cooling systems
43.
It is very important that the underfloor cooling system is equipped with appropriate control systems that prevent water vapour condensation on the floor surface. To prevent this, the temperature of cold water in the underfloor cooling system pipes should not fall below a specified value. Each room with an underfloor cooling system should have a sensor installed that calculates the dependence of relative air humidity on the floor panel surface temperature and cuts off the cold water supply before the so-called dew point is reached, i.e. before water vapour begins to condense on the surface of the panels. Thermostats in rooms should not be set to a temperature lower than 23°C. In addition, the difference between the temperature set on the thermostat and the room temperature should not exceed 5°C. Example: room temperature is 30°C, temperature set on the thermostat is minimum 25°C. The underfloor cooling system should be protected against a drop in the water temperature in the system below +18°C.
- Switch off the underfloor cooling system 48 hours before installing the floor. The underfloor cooling system can be restarted 48 hours after the floor installation.
- The moisture content should not exceed 1.8% for cement screed and 0.3% for anhydrite screed. Measurements should be performed using the carbide method, the so-called CM method.
- Other installation and use parameters are in accordance with the installation instructions and the Terms of Use and Care of the SPC Floors. For more information, please visit barlinek.com
- To decide whether to use an underfloor cooling system, a heat balance should be prepared at the design stage. Otherwise, the cooling equipment may be selected incorrectly and the entire cooling system may not operate efficiently enough.

Installation of the SPC panels in wet rooms
44.
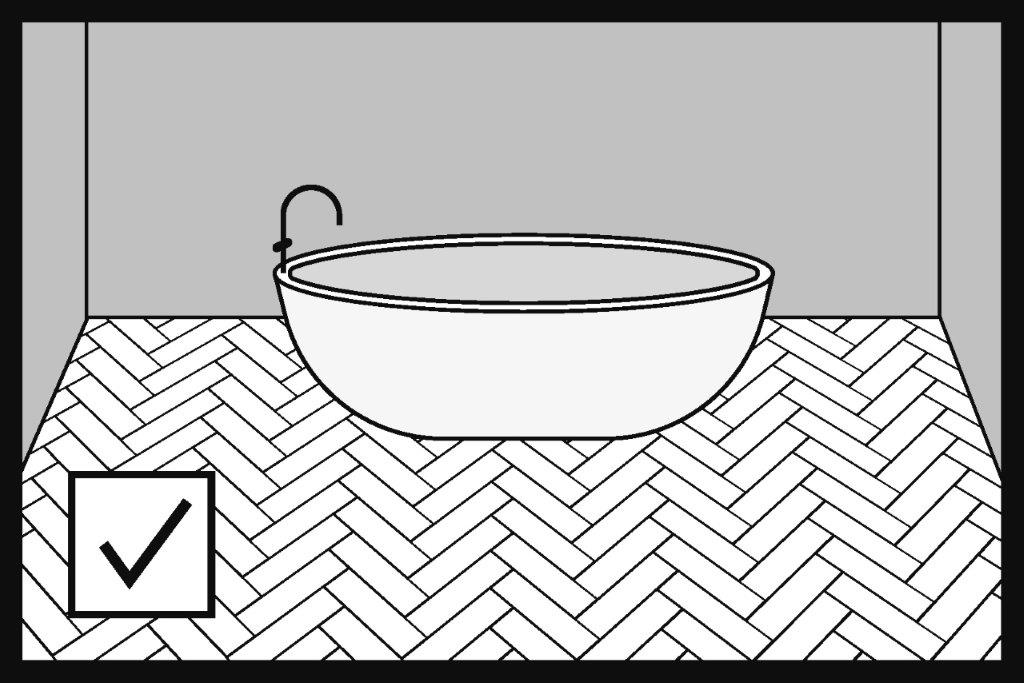
The SPC panels with integrated underlay can be installed as floating floors in bathrooms and other rooms where water spills may occur. When installing the panels as a floating floor, it is necessary to leave an expansion gap with a width of at least 5 mm in the door frame. (suitable for the type of masking expansion gap strip). The expansion gap can be filled with an elastic filler). When installing the panels as a floating floor, always leave a perimeter expansion gap with a width of 5 mm.
In bathrooms with an underfloor heating system, leave an expansion gap in the door frame to separate the bathroom from other rooms. Leave expansion gaps around walls, shower tray casings, bathtubs, toilet bowls and other obstacles permanently attached to or embedded in the screed.
Important!
Do not install the SPC panels in shower trays, baths, saunas, swimming pools and similar places.
Care and use of the SPC panels
45.
Place doormats at the entrances to the apartment to effectively prevent sand, earth and water from being brought in on the shoe soles. Protect your floor by placing protective mats in front of and/or behind each entrance. Protective mats will collect dirt, sand, pebbles and other solid particles and absorb moisture. Keep protective mats clean. Do not use latex or rubber backed mats on the SPC floors as some compounds in latex and rubber can permanently stain or damage the panels. Protective mats for laying on the SPC panels should be marked as “non-staining”.

46.
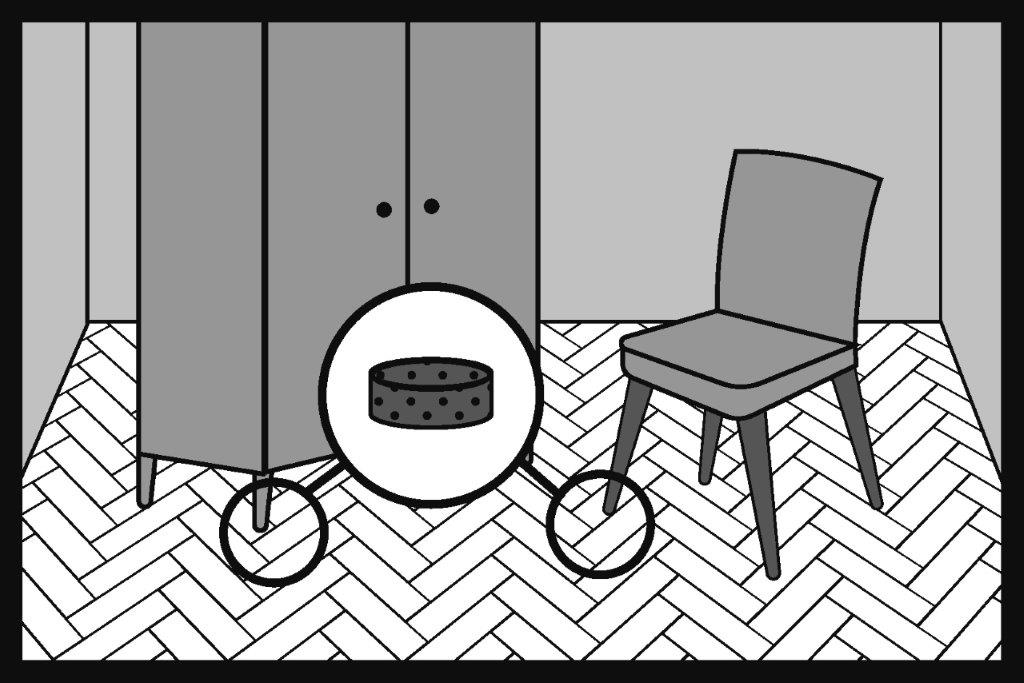
All furniture and other devices that are in contact with the floor should be equipped with protective pads, e.g. felt pads, which should be replaced regularly.
47.
Place armchairs and other furniture equipped with hard plastic casters on plastic protective mats. If the protective mats are not used, replace the castors with W-type hard floor castors.

48.
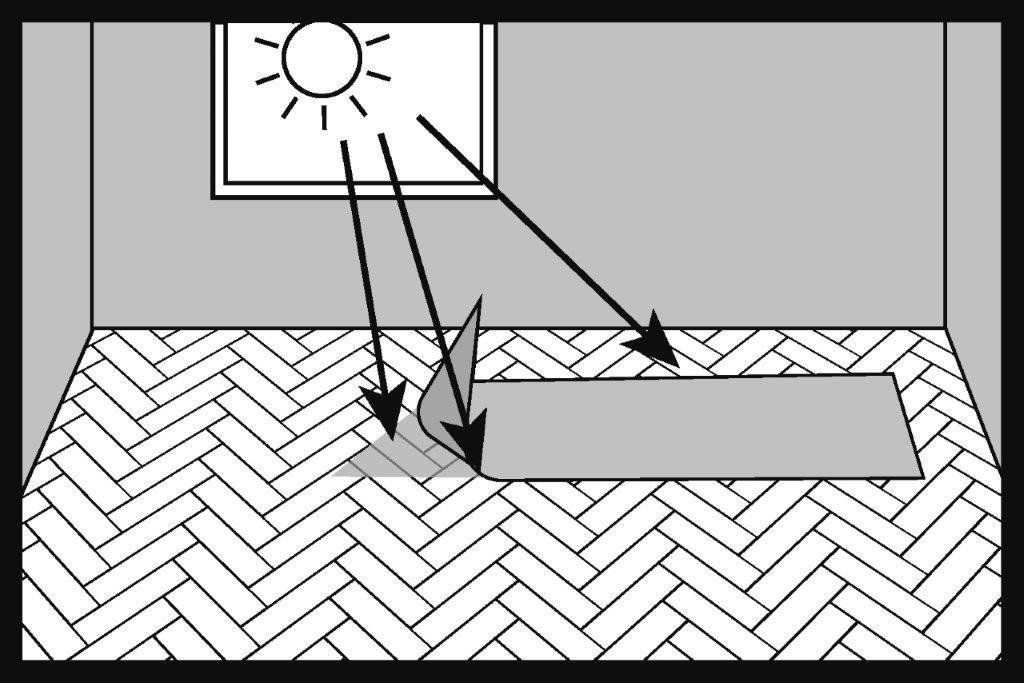
The floor exposed to sunlight (UV light) will change its original colour.
49.
The floor is factory finished and ready for use immediately after installation. Floor care should only be carried out using products designed for this purpose. The SPC floor care instructions can be found at barlinek.com
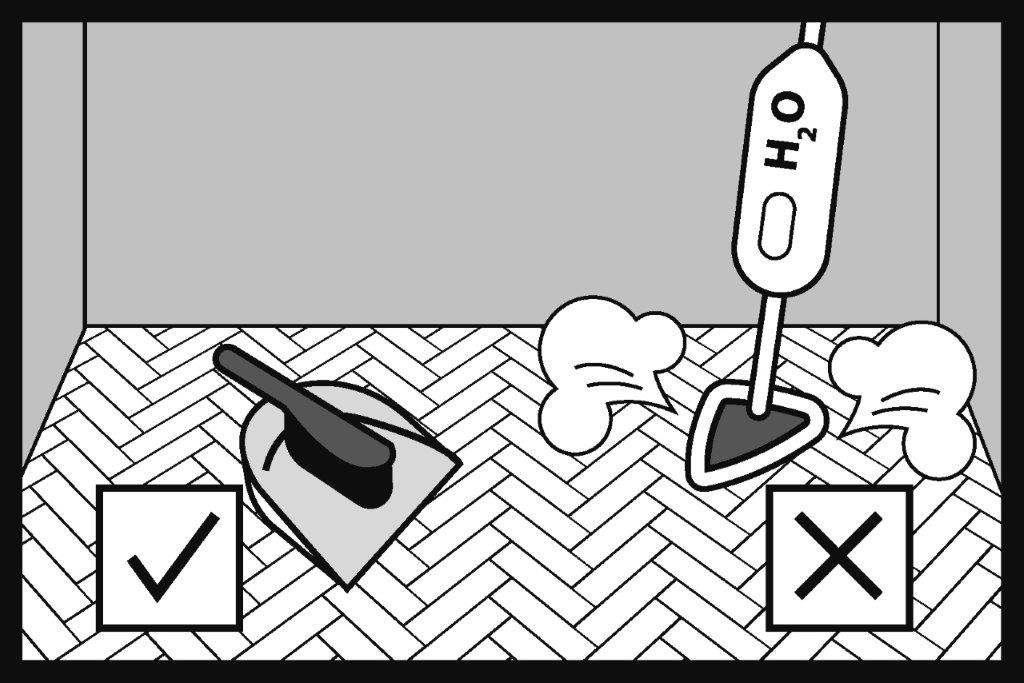
- Never use vacuum cleaners with a brush that can damage the floor.
- Immediately remove any water spills.
- Vacuum or sweep the floor to remove any particles that can scratch it.
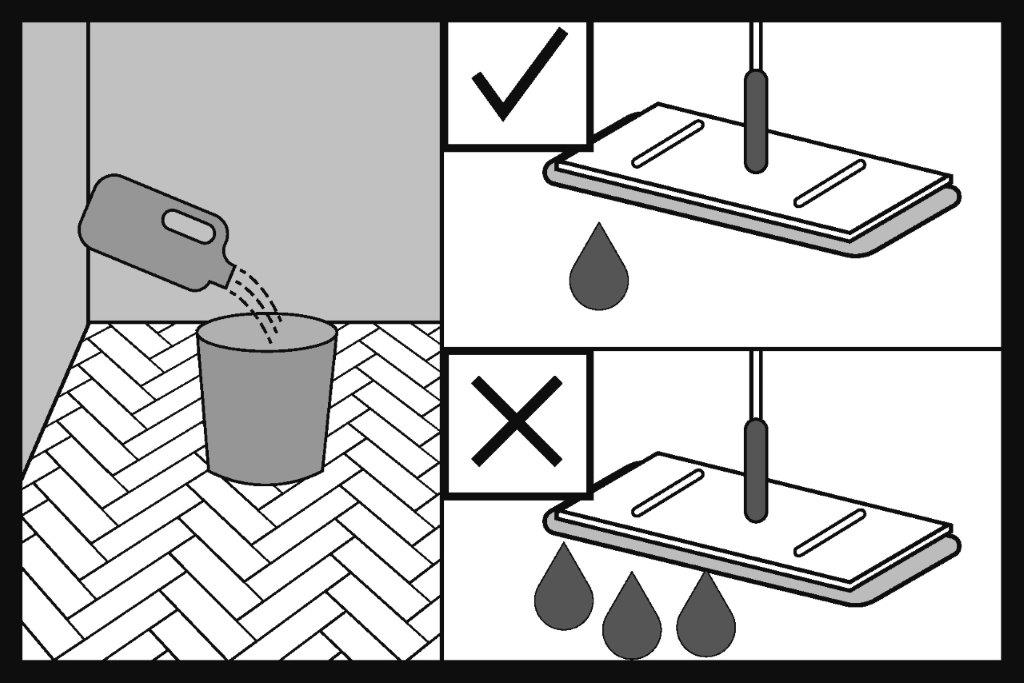
- You can use a damp cloth with or without a recommended floor care product. Do not leave wet marks on the floor after cleaning.
- Do not use high-pressure or steam washers to clean the floor.
- Trim pets’ claws to prevent damage to the floor.
- Do not move heavy furniture or equipment across the floor.
- Floor care products other than those recommended by Barlinek may damage the varnish layer, change the colour and gloss of the floor and stain the floor.
- Do not use wax, paraffin or silicone-based floor care products.
- For daily care, we recommend dry cleaning (vacuuming, sweeping).
Clean the floor with a mop, along the panels.
50.
The temperature in the room where the floor is installed should be between +18°C and +29°C.
