How to install vinyl flooring with integrated underlay (herringbone)? Installation instruction (collections: Forma, Idea)
Vinyl flooring is a popular choice for various rooms thanks to its durability and moisture resistance. The installation of vinyl flooring is relatively simple and does not require specialized tools. Before beginning installation, make sure the subfloor is clean, dry, and level.
contents
Herringbone installation of SPC panels without an integrated underlay – general information
1.
Before the flooring is delivered to the installation site, the doors and windows must be installed in the building, and all “wet” work must be completed, such as plastering, building partition walls, painting, etc. If there are basements beneath the floor installation area in the building, they must be dry and well-ventilated. SPC panels can be installed in all living spaces, such as living rooms, bedrooms, kitchens, and bathrooms, as well as in most public spaces.
SPC flooring should be used in accordance with its intended purpose as defined by the room usage classes specified in ISO 10874. Information regarding the suitability of a given SPC floor for a specific room use class can be found on the product packaging, in the product data sheet, and in the product description available at barlinek.com
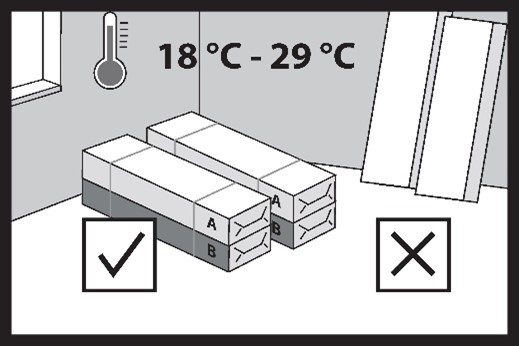
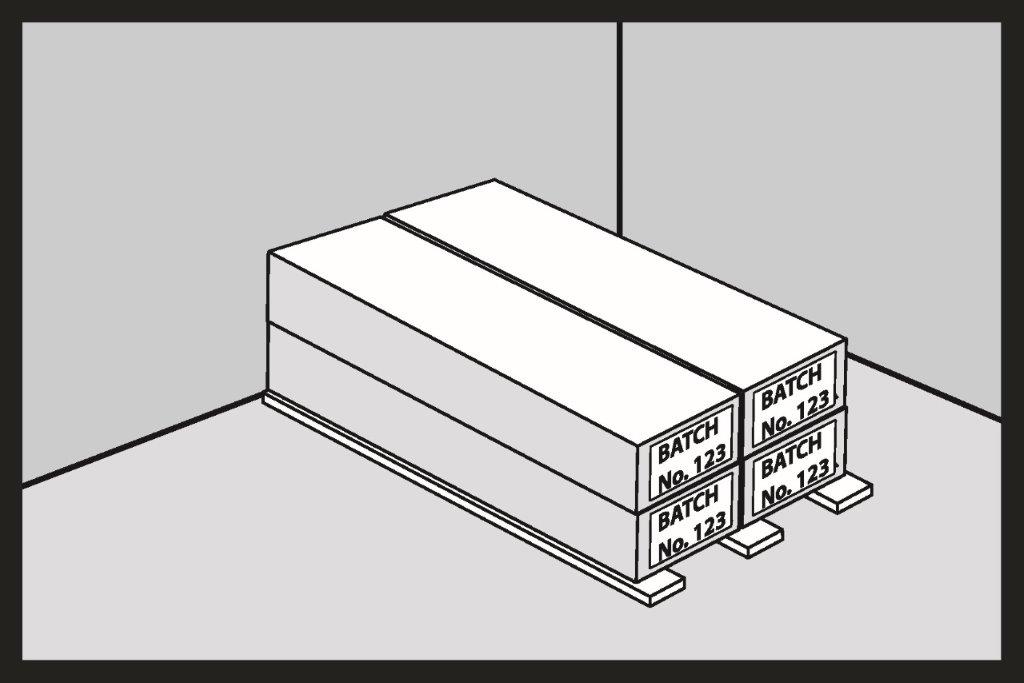
Packages containing SPC flooring panels must be handled with care during transport and unloading to avoid any mechanical damage. SPC flooring panels in their original packaging should be stored in a dry place, in a horizontal position, on pallets or wooden beams. A clearance of at least 75 mm must be maintained between the packages of SPC panels and the floor.
The flooring should be stored in its original packaging in the room where it will be installed for at least 24 hours to allow it to acclimate. The air temperature should be between +18°C and +29°C.
2.
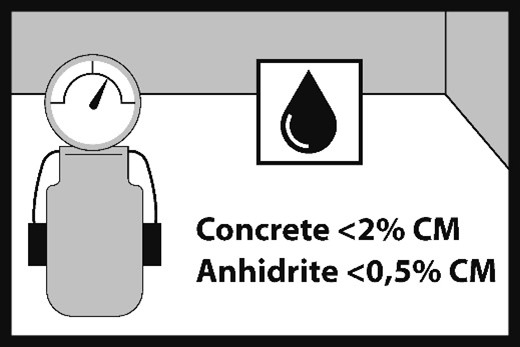
The moisture content of a wooden subfloor (or wood-based panels) should not exceed 12%. The moisture content of a concrete subfloor should not exceed 2%, and that of an anhydrite subfloor should not exceed 0.5%. The measurement results should be documented.
3.
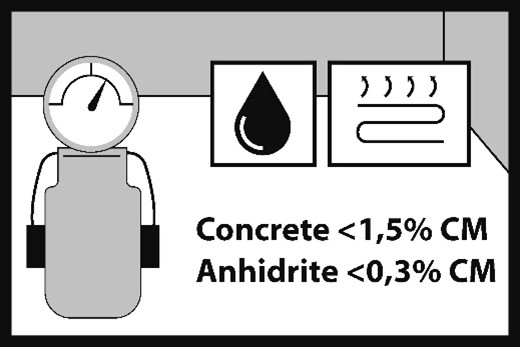
When performing the installation of SPC panels over underfloor heating, the moisture content of the concrete subfloor should not exceed 1.5%, and that of the anhydrite subfloor should not exceed 0.3%. The measurement results should be documented.
4.
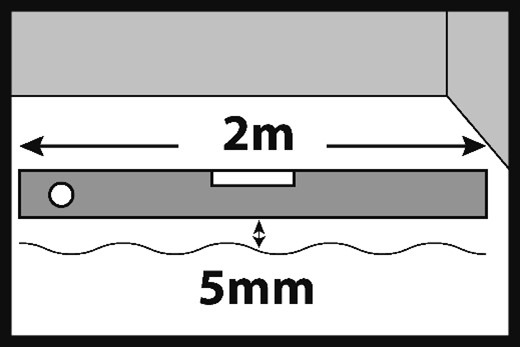
The maximum permissible unevenness may be up to 5 mm, measured over a length of 2 m. Local unevenness must not exceed 2 mm over a length of 20 cm.
5.
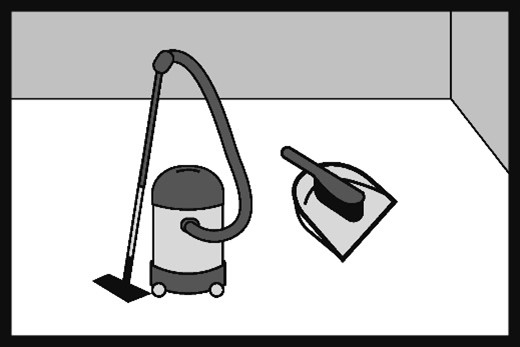
Before beginning the installation of SPC panels, sweep or vacuum the subfloor. The subfloor should be free of dust, debris, paint, varnish, wax, grease, oils, hardeners, sealants, solvents, sand, adhesive residue, fats, and other foreign matter.
6.
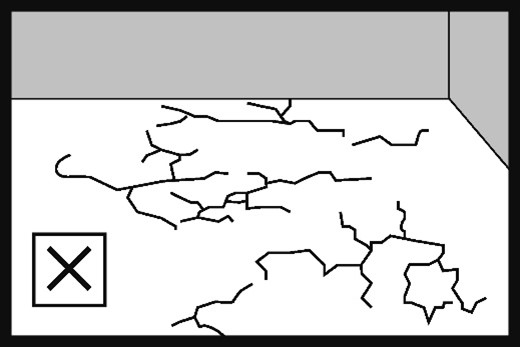
The substrate should be dry, stable, free of scratches and cracks, and clean, with no visible dirt. Cracks and voids in cement or anhydrite substrates should be filled. Grout joints wider than 5 mm and deeper than 2 mm must be filled.
Plywood, OSB, and particleboard must be structurally sound and installed in accordance with the manufacturer’s instructions. We recommend the installation of wood-based panels in two layers, fastened with wood screws. The edges of one layer of panels should be installed in a staggered pattern relative to the other layer. The wood-based panel subfloor must provide adequate rigidity and support for proper installation of the SPC flooring. Panel joints should be smooth and should not cause deflection or flex under load. All screw heads should be slightly countersunk below the surface of the panel.
Important!
SPC panels with underlay with cannot be installed using an adhesive system.
7.
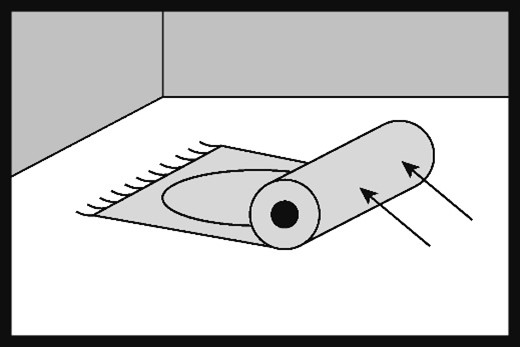
SPC flooring panels must not be installed over existing soft carpet flooring, soft PVC flooring, rugs, or other similar materials.
8.
Recommended tools and materials for the floor installation:
Safety glasses
Vacuum cleaner or broom
Knee pads
Protective gloves
Non-rebounding hammer
Wooden block for hammering
Expansion wedges
Tape measure
Pencil
Electric saw
Spirit Level
9.
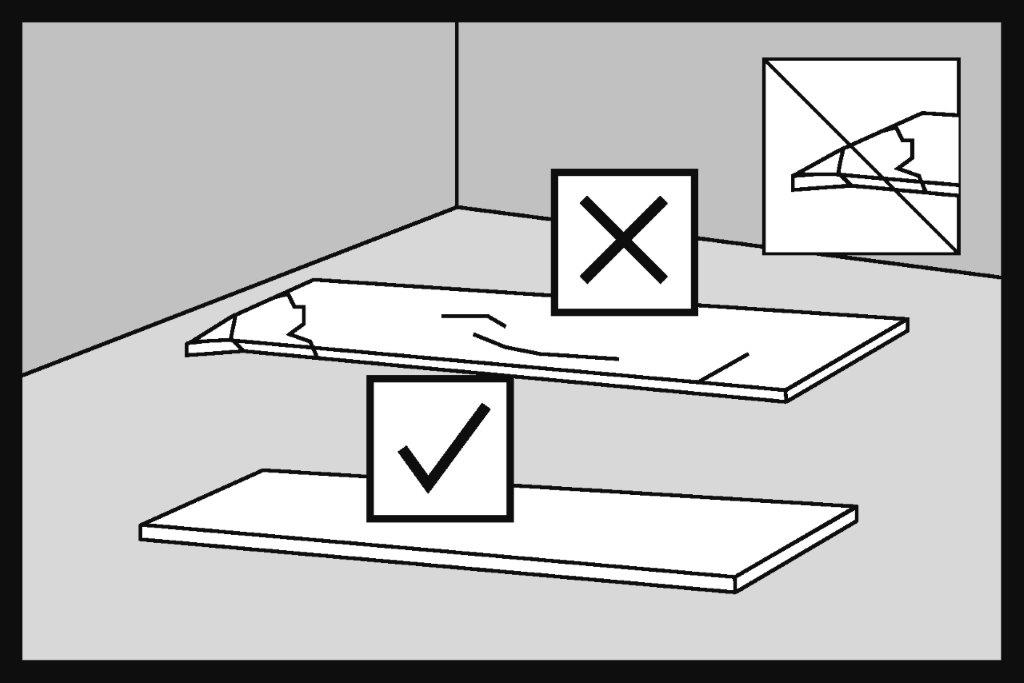
Before installation, the investor or installer should inspect the SPC panels and verify that they match the order. The panels should be inspected for quality, finish, gloss, color, and mechanical damage (information regarding the product type can be found on the label, in the instructions, or on the product sheet). If in doubt, the investor or installer should not use any SPC panel that they consider unsuitable for installation and should contact the seller immediately. Installing a damaged SPC panel, one that does not match the order, has visible defects, or exhibits unacceptable visual characteristics will void the warranty.
10.
During installation, use panels from several packages, carefully matching their colors to achieve a balanced visual effect for the floor. When ordering flooring, order about 5% more panels than the measured floor area. In rooms with many corners or obstacles, or where SPC panels are installed diagonally across the room or at the junctions with ceramic tiles, an additional 10% may be necessary.
11.
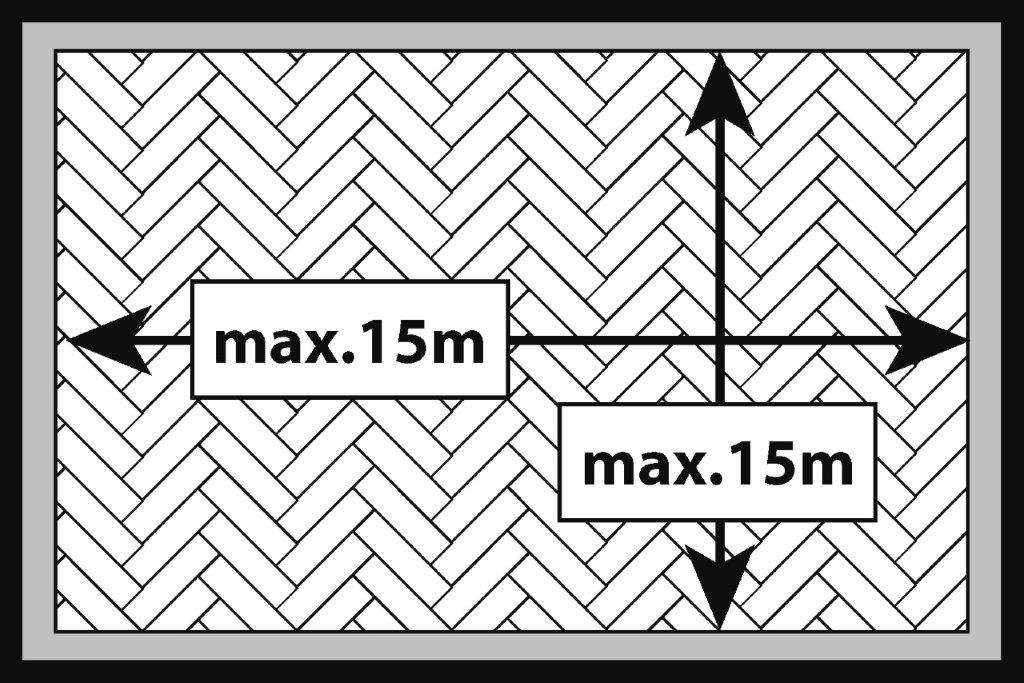
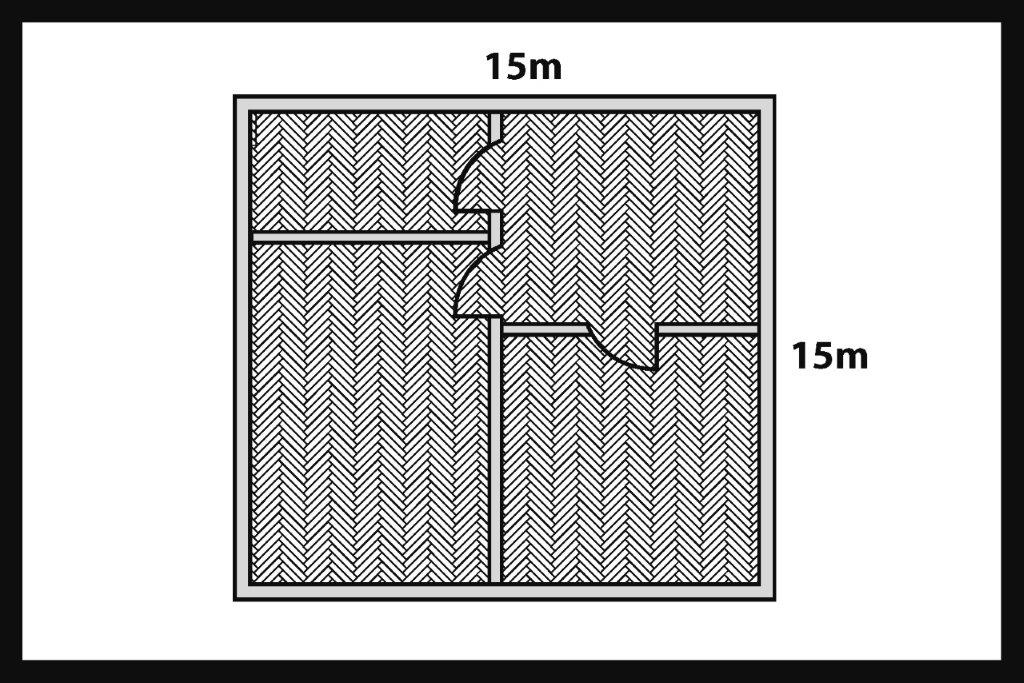
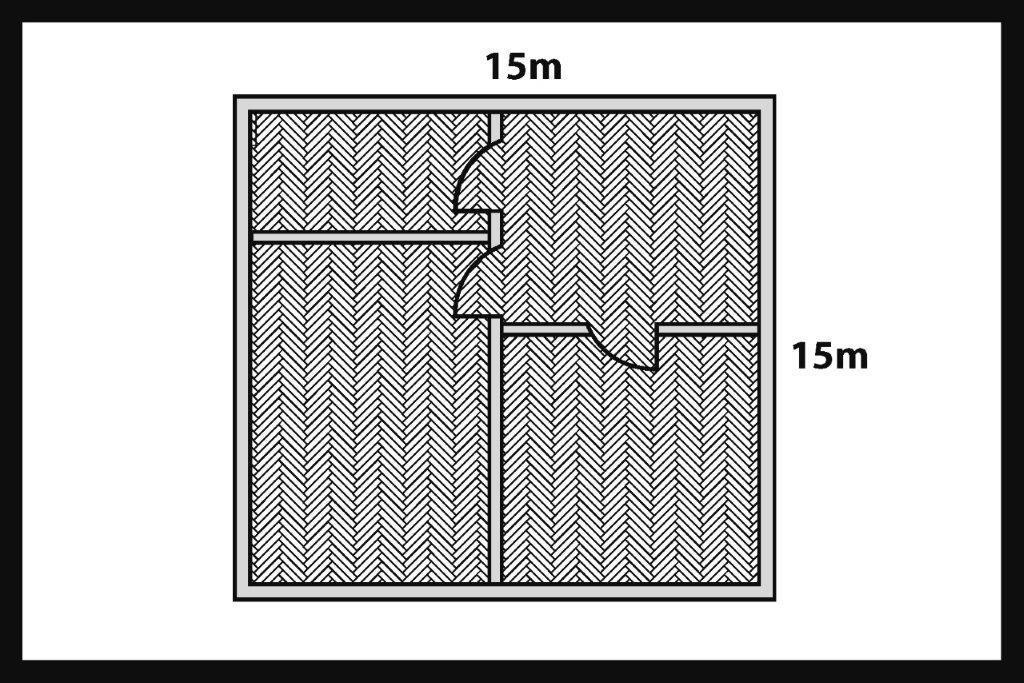
The maximum floor plan dimensions of a house or apartment for which an SPC floor installed as a floating floor does not require expansion joints in doorways are 15 m × 15 m. For floor plans up to 15 m × 15 m, we do not install expansion joints at doorways or openings leading to adjacent rooms. We install expansion joints around walls and structural elements such as stairs and columns.
12.
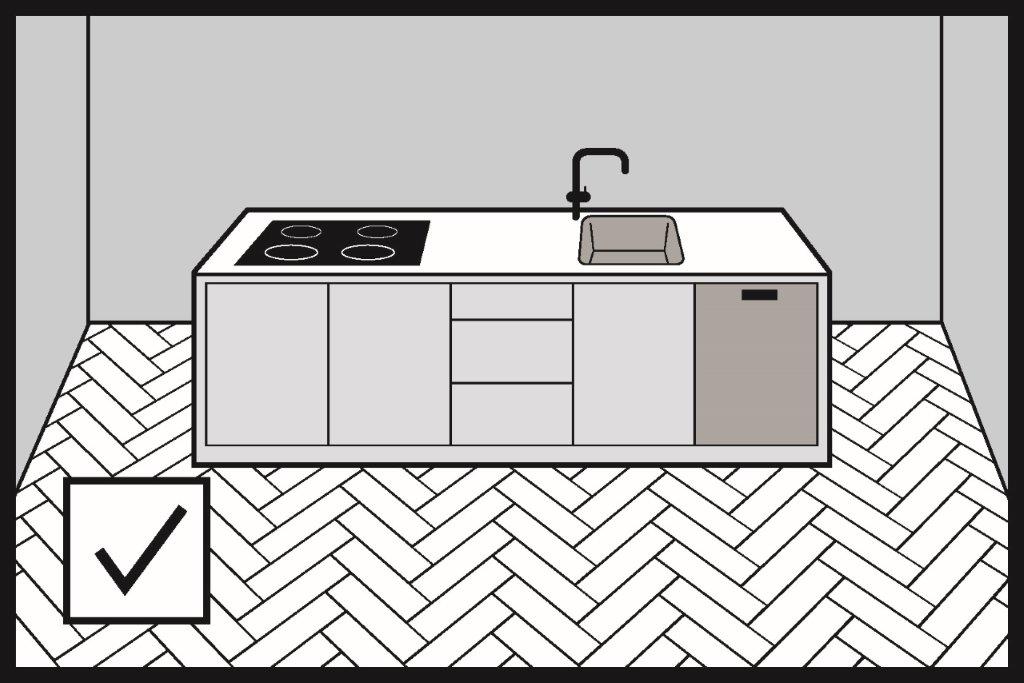
Heavy objects, such as a kitchen island or furniture, can be placed on a floating floor without the need to install expansion joints around the fixtures. However, it is necessary to install a perimeter expansion joint around fixed elements running from the floor to the island, such as plumbing and drainage systems. We always install wall-adjacent expansion joints.
13.
Before beginning installation, verify that the material’s color is consistent. The technology used is designed to faithfully reproduce the unique characteristics of natural wood; therefore, slight variations in shade and texture among individual pieces are acceptable. This is a characteristic of the product, not a defect. A delivery may include panels from different production runs, which is standard practice. The buyer or installer is required to select and mix panels from different packages to achieve a harmonious visual effect. Installation should be suspended if significant contrasting color differences occur that disrupt the consistency of the decor.
Installation of SPC panels using the floating system
14.
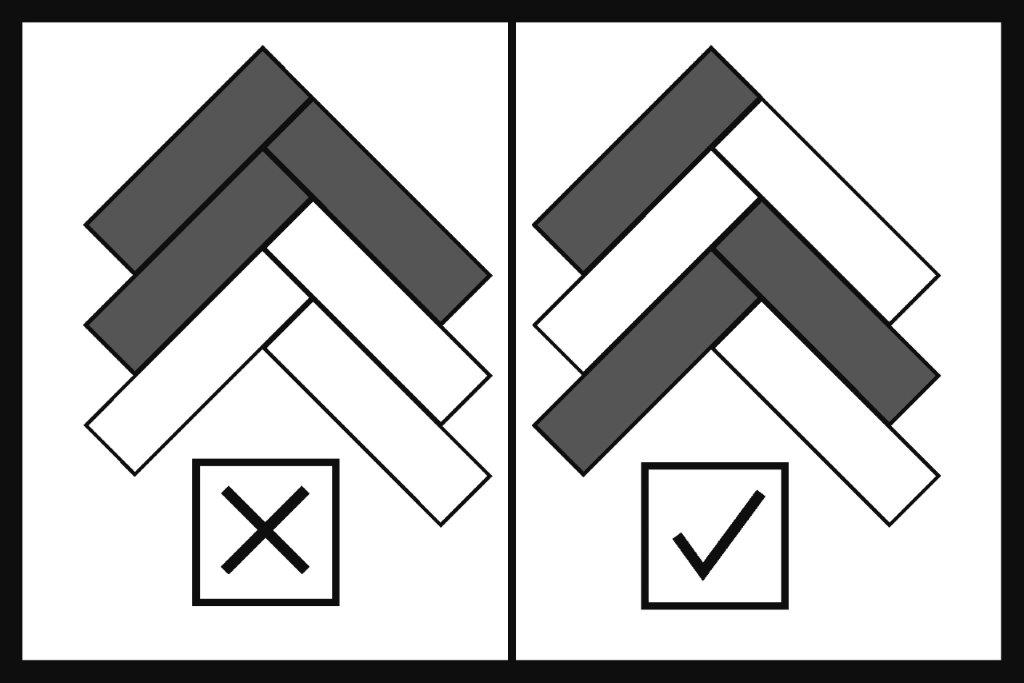
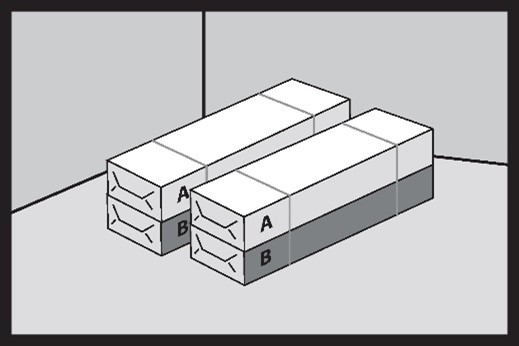
Each two-pack for classic herringbone installation contains two packages of panels: right-side panels marked with the letter “A” on the package and left-side panels marked with the letter “B” on the package.
15.
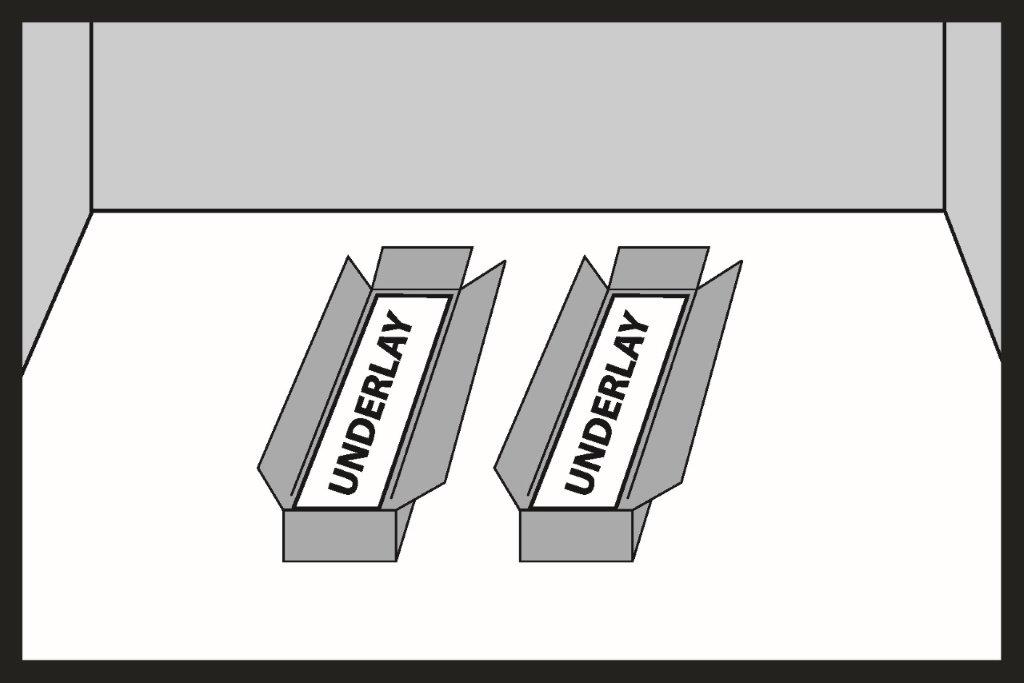
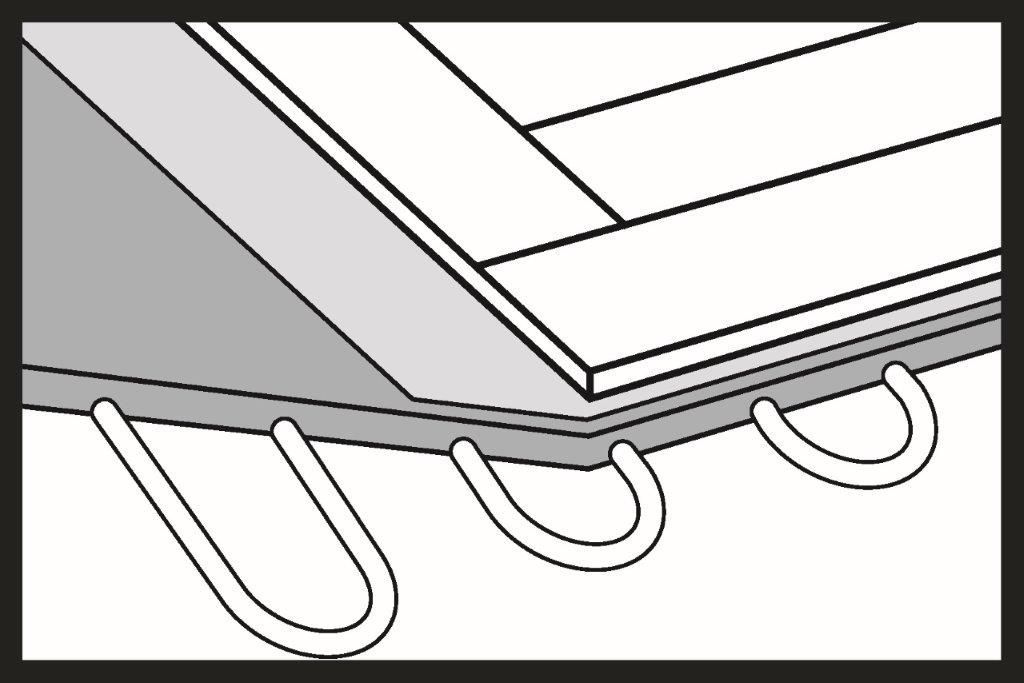
The SPC panel has a 1 mm thick XPS foam underlay bonded to its underside. The underlay’s CS rating—short-term load capacity—is ≥ 400 kPa. An underlay integrated with the SPC panel that meets this parameter will withstand various types of loads throughout the floor’s service life.
Important! Do not use additional primerbase.
16.
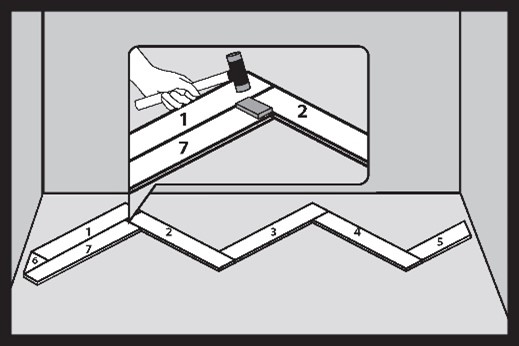
Start the herringbone pattern installation from the left side of the room toward the right. You should always make sure that the grooves (lock tongue) on the longer sides of both the L and R planks are facing you.
17.
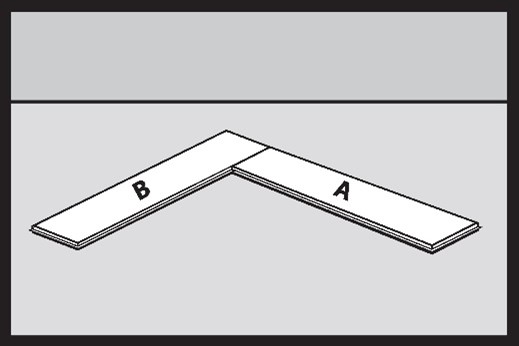
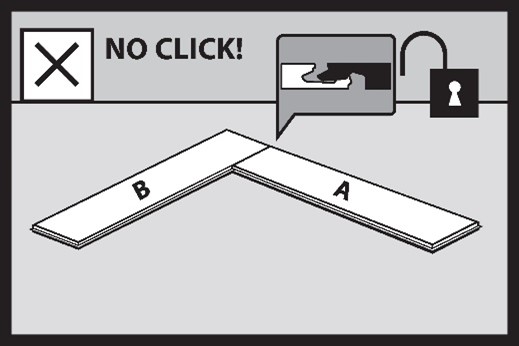
Just because the locks on two boards are connected along the short side doesn’t mean the lock is fastened.
18.
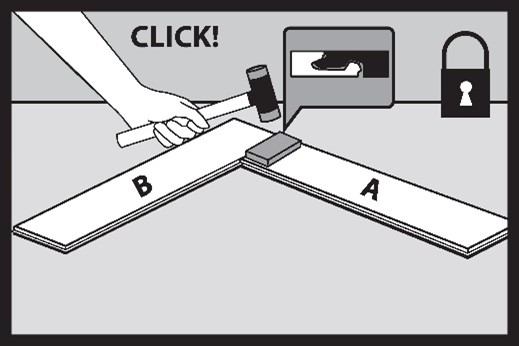
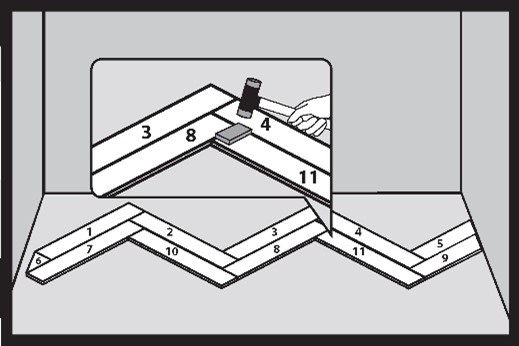
To fasten the lock, strike the lock joints several times with a hammer.
When the lock is properly fastened, the top surface of the panels should be flush, and there should be no visible difference in level between the joined panels.
Important!
Use a non-rebounding hammer, such as a sand hammer, for driving nails.
To properly join the panels, tap each short edge using a wooden block placed on top and a hammer.
19.
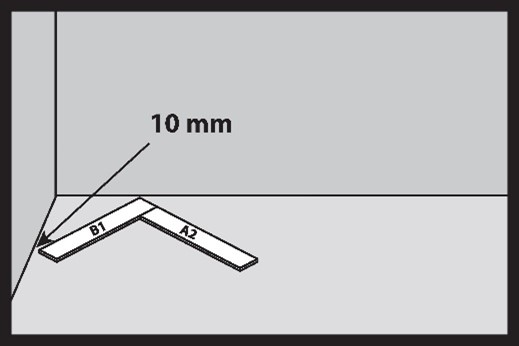
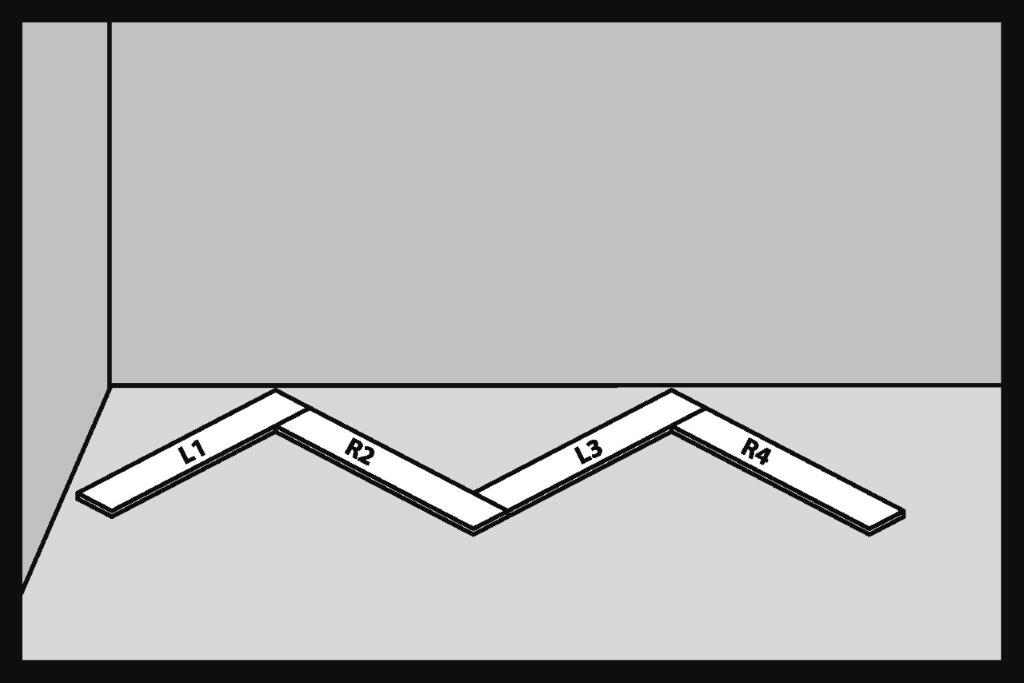
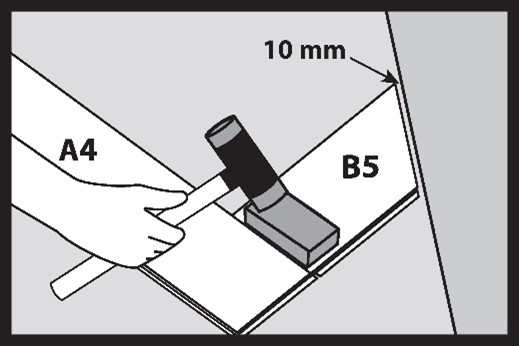
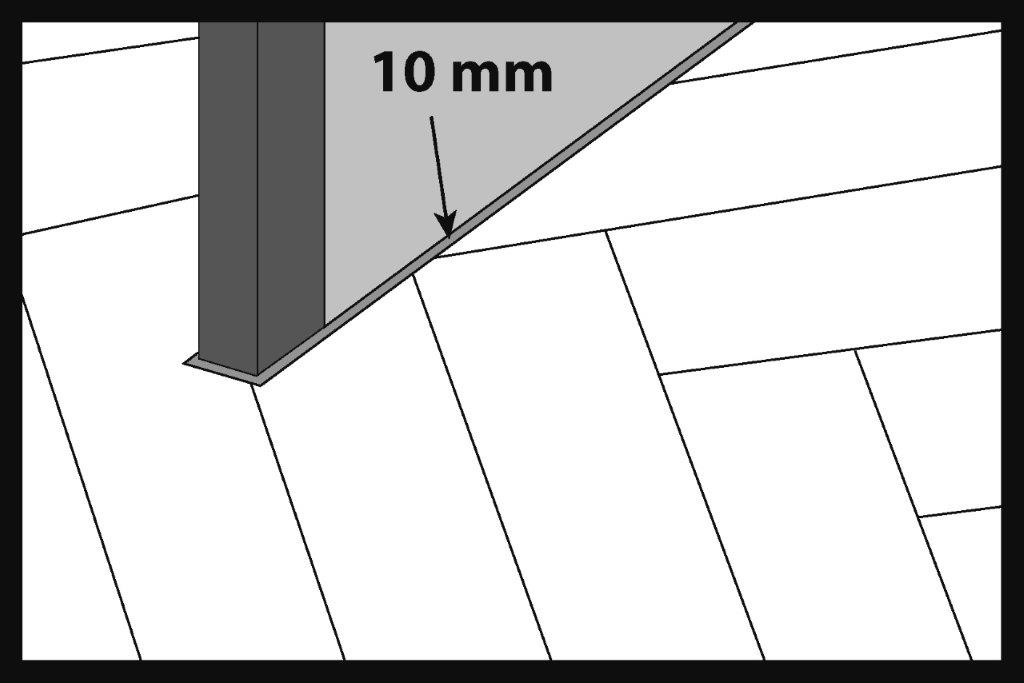
The order and placement of the first two panels are very important. Install the left panel (L) first (1). The right panel (R) is installed second (2). The corner of panel L1 should be set back 10 mm from the wall (expansion gap). This is very important and will affect the proper installation of the rest of the system.
20.
Install the next panels in the order B3 and A4. Be sure to tap the joint on the short edge of the lock with a non-rebounding hammer.
21.
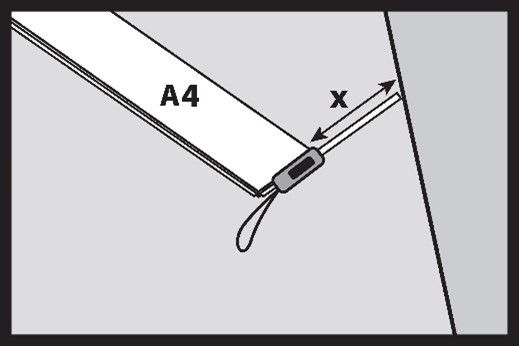
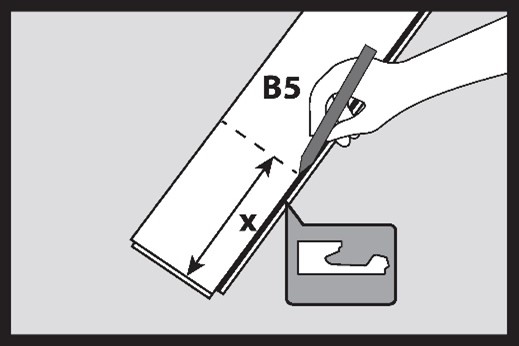
To perform the installation of the last panel, start by measuring the distance X from the corner to the wall.
22.
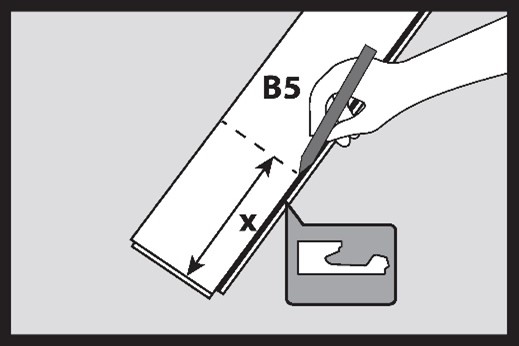
On the last panel (in this case, L5), measure a distance of X minus the 10-mm expansion joint width.
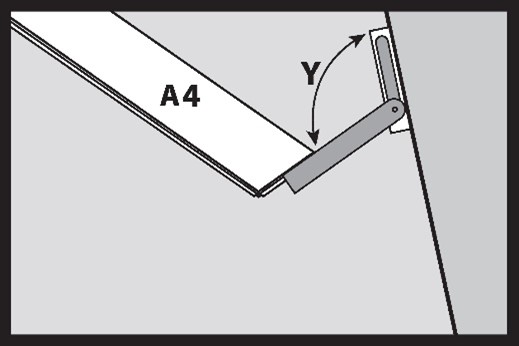
23. Using an adjustable square, measure the angle Y between the short edge of the panel and the wall.
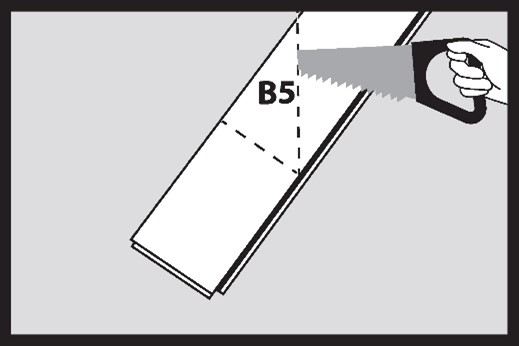
24. On the L5 panel, enter the measured angle Y and mark the cutting line.
25. Use a hand saw or power saw to cut the SPC panel.
26. Attach the panel, cut to the correct length, using the locks. Be sure to tap the locks together with a hammer. When installed, a properly cut panel will have a 10-mm expansion gap from the wall.
27.
To properly join the panels, tap each short edge using a tapping block placed on top and a hammer.
28.
Place the hammer on top of the panel, right at its edge.
29.
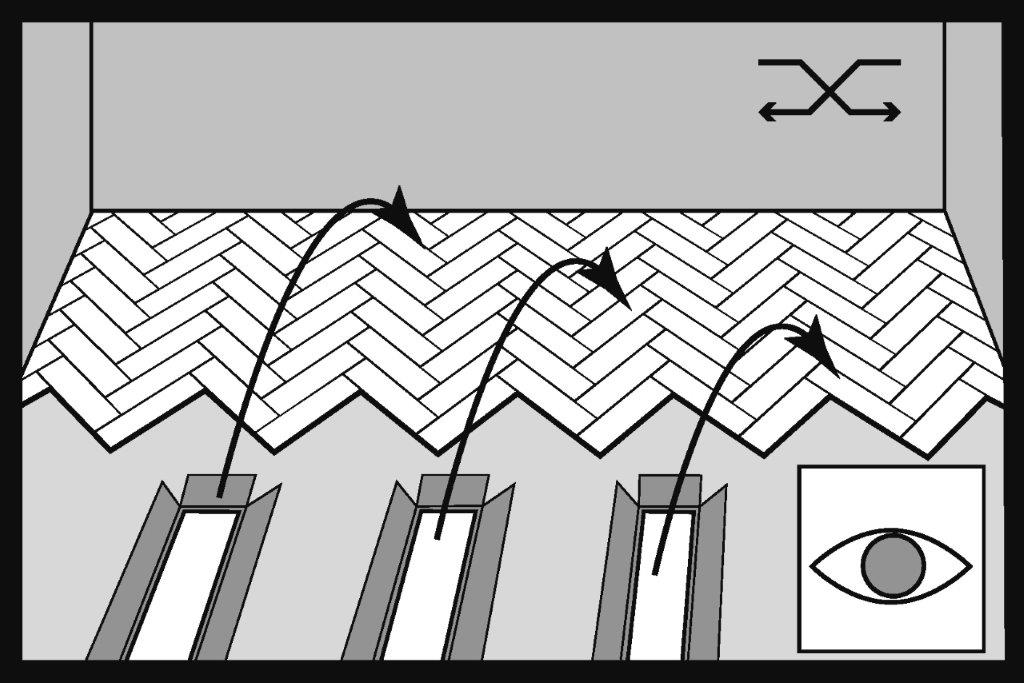
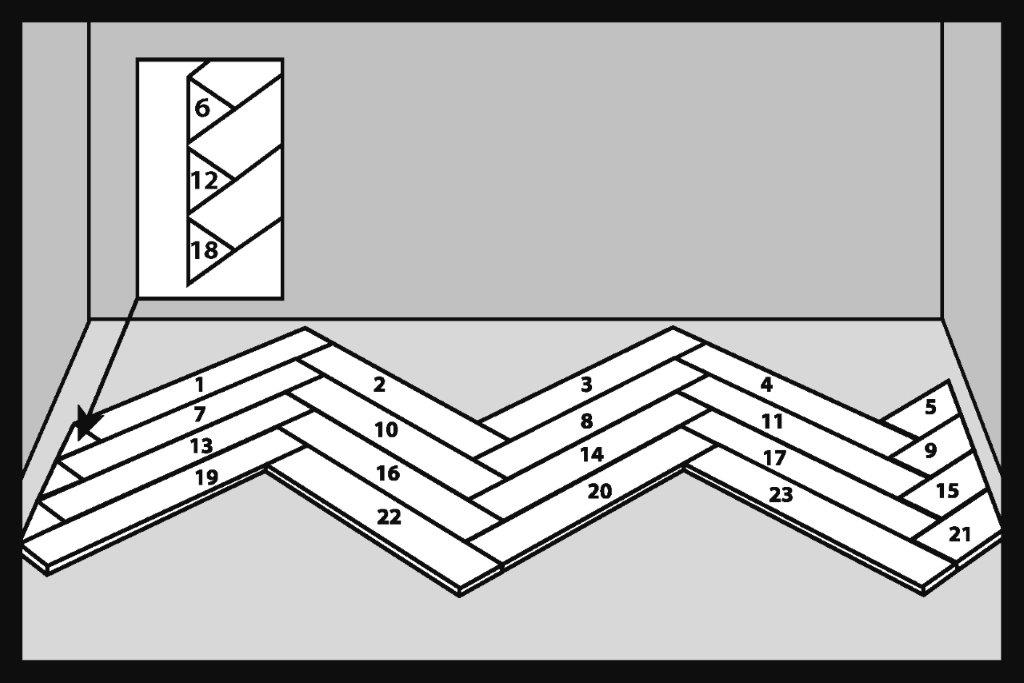
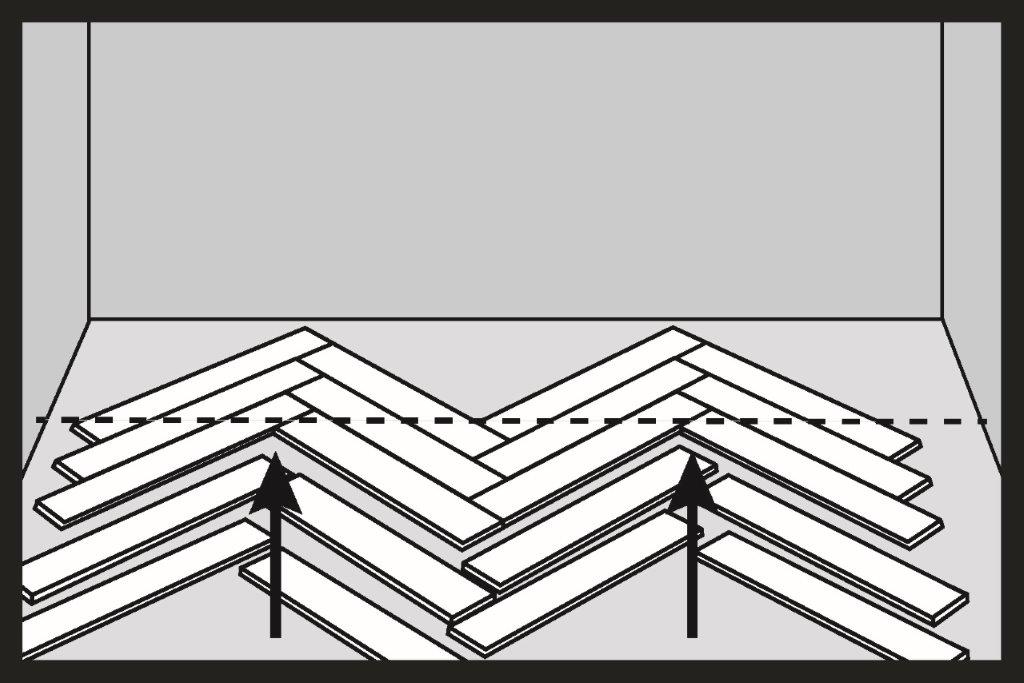
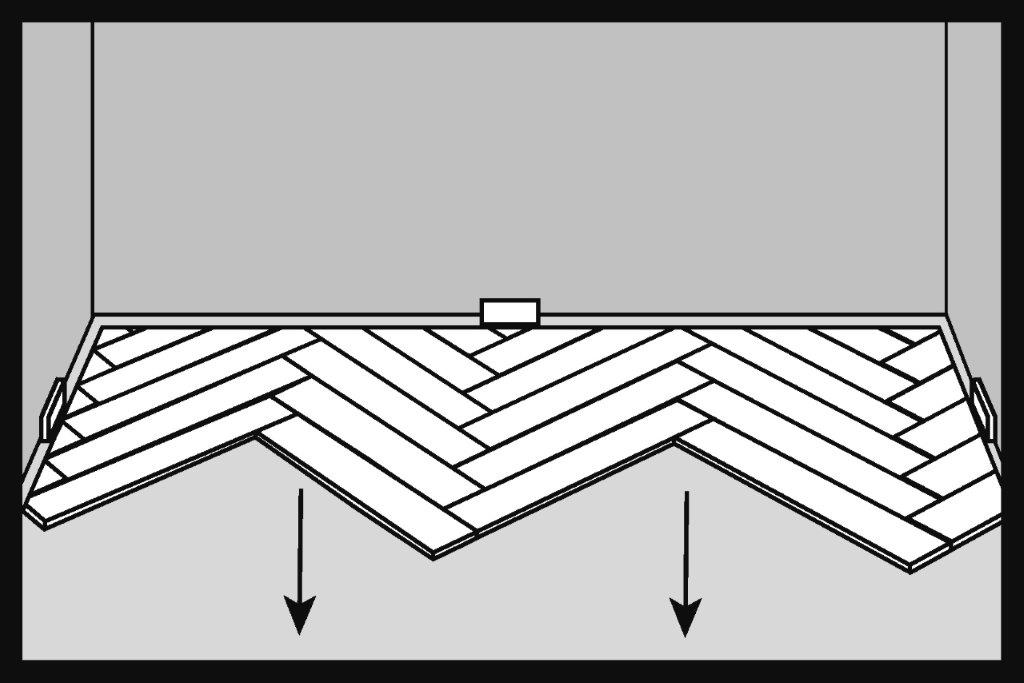
After installing the first herringbone strip, install the next panels. The order of installation is very important. The diagram shows the correct order of installation.
30.
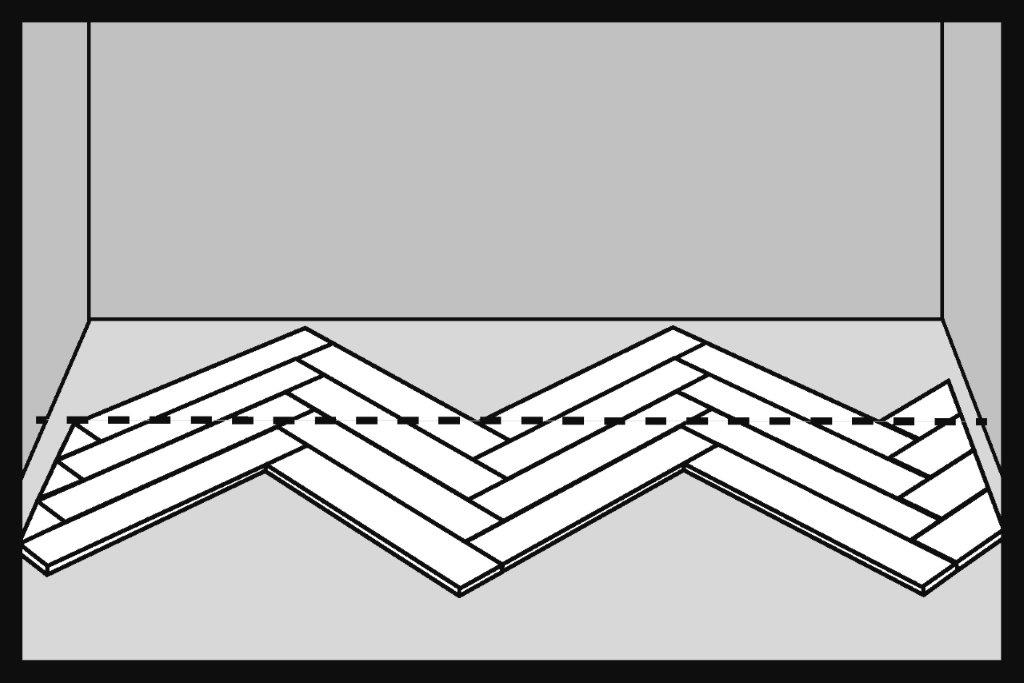
After installing four rows of SPC panels, mark a cutting line parallel to the wall. The line runs from the corner on the left to the right.
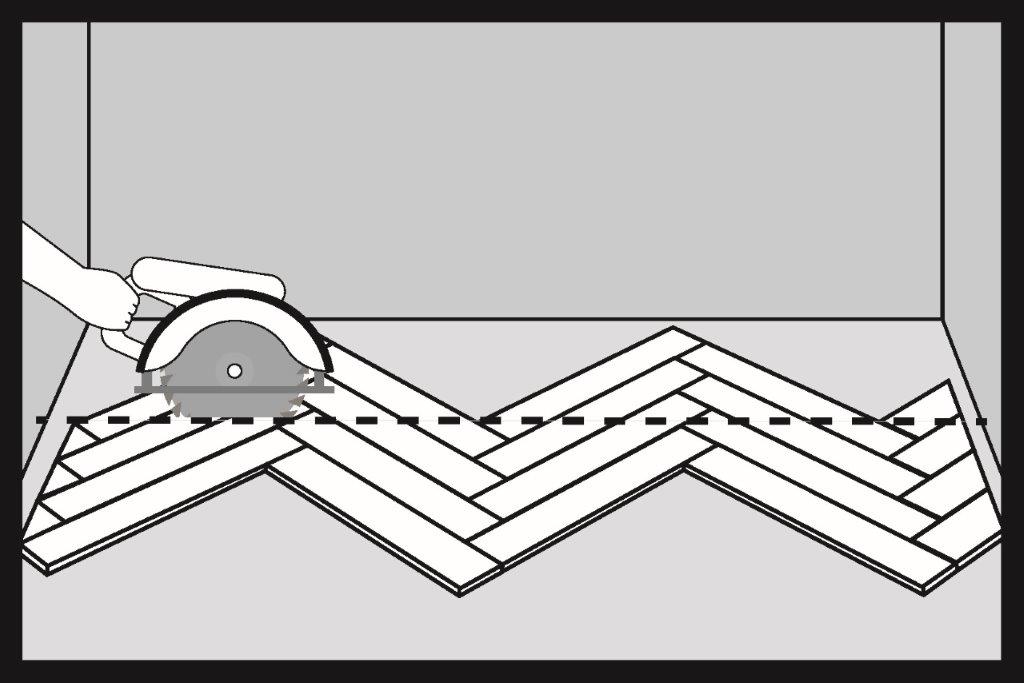
31.
We cut the installed SPC panels using an electric saw with adjustable cutting depth.
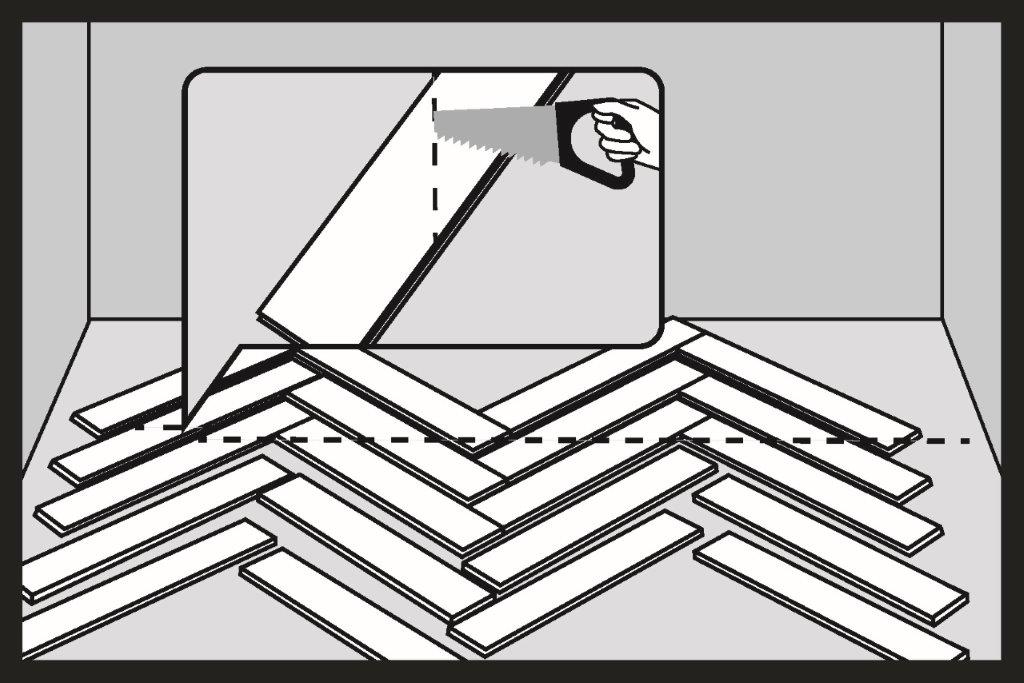
32.
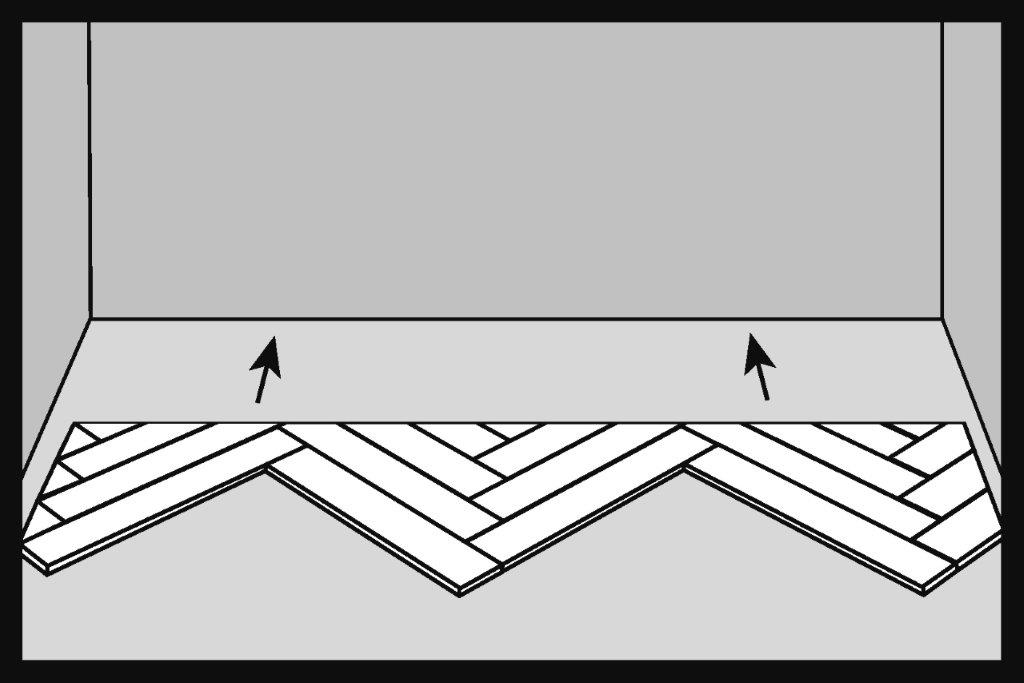
If you don’t have an electric saw with adjustable cutting depth, you can use a hand saw. Unfasten all the installed herringbone rows. The arrows indicate the direction in which to unfasten them.
33.
After unfurling the floor covering, cut the individual panels along the drawn line. Fold the cut panels together to form a single surface.
34.
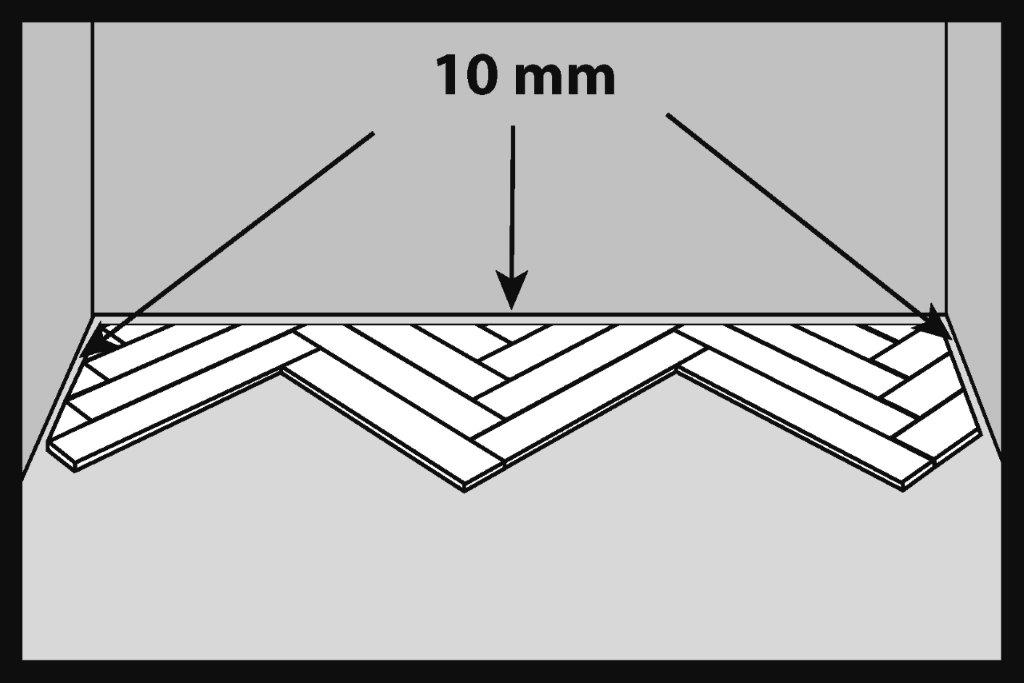
Regardless of how the SPC panels are cut, lay the entire section of flooring flush against the wall.
35.
Let’s remember to leave a 10-mm expansion gap on each side.
36.
Install the remaining SPC panels in the same order as during the installation of the first four rows of the floor.
37.
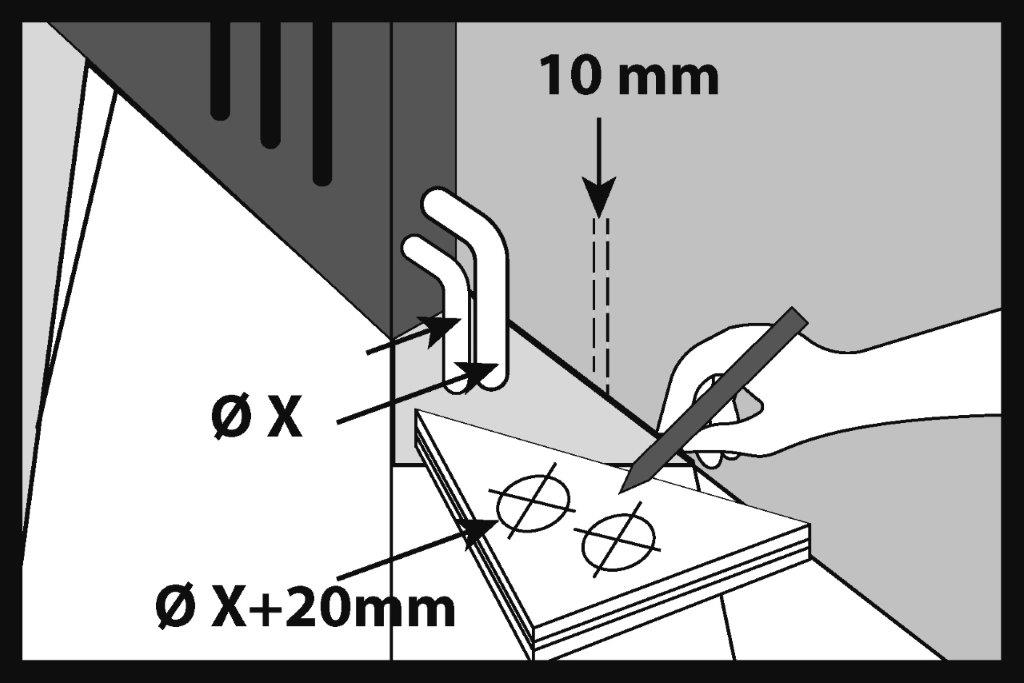
When performing the installation of the floor around pipes, we must cut holes with a diameter equal to the pipe diameter plus 20 mm. This will allow for a 10-mm expansion gap around the pipes.
38.
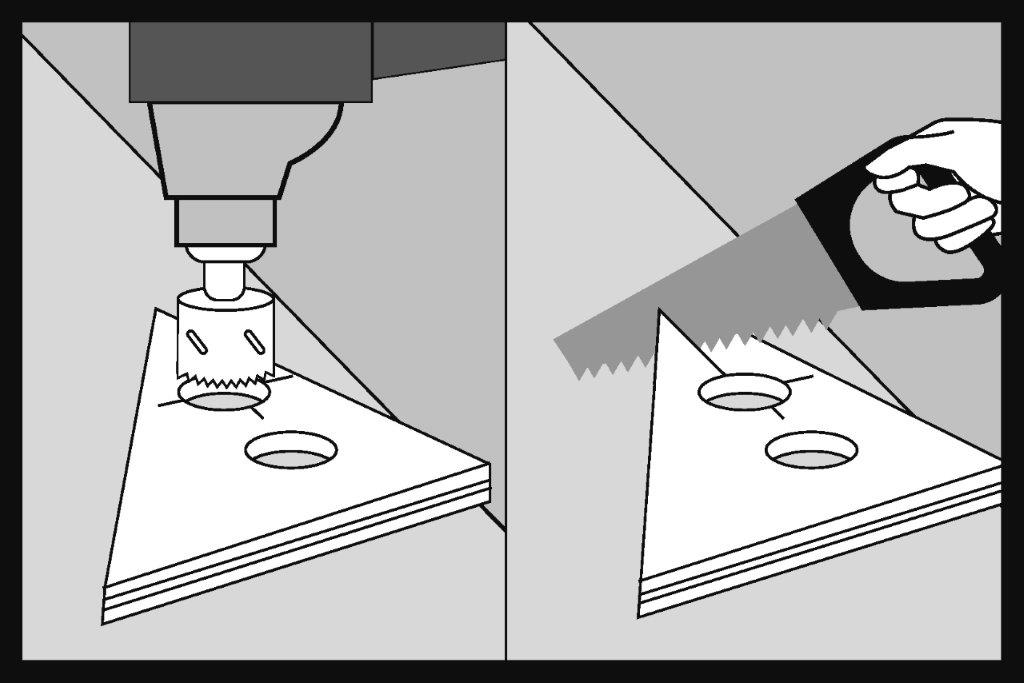
We use wood drill bits to drill the holes. We cut the panel along the diameter of the holes.
39.
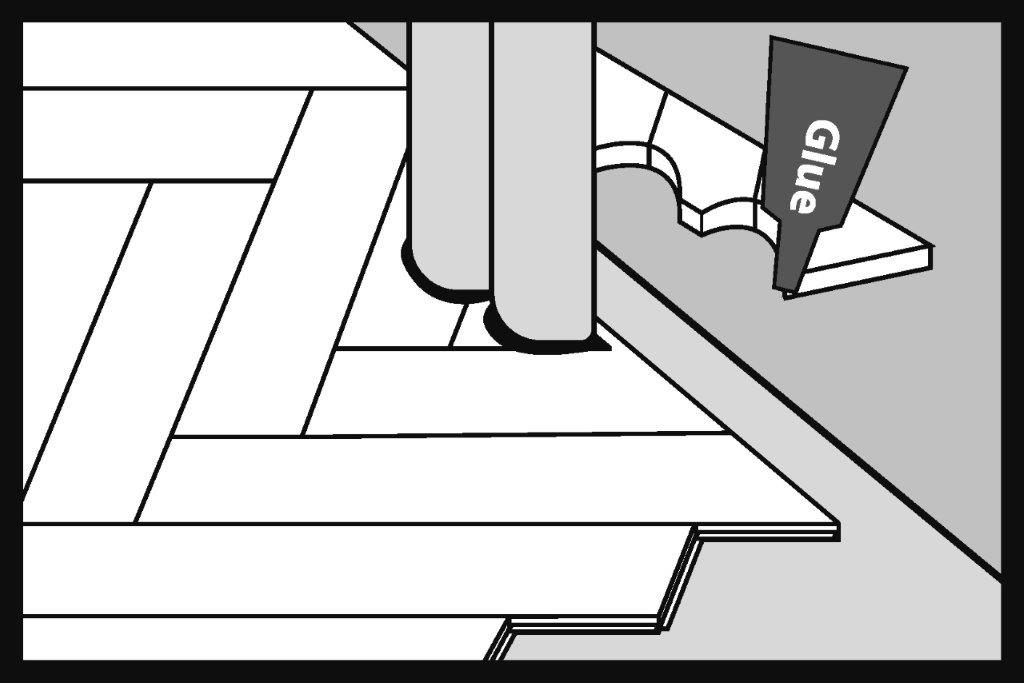
We attach the cut-off piece of board using construction adhesive.
40.
The maximum floor plan dimensions of a house or apartment for which an SPC floor installed as a floating floor does not require expansion joints in doorways are 15 m × 15 m. For floor plans up to 15 m × 15 m, we do not install expansion joints at doorways or openings leading to adjacent rooms. We install expansion joints around walls and structural elements such as stairs and columns.
41.
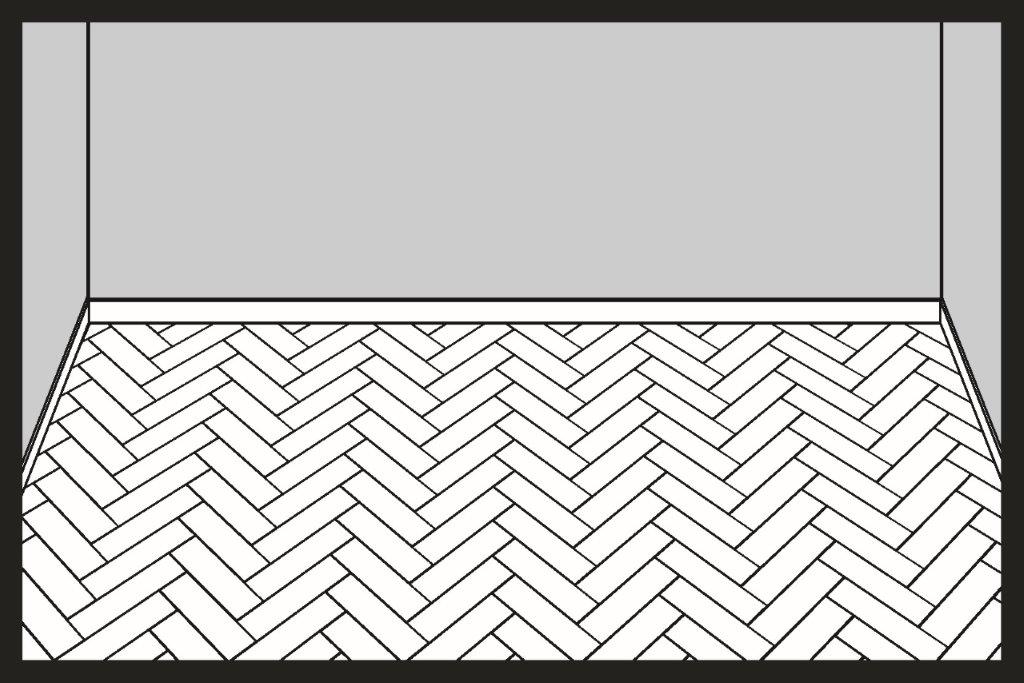
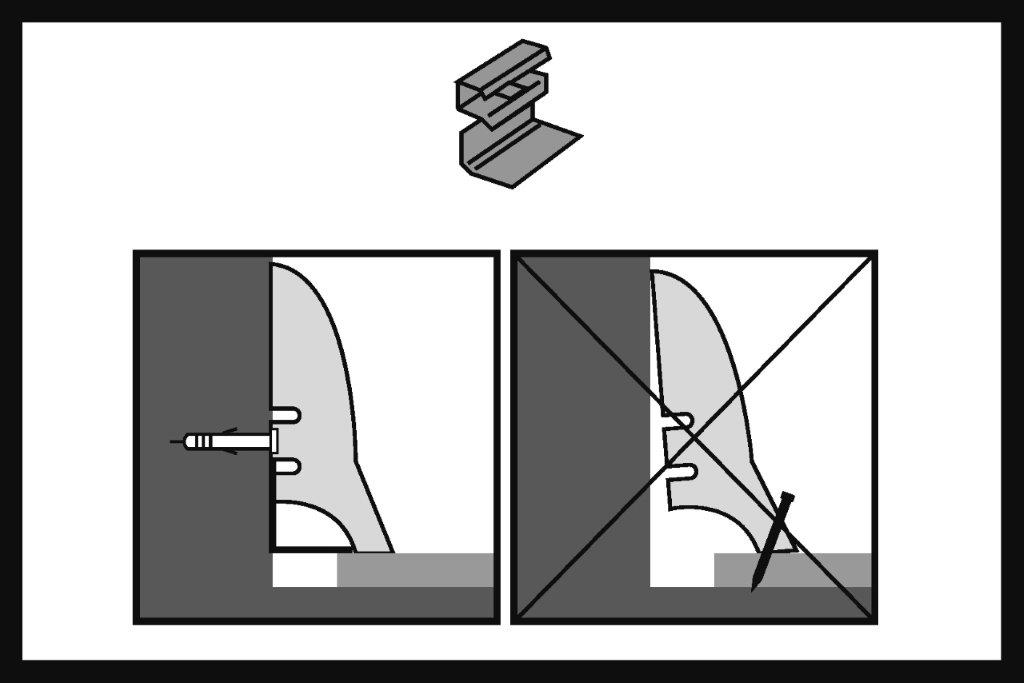
After installing the entire floor surface, install the decorative skirting boards. Attach the skirting boards only to the walls, using mounting clips or adhesive.
Installation of SPC panels over radiant floor heating
42.
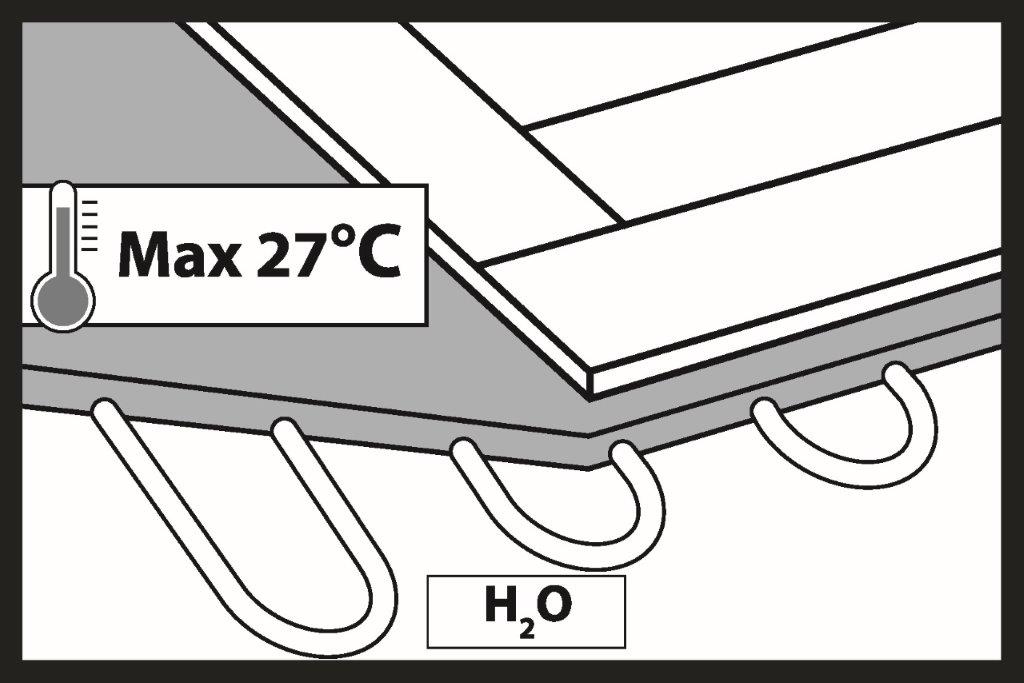
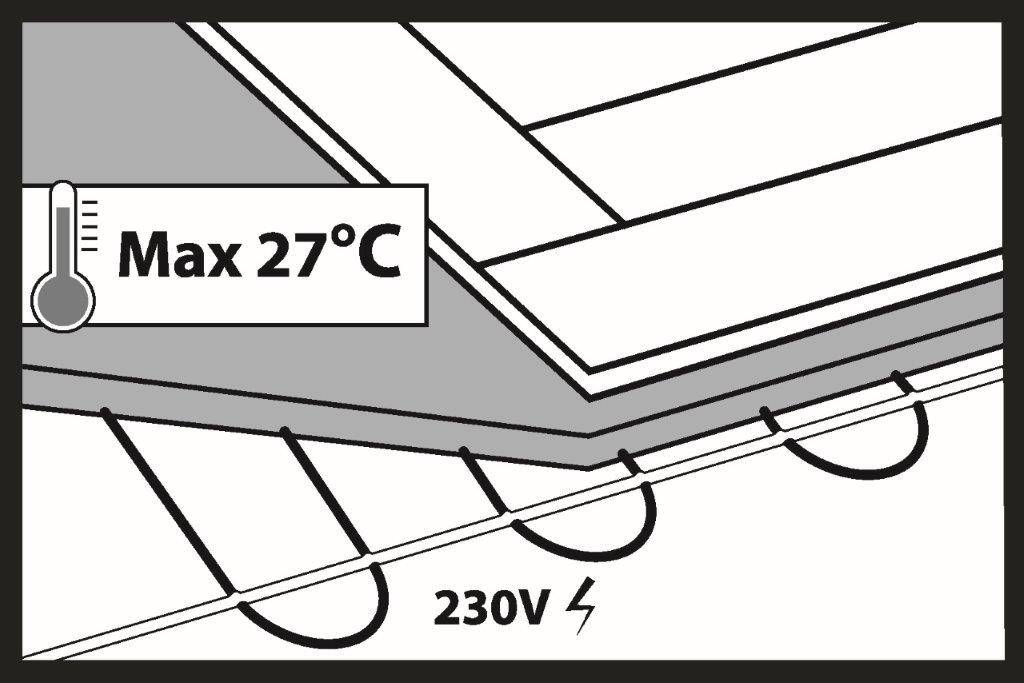
SPC flooring with an integrated underlay can be installed over a water-based or electric underfloor heating system using a floating installation method.
IMPORTANT:
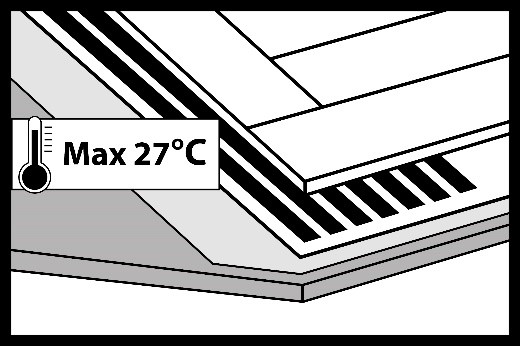
Installation on heating films (infrared mats) may only be performed using panels without an integrated underlay.
Important!
Before installing panels over underfloor heating, the screed must be cured, and a curing report must be prepared—this applies only to new, uncured screeds. Information on screed curing and the curing report are available at barlinek.com. The screed curing process should also be performed during the summer.
The maximum temperature at which the heating should be set is 27°C on the surface of the panels. The moisture content of the screed during installation over underfloor heating should not exceed: 1.5% CM for cement screeds and 0.3% CM for anhydrite screeds. When installing SPC panels with an integrated underlay over underfloor heating systems, expansion joints with a minimum width of 10 mm must be provided between rooms.
To prevent uneven operation of the panel core, the entire floor surface should be […]. If there are two or more heating loops in a single room, the temperature difference set between the loops must not exceed 5 °C. This also ensures the highest level of comfort (no colder spots on the floor).
The installation of SPC flooring over heated floors using a floating installation method requires the use of isolation expansion joints between the heated areas and the areas without underfloor heating. The underfloor heating system should not be activated until at least 48 hours after the SPC flooring has been installed. When using SPC flooring on subfloors equipped with underfloor heating, keep in mind that any liquids spilled on the floor surface may evaporate more quickly. Therefore, any stains caused by liquids such as wine, urine, milk, etc.must be removed from the floor surface as soon as possible, as allowing them to dry on the surface of the SPC panels may cause permanent discoloration of the floor. The screed should be at least 20 mm thick above the heating elements.
It is necessary to install controllers and floor temperature sensors. For installers—the use of thermal seals is recommended. Furniture placed on top of the floor heating system, such as sofas, should have legs that are at least 10 cm high.
Installation of SPC panels on underfloor cooling systems
43.
It is very important that underfloor cooling systems be equipped with appropriate control systems that prevent water vapor from condensing on the floor surface. To prevent this, the temperature of the cold water in the pipes should not fall below a specified value. In every room with an underfloor cooling system, a sensor should be installed that calculates the relationship between relative humidity and the temperature on the surface of the floorboards and shuts off the cold water supply before the so-called dew point is reached, that is, the condensation of water vapor on the surface of the panels. Room thermostats should not be set to a temperature lower than 23°C. Additionally, the temperature difference between the thermostat setting and the room temperature should not exceed 5°C. Example: room temperature 30°C, thermostat set to at least 25°C. The underfloor cooling system should be protected against the water temperature in the system dropping below +18°C.
Turn off the underfloor heating 48 hours before the flooring installation. Once the flooring installation is complete, you can turn it back on after 48 hours.
The moisture content of a cement screed should not exceed 1.8%, and that of an anhydrite screed should not exceed 0.3%. Measurements should be taken using the carbide method, also known as the CM method.
All other installation and usage guidelines are in accordance with the installation instructions and the terms of use and care for SPC flooring. For more information, visit barlinek.com
The decision on whether to use underfloor cooling requires a heat balance analysis, which should be performed during the design phase. Omitting this step may result in improper equipment selection and inadequate performance of the entire cooling system.
Installation of SPC panels in a damp room
44.
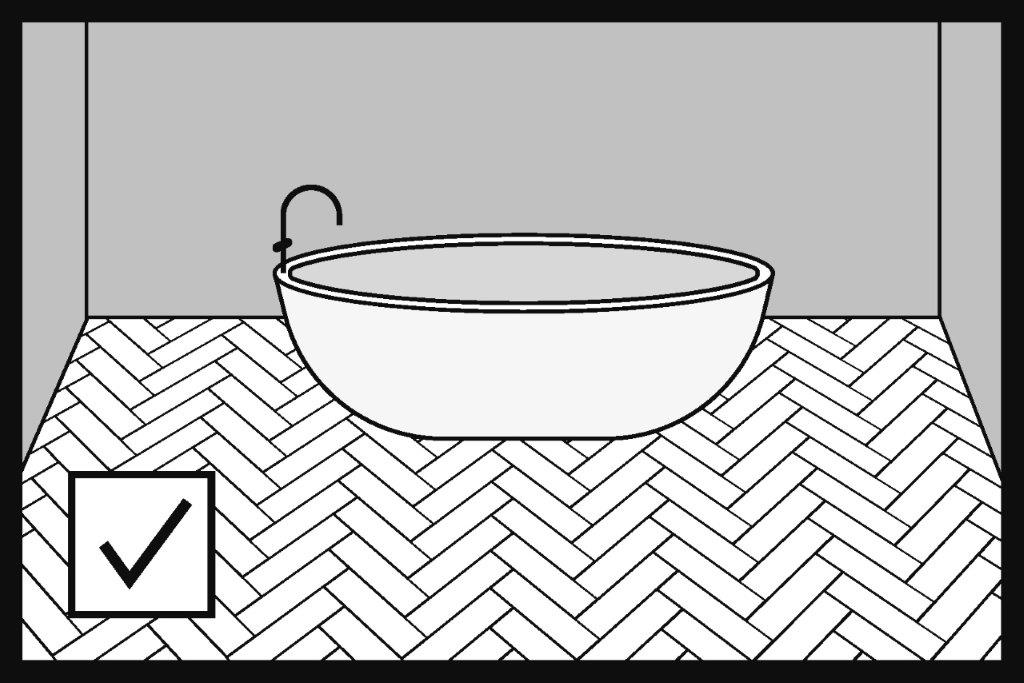
SPC panels with an integrated underlay can be installed in bathrooms and other rooms where water spills may occur in a floating installation system. In a floating installation system, it is essential to create an expansion gap in the frame opening that is at least 5 mm wide (adjusted to the type of expansion joint cover strip). The expansion joint can be filled with a flexible sealant. With a floating installation system, we always create a 5-mm-wide perimeter expansion joint.
In a bathroom equipped with an underfloor heating system, an expansion joint must be installed in the opening of the door frame separating the bathroom from the other rooms. It is essential to install expansion joints around walls, shower enclosures, bathtubs, toilet bowls, and other obstacles permanently attached to the floor.
Important!
SPC panels must not be installed in shower pans, bathtubs, saunas, swimming pools, or other similar locations.
45.
Download the manual as a PDF file.
autor:
Krzysztof Wilczek
Share:
Technical documents
Terms of use, warranty cards, protocols, declarations.