A FLOOR IS NOT ENOUGH
… NOW YOU CAN FIT BARLINEK BOARDS ON THE WALL TOO!
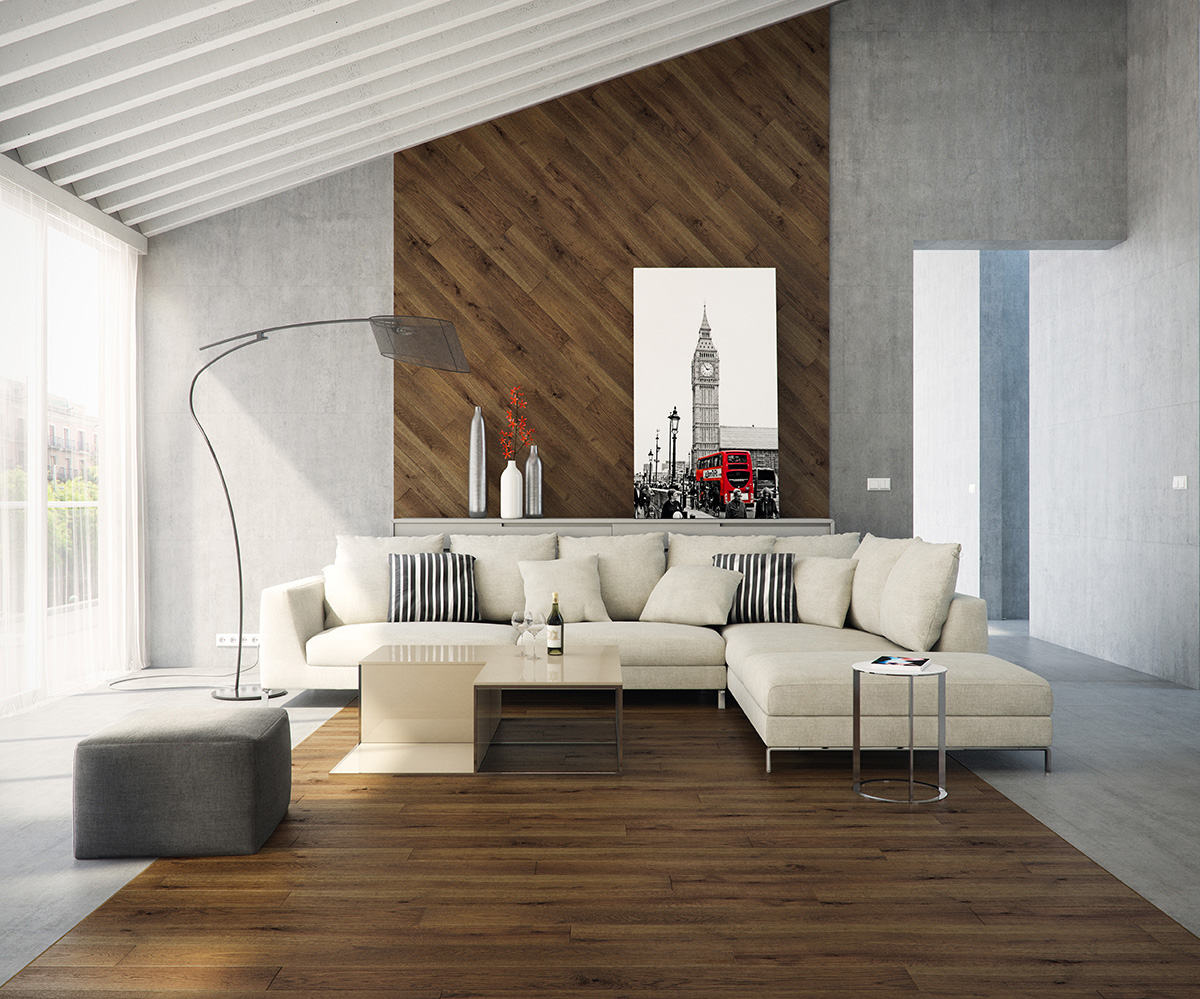
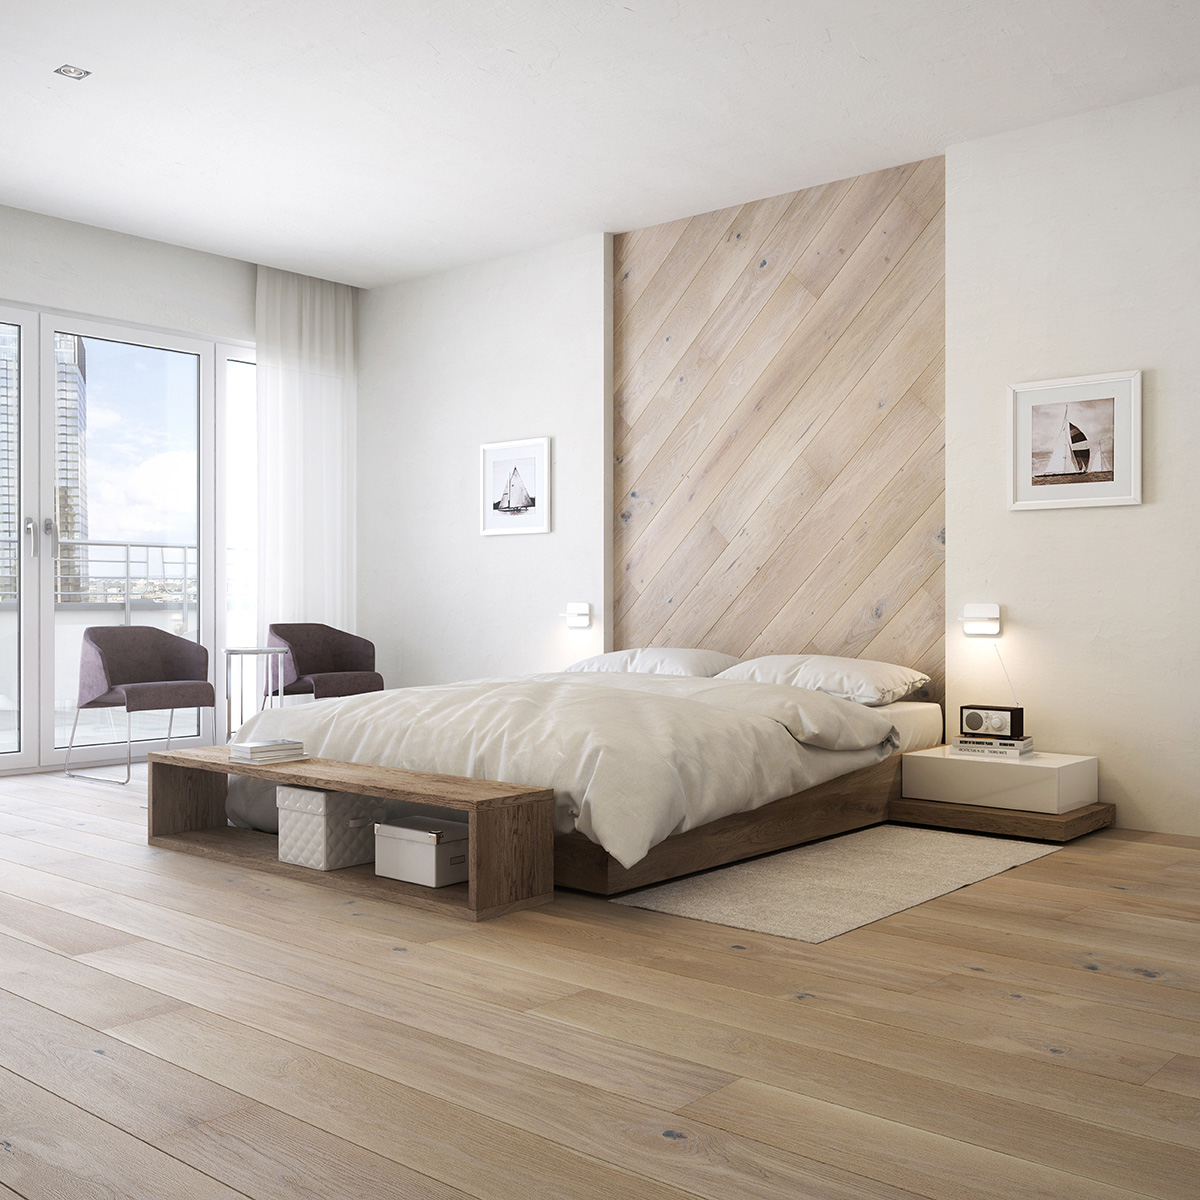
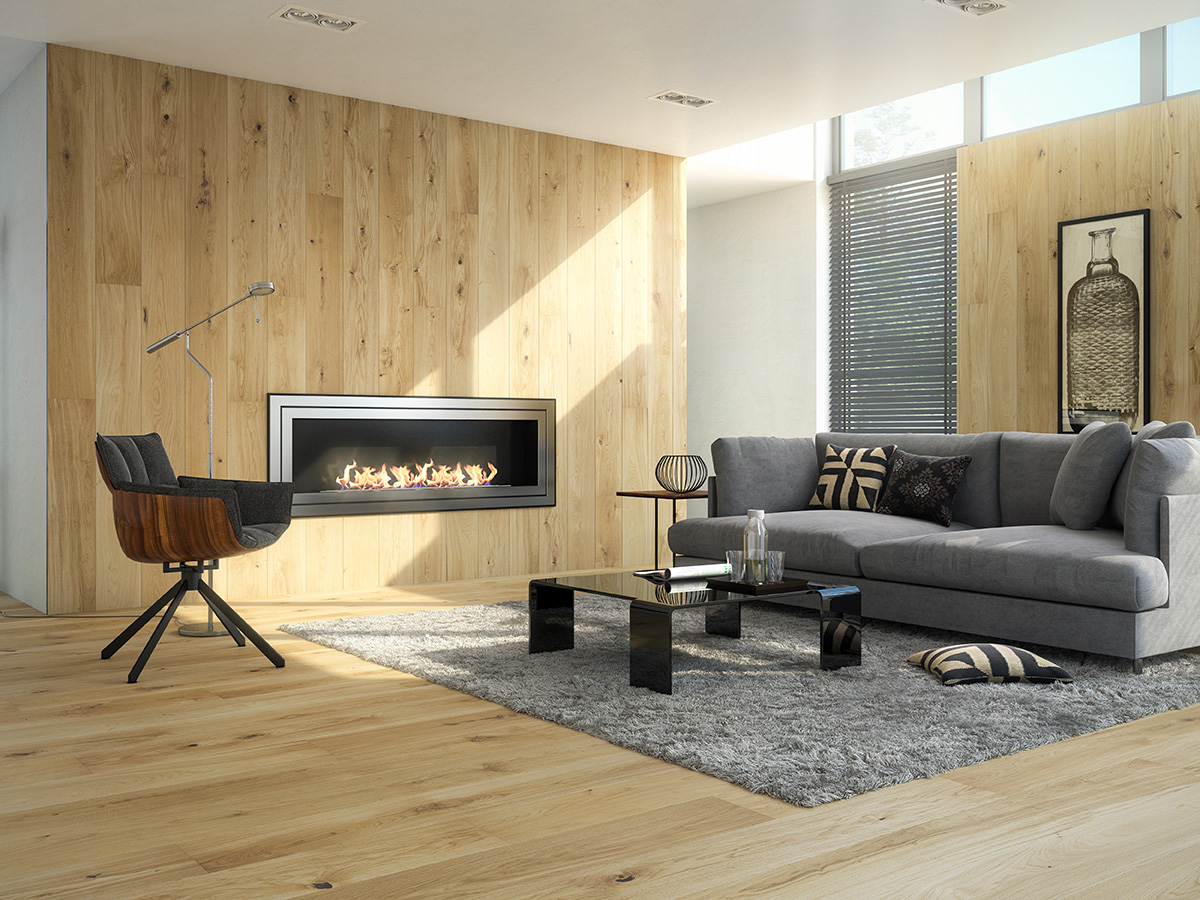
VISUALLY EXQUISITE — IN LINE WITH DESIGN TRENDS
A subdued, cosy and warm interior, with designer features giving an original way to display the natural beauty of wood. A variety of wood types, finishes and board widths are available.
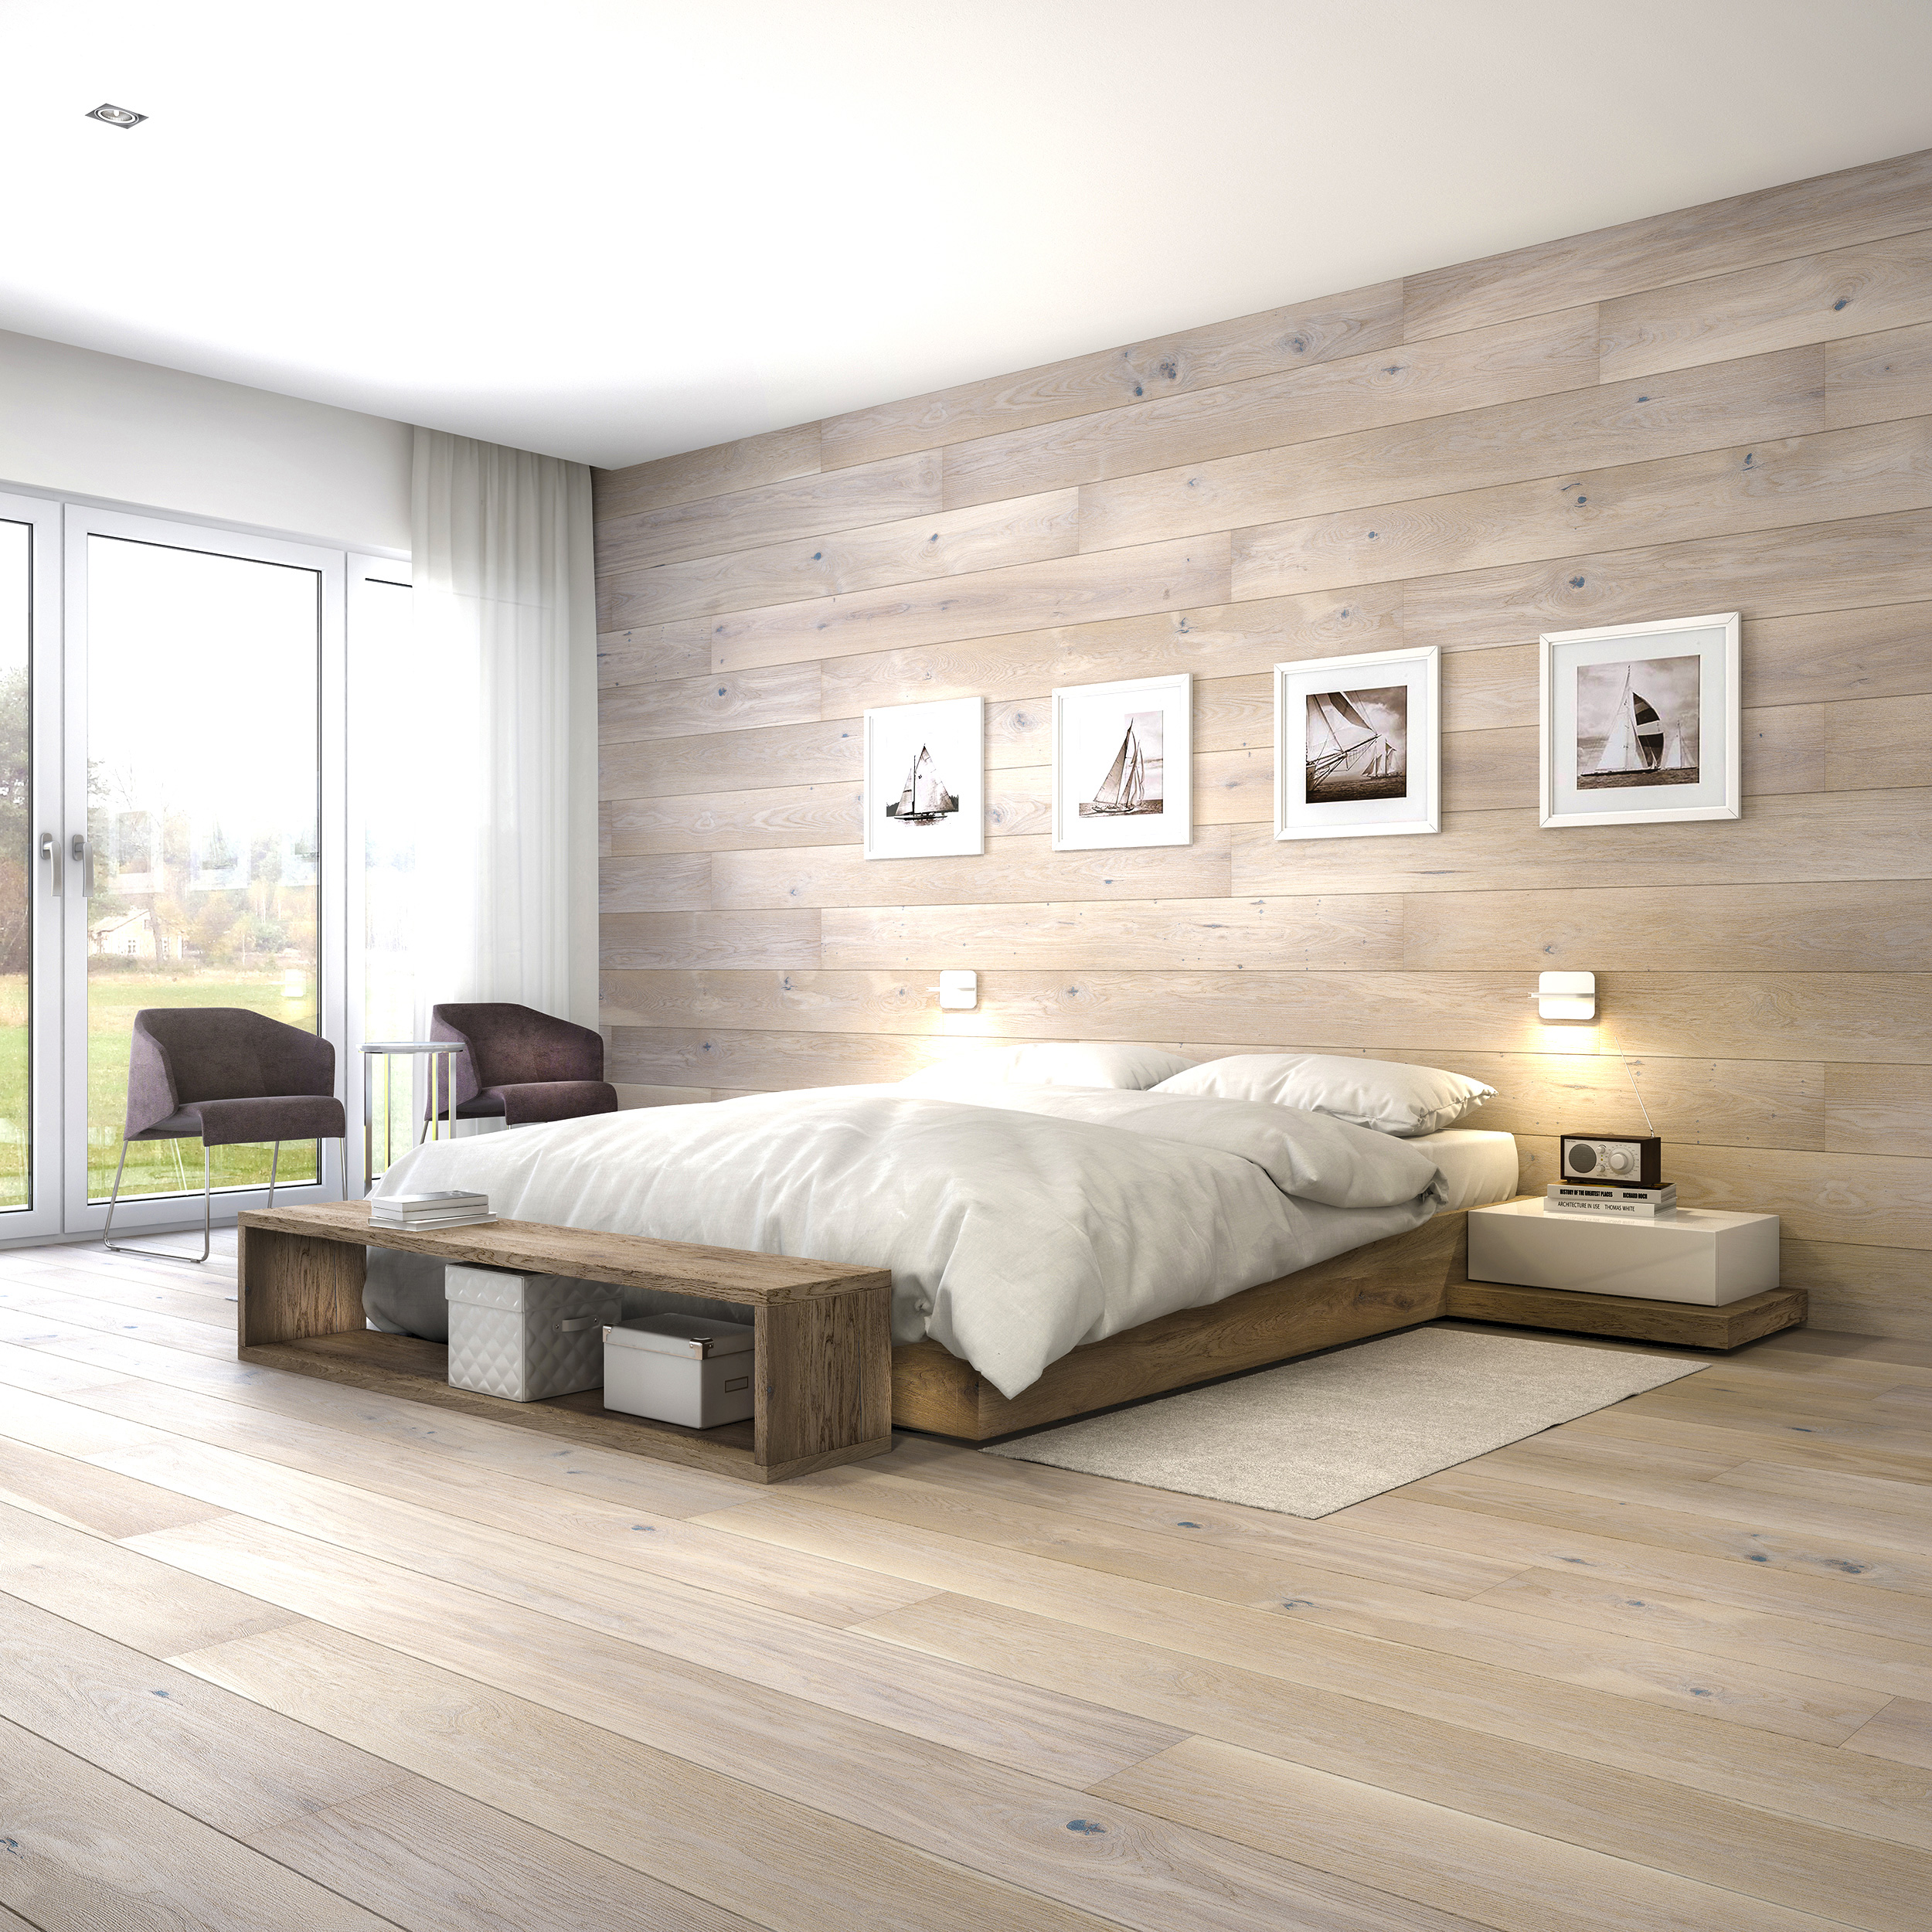
ARRANGE IT IN ANY WAY YOU LIKE — OVER THE WHOLE WALL OR COVER A SELECTED FRAGMENT
Natural materials rule in interior design, with wood supreme among them. On the one hand, new uses are being found for it, whilst being applied alongside more traditional uses that have been around for centuries.
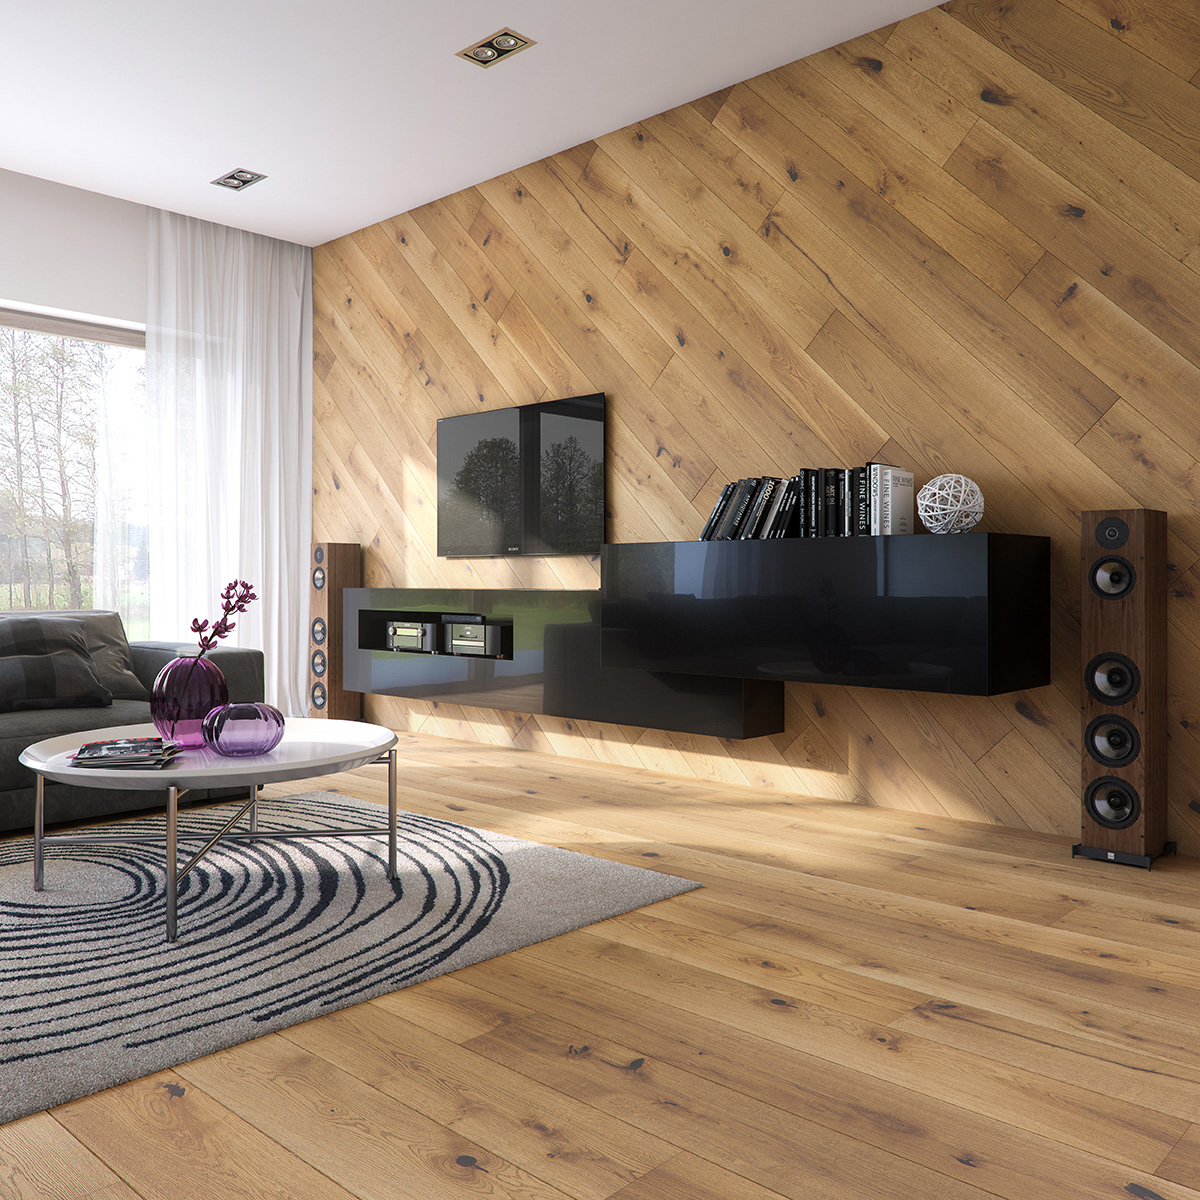
ENJOY THE NATURAL BEAUTY OF WOOD ANYWHERE YOU LIKE
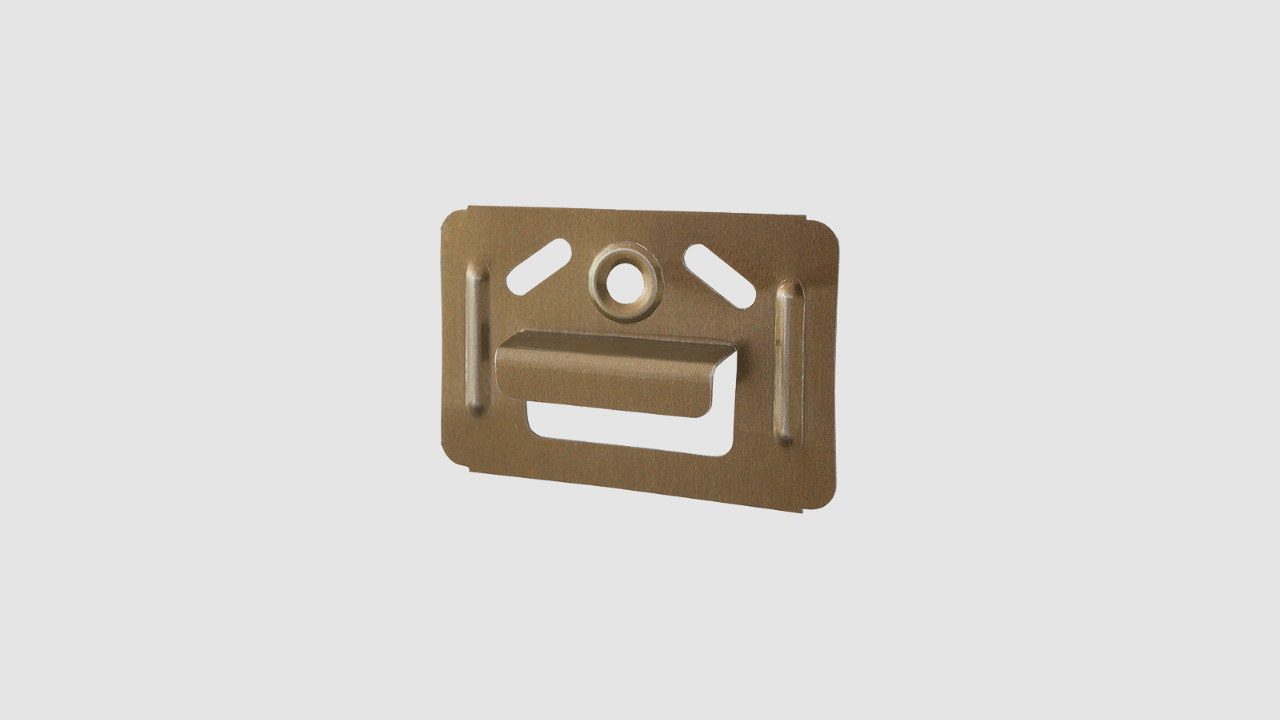
Quick and easy assembly of the board:
- using a specially designed mounting clip.
- making use of generally available finishing materials such as aluminium flat and angle bars on internal and external corners
INSTALLATION

STEP 1
Check the level of the wall using a spirit level. The deviation must not exceed 2 mm over 2 metres.

STEP 2
Mark the places where the wooden construction floats, with a cross-section measuring at least 18mm x 50mm, are to be attached. Attach the first float a maximum of 10cm from the internal or external corner.

STEP 3
The distance between subsequent floats should not exceed 50 cm.

STEP 4
Attach the floats using rawlplugs, remembering that their heads must not protrude beyond the float.

STEP 5
The floats must form a single plane. Check this by using a spirit level applied over a width of at least 3 floats. If necessary use plywood or other material to level the structure.

STEP 6
Check the level of the wall using a spirit level. The deviation must not exceed 2 mm over 2 metres.

STEP 7
Before fitting the boards, acclimatise them in their factory packaging for around 48 hours. The Barlinek board is made from natural wood, which makes its pattern unique. Because of this, select and decide on the colour scheme of the surface to be covered before starting.

STEP 8
Apply wood or construction glue to the wooden structural beams (to a height of one board). Lay the first board, with the tongue removed, to the glued grid and fix it from above with the clips.

STEP 9
Fit the mounting clip into the protruding groove, then screw it on to each beam with the aid of a wood screw.

STEP 10
Connect the subsequent boards together using the locks, knocking them home.

STEP 11
The external corners can be finished by, for example, trimming the edges of the boards at an angle of 45 degrees. Apply assembly glue where the edges meet.

STEP 12
Apply assembly glue where the boards meet at the corner trimmed in this way.

STEP 13
Then glue in an aluminium flat bar, for example, at this point, which serves as both decoration and protection on the sharp trimmed edge. Aluminium or wooden angle bars can be used instead.

STEP 14
The end result. Many finishing elements can be used, such as shelves or hangers.
ADDITIONAL INFORMATION
- Boards with a 5Gc frontal lock are recommended when assembling layered Barlinek wooden boards. This lock does not need knocking home on the short edge, which makes assembly much simpler.
- The joint at the inside corner can be made using acrylic filler of the same colour as the board.
- The wall-floor joint or finishing of the wall covering can be masked with a skirting board.
- The skirting board can be made into a quarter round to conceal the joint, by cutting off the top to a thickness of 14mm.
- When fitting a television or cabinet to the wall covering, attach the mounting braces to the masonry wall. Light objects can be fixed directly onto the wooden covering using braces designed for this purpose.
- Conditions for using wooden layered boards fitted anywhere other than a floor are the same as for floorboards, i.e. relative air humidity ranging from 45% to 60%, at a temperature between +18°C and +24°C.
- Care for Barlinek board wooden wall coverings using care agents from the Barlinek range intended for individual board finishings.
REMEMBER THE CLIP!
A metal mounting clip enabling quick, safe and easy mounting of any multi-layer Barlinek flooring to the wall.
(step 8 i step 9 – Installation)
PDF CATALOGS

The suggestions above for assembling and finishing the boards are purely to provide help and inspiration. Assembly and finishing work can be done individually using materials generally available on the market.